Enhance User Experience With Coveo Smart Snippets
You’ve got an amazing website. Everything your users could ever want is there, answers to all their questions in glorious detail, follow-ups on their most common issues. You name it, you have it. But your users don’t know the website as well as you do, and they really would like their questions answered instantly, without having to talk to customer service, or reading lots of pages. Sure, you could set up an FAQ, or go through a lot of work hand-tagging content to make it more discoverable. That really is a lot of work though, and you don’t know for sure if it will help out, ahead of time.
This is where Coveo Smart Snippets come in. That’s an AI model that can read you already existing search results and pages, extract the answers, and match them up to your users questions right on top of your search page. No mess, no fuss, no extra content writing.
What Are the Prerequisites?
First off, you need to have a Coveo search source, populated with your web pages. If you’ve set up Coveo search for any other context, great, you have that. Smart Snippets plugs into your query pipeline on the back end, and your existing search page on the front end. That’s it!
Start Without Coding
Creating the AI Model
First you click into “models” under “Machine learning” in the Coveo platform, then click add model.

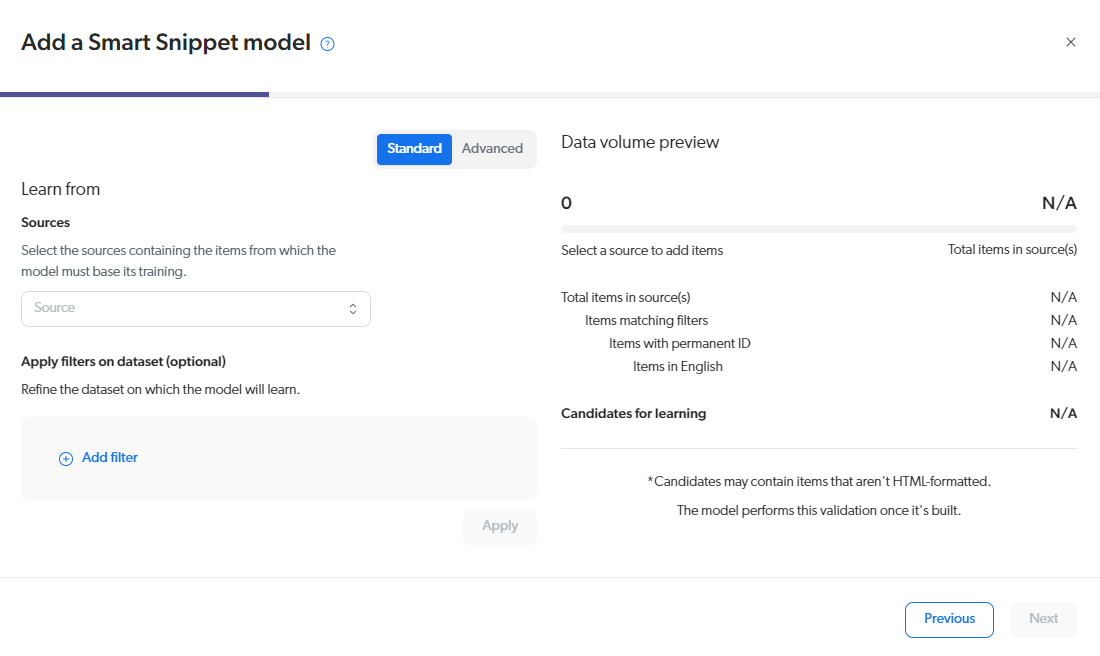
Pick Smart Snippets from the model, and you get this diagram.

Don’t worry, it’s actually very simple. Pick your source from the dropdown on the left. Salesforce, web sources, documents, it doesn’t matter, it will just work. If you want to limit the model to, say, case documents, or article type web pages, you can add a filter. That follows the standard Coveo query syntax, but for today, we’re going to say everything can contain questions and answers. This is true for most cases.
Attaching the Model to Your Query Pipelines
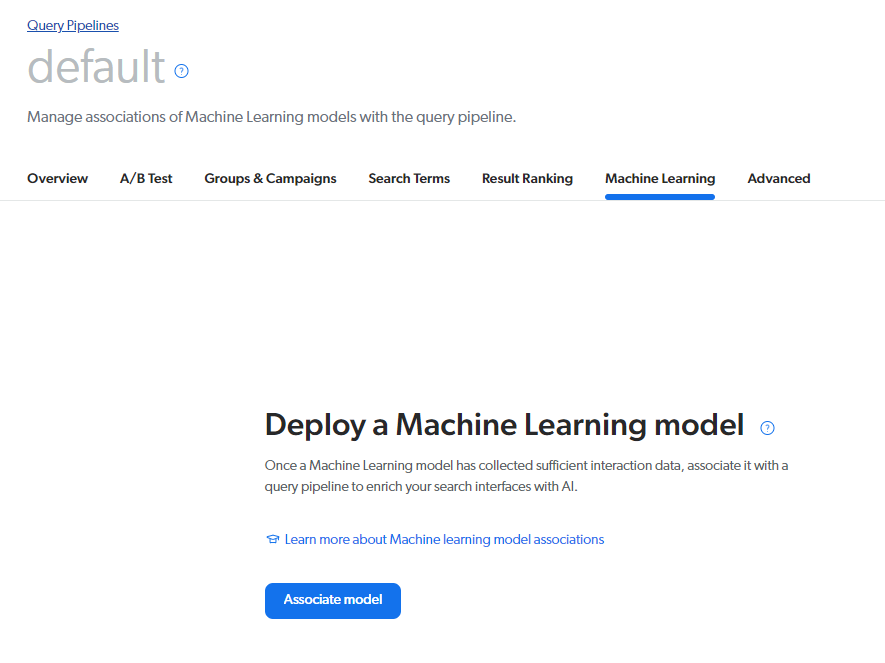
The model is set up, and it’s reading your document and thinking. That takes a while, so don’t rush. Then you go into Query Pipelines in the platform, and pick “Machine Learning”, and then the associate model button. In this example, we’re using the default pipeline, but yours could be named whatever you like.

That’s everything for the backend.
Displaying the Snippets
Great, the backend is all done, and you have questions and answer, but how do you get them to your users? Coveo has documentation here: https://docs.coveo.com/en/l8ve0354/leverage-machine-learning/configure-a-search-interface-for-smart-snippets
That gives you examples for each of the interface types, Atomic, Headless, Javascript UI, even Quantic.
Atomic is very simple to set up, but let’s say… we want a lot of control and customization. That probably means you had the same though when getting started with Coveo, so we’re going to use Headless and React in this example. This point is when the coding starts.
import React, { useEffect, useState } from 'react';
import { cleanHtml } from '/utils/clean';

export const SmartSnippet = (props) => {
  const { controller } = props;
  const [state, setState] = useState(controller.state);

  useEffect(() => controller.subscribe(() => setState(controller.state)), []);

  const {
    answerFound, answer, question, source,
  } = state;

  if (!answerFound) {
    return <div>There are no answers for your question!</div>
  }

  return (
    <section className="coveo-snippet" aria-label="">
      <h2 className="snippet-heading">{question}</h2>
          <div dangerouslySetInnerHTML={{
            __html: cleanHtml(answer),
          }} className="snippet-html-wrapper">
          </div>
            <a
              className="smart-snippet__more"
              data-event="snippet click"
              href={source.clickUri}
              onClick={() => controller.selectSource()}
              onTouchEnd={() => controller.cancelPendingSelectSource()}
              onTouchStart={() => controller.beginDelayedSelectSource()}
            >
              Get more details
            </a>
    </section>
  );
};
That’s the main display for a snippet. It’s best to put this right at the start of the search results. For the sake of brevity, I’ve left out the incoming controller, but Coveo has excellent documentation on that.
Related Questions
The next thing neat thing? You automatically get a set of related questions for free! No extra setup required on the back end, but you do need some code to display them:
import React, { useEffect, useState } from 'react';
import {RelatedSnippet} from './components/relatedsnippet.jsx';

export const RelatedQuestions = props => {
  const {controller} = props;
  const [state, setState] = useState(controller.state);

  useEffect(() => controller.subscribe(() => setState(controller.state)), []);

  const {questions} = state;

  const handleOnClick = (question) => {
    if (question.open) {
      controller.close(question.answerId);
    } else {
      controller.open(question.answerId);
    }
  };

  if (questions.length === 0) {
    return <div>There were no related questions. Your thoughts are unique!</div>
  }

  return (
    <section className="related-snippets">
      <h2 className="heading">
        You might also want to know:
      </h2>
      <dl>
        {questions.map((question, index) => {
          return <RelatedSnippet
            question={question}
            isOpen={question.open}
            handleOnClick={handleOnClick}
          ></RelatedSnippet>;
        })}
      </dl>
    </section>
  );
};
Again, Coveo has excellent documentation on setting up the controllers for this, in the link above.
What Happens if There Are No Questions?
Here I’ve put in some simple messaging, but you can just as easily hide the snippets sections gracefully. Or you could put in any sort of messaging you want; call other components to send people to customer support, if they are stuck. Or track your analytics and only send them after the third missed question. There’s a tone of control available here.
Simplify Instant Answers With Coveo Smart Snippets
Setting up Coveo’s smart snippets is very quick, and fairly simple. There’s a lot of different ways to do the front end though, so hopefully this helps you get started and feel secure in your project’s success.


