Getting Started
If you’ve read our previous blog about A/B testing in Google Optimize and you’re ready to get started with your web experiments, let’s not waste any time!
If you haven’t, here’s a quick recap.
A/B testing is a great way to optimize your website user experience. Whether your goal is to increase conversion rates or boost revenue, A/B testing allows us to validate a hypothesis about what site changes could positively impact those goals. By making small incremental changes and testing their impact on our user journeys, we are able to make better and more informed decisions.
There are a variety of different tools you can use to A/B test, but we are going to focus on Google Optimize. It’s a free Google tool that we can install on our website using Tag Manager and configure to our Google Analytics 4 property.
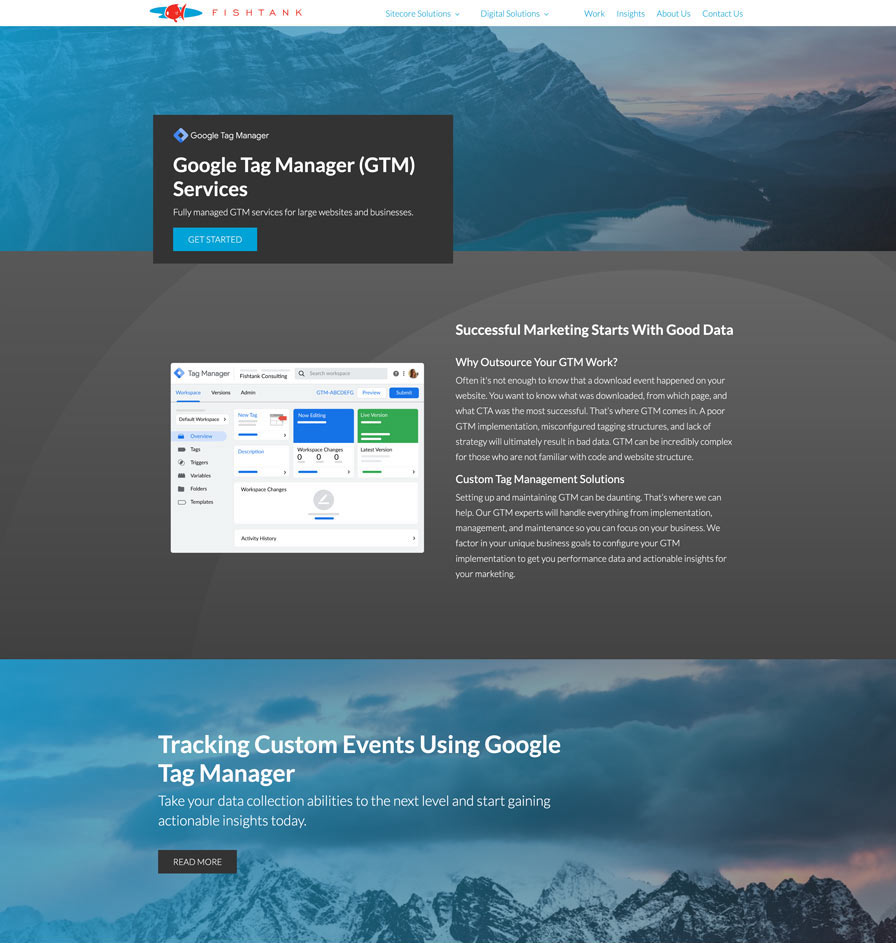
Let’s get started creating our A/B test. We created test landing page with a blog banner to use for our A/B test. We want to see if changing the colour of our CTA button from dark grey to white will have an impact on our conversion rates.
An example hypothesis for this test would be:
Changing the colour of the 'READ MORE' button from dark grey to white will increase blog engagement by 10 percent.
Creating An A/B Test In Google Optimize
Here are the different stages we will be exploring in this blog to create an A/B test in Google Optimize.

But first, let’s configure our Google Optimize container.
Google Optimize Container Setup
1. Select the optimize container you want to test
2. Click Create experience
3. Name your experiment (max. 255 characters)
4. Enter the web page URL (redirects are not supported)
5. Choose the type of experience you want to create — in this case click A/B Test6. Click Create
After our container is created, we will see two tabs at the top left corner of the page: Details and Reporting. Make sure you have the Details option selected to configure our experience.
Creating Variants
In your Optimize container, you will see a Targeting and variants section at the top of the page. This is where we can create our tests and make specific changes to our website. Each change we make is called a variant. In Google Optimize, we can create as many variants as we want to test against the original version of the page.
1. Click Add Variant

2. Name your Variant

3. Click Done
4. Repeat these steps to create additional variants
5. Once you’re done, a list of variants will appear on your variant card
6. Click the variant to start making a change
7. Open the Optimize Visual Editor
Editing Your Web Page
1. Click the element you want to edit—in this case, we want to change the colour of our 'READ MORE' button from dark grey to white.
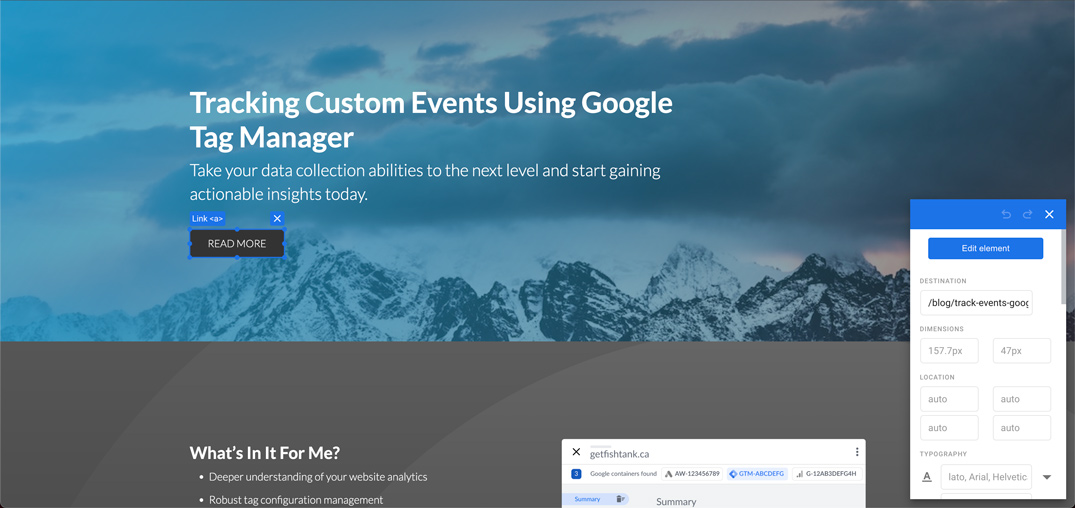
2. Use the visual editor panel to make the change to your variant—here we changed the colour of the element
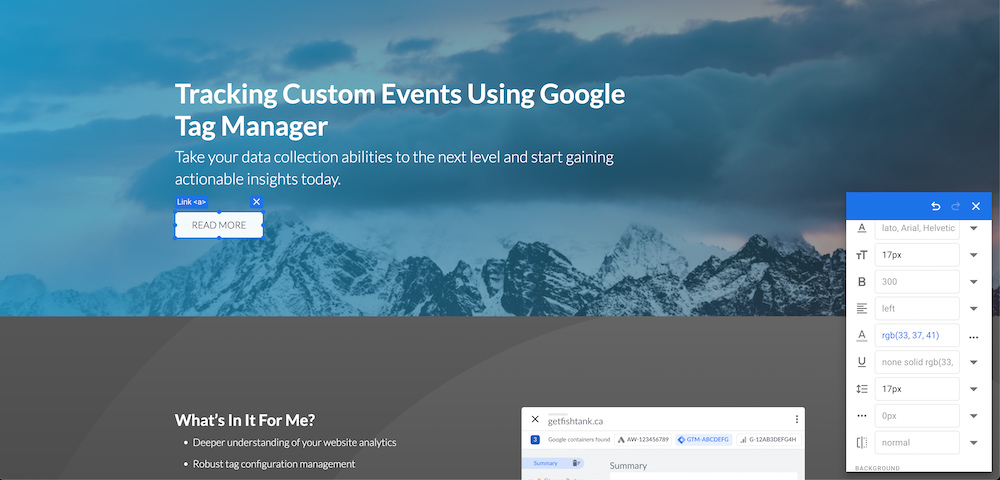
3. Click Save
4. Continue making changes / edits to the web page in accordance to all the variants you want to test
5. Click Done
Variant Weighting
The variants in every Google Optimize experiment are weighted equally by default. A visitor targeted by your experiment will have an equal change of seeing any of the variants you configure. If you want to change the weight of a specific variant to direct more, less, or all of your traffic, you can change it here.

1. Click on one of the weight percentage under your variant list
2. Select the dropdown menu and click Custom percentages to change the variant weight
3. Enter the new percentages you want changed for your variant weights
4. Click Done
Targeting
This is where we choose who and when to target with our new Google Optimize experiment—also known as Page and Audience targeting. When configuring a new targeting rule, a menu will appear on the righthand side where you can choose a rule type to get started.
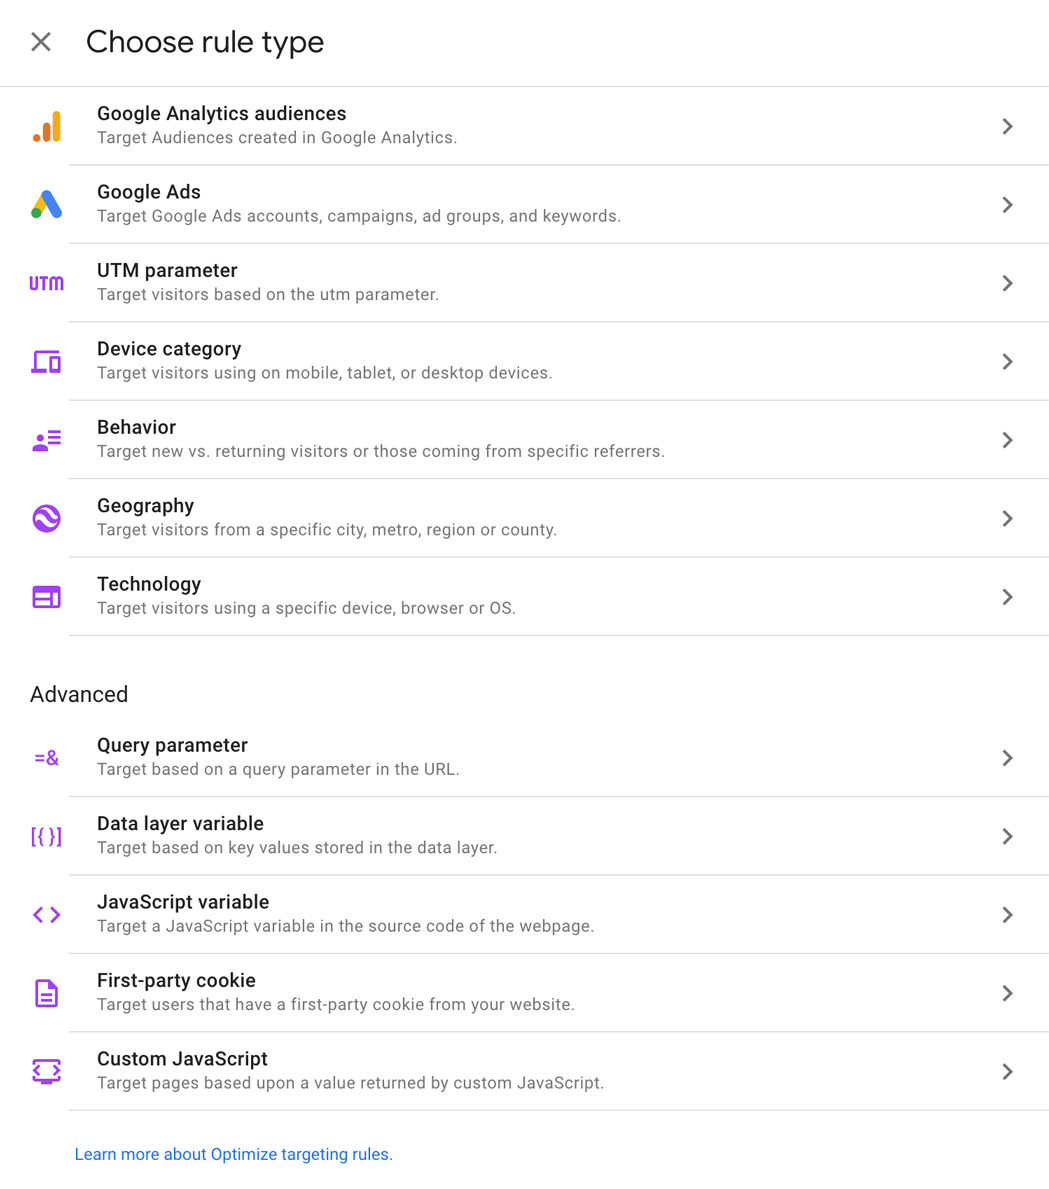
The different targeting rule types are:
- URL targeting
- Google Analytics Audiences targeting
- Behaviour targeting
- Geo targeting
- Technology targeting
- JavaScript variable targeting
- First-party cookie targeting
- Custom JavaScript targeting
- Query parameter targeting
- Data layer variable targeting
Page Targeting
This is where we determine when this experience is shown on the website. The when is evaluated each time a user visits the experiment page which we will identify using the following rules.
Pro Tip: You must create a URL or path targeting rule to start your experience. The quickest way to do this is to create a URL matches rule with the same Editor page URL that was used when creating the experiment.

Audience Targeting
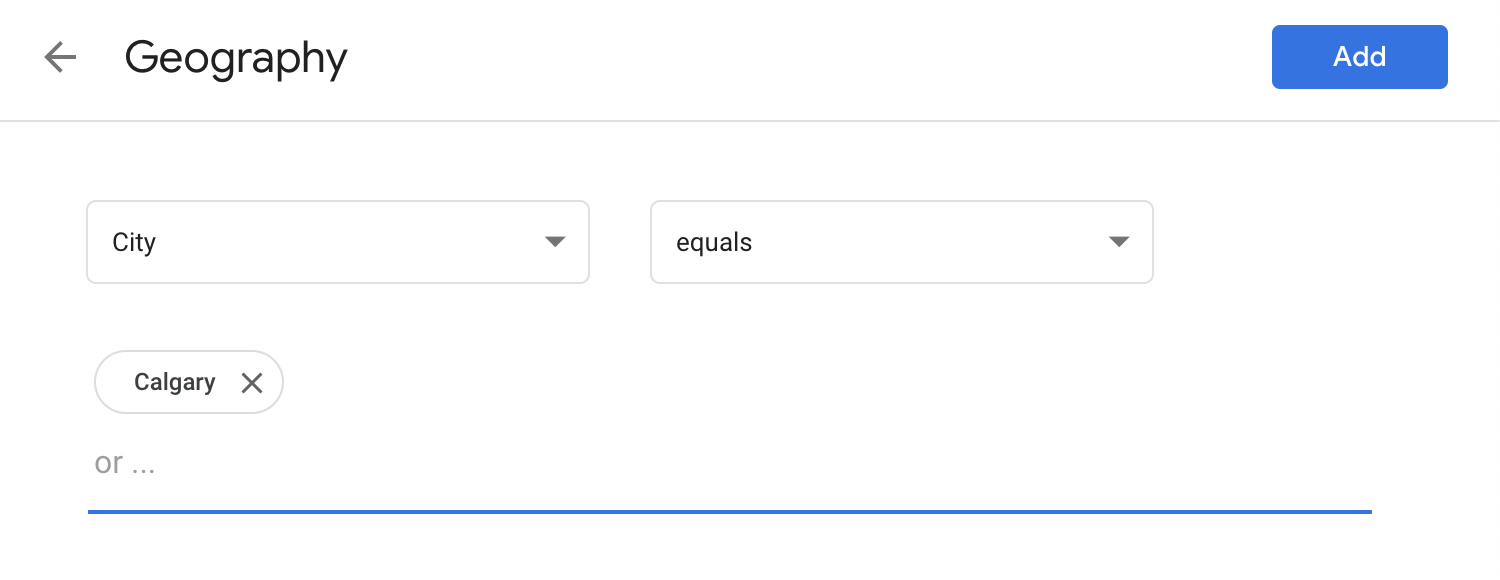
This is where we indicate the website visitors we want to target with our experiment. In this example, we chose a Geo targeting rule set to the City of Calgary as the audience we want seeing this experiment. Feel free to add as many rules as you like.

Analytics
The next step is simple, we want to configure our Optimize account to use our Google Analytics 4 property for measurement. This step should already be configured with our container. Read more about setting up your Google Analytics account in our blog here.
Objectives
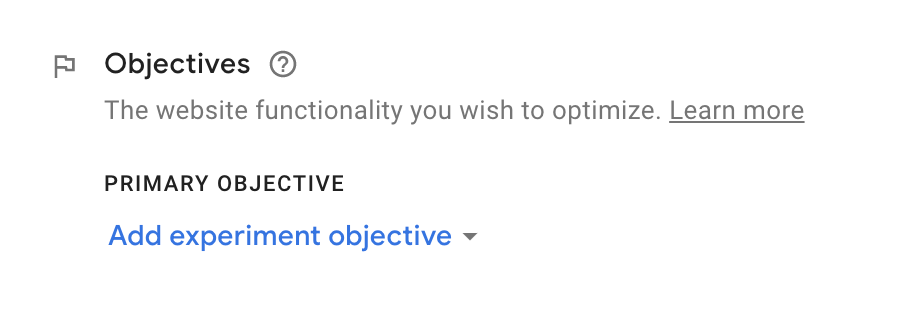
The Measurement and objectives section is where you outline the website functionality you wish to optimize. Setting it up is easy, just follow these simple steps:
1. Go to the Measurement and objectives section on the experiment detail page and click Add experiment objective
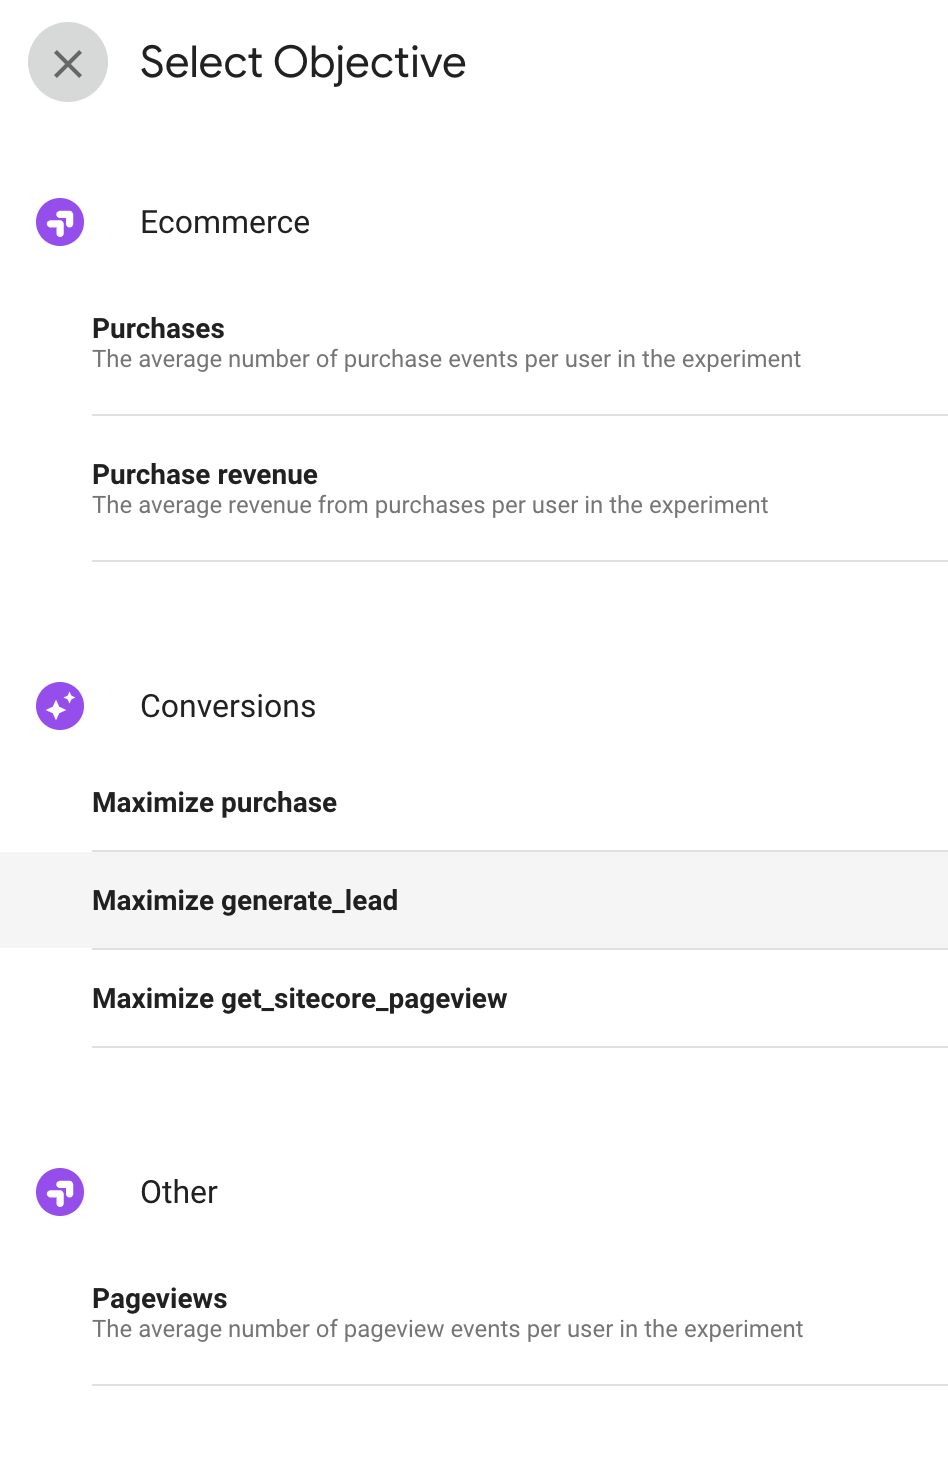
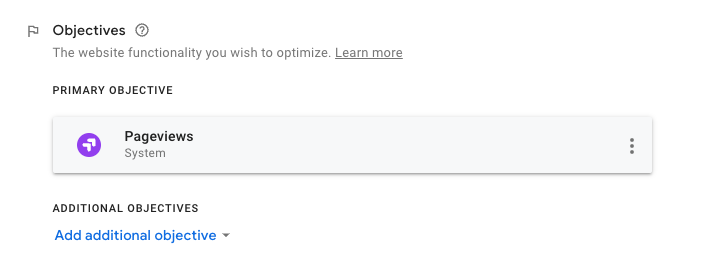
2. Select an objective from the list or create your own — in this example, we chose Pageviews
4. Feel free to click Add additional objective if you have others you want to identify
Start The Experience
Once we’ve configured our variants, targeting rules, objectives and linked our container to analytics, the final step is to click Start to run our experience.

Once the status field says running, your experiment is live on the website.

Here is a screenshot of the experience preview.

How Long Should The Experience Run?
Google’s recommendation is to keep the experiment running until at lest one of the following conditions have been met:
1. Two weeks have passed. This is to account for any cyclical variations in website traffic during that time
2. At least one variant has a 95 percent probability to beat baseline or probability to beat baseline. This means that the probability that a specific variant will result in a better conversion rate than the original
In Closing
Google Optimize is a great way to experiment with what works best for your website. Its relatively easy to set up and can yield some great insights. You can use it for anything from designing an effective website or figuring out which content performs best.
If you want to chat more about Google Optimize or explore other A/B testing tools, reach out to our analytics team at [email protected]
Until then, happy testing!

