Prerequisites
Before installing the Google Optimize code snippet to your website, here’s a list of prerequisites you need:
- A Google Analytics account
- A Google Analytics property installed on your website
- A Google Tag Manager container install on your website
- A Google Optimize account and container linked to the Google Analytics property
If you don’t have the ability to easily edit your website source code directly or make changes to your site, this blog will cover the Optimize installation using Google Tag Manager.
Linking Google Analytics To Google Optimize
Before installing Google Optimize on our website using Google Tag Manager. We first have to connect our Google Analytics 4 (GA4) account with Optimize. Without access to an Analytics account, we won’t be able to run any tests.
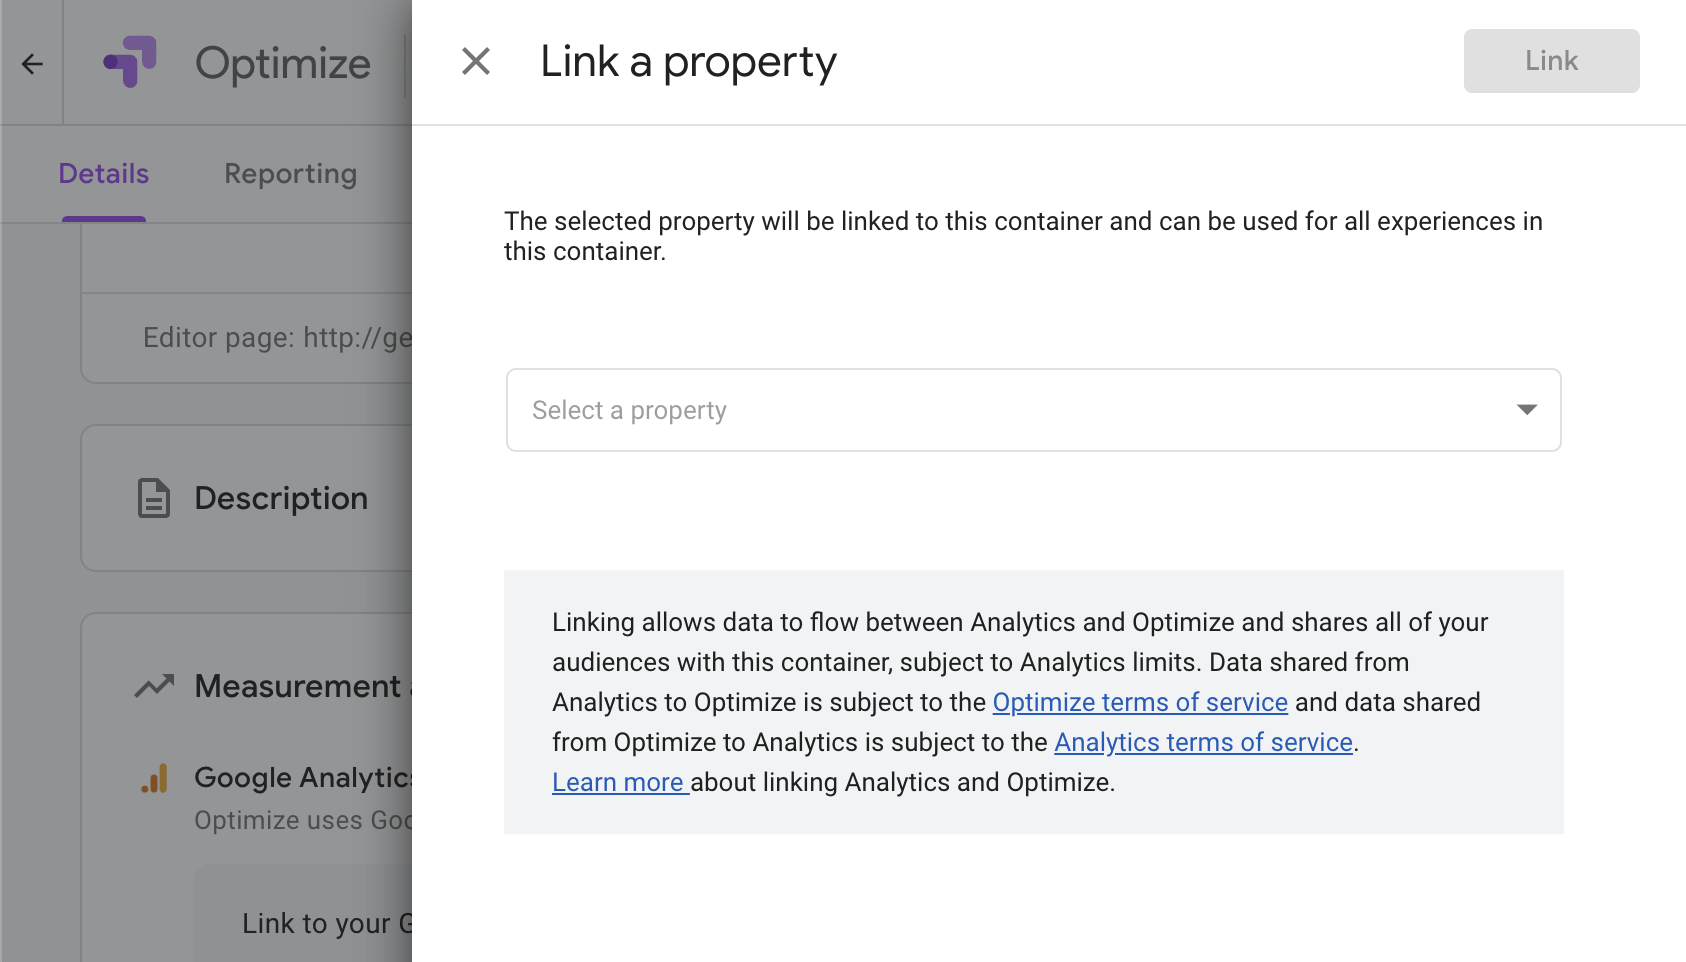
1. Under the Measurement and objectives section, click the Link to Analytics button to begin the process.

2. A dialog box will open with the option to Link a property. Click the drop down menu to see all of the corresponding Google Analytics properties your Google account has access to. Select Google Analytics property you want to connect.
Note: Google Universal Analytics will be discontinued as of July 1, 2023, so be sure to set up your GA4 account and link that to your Optimize container.
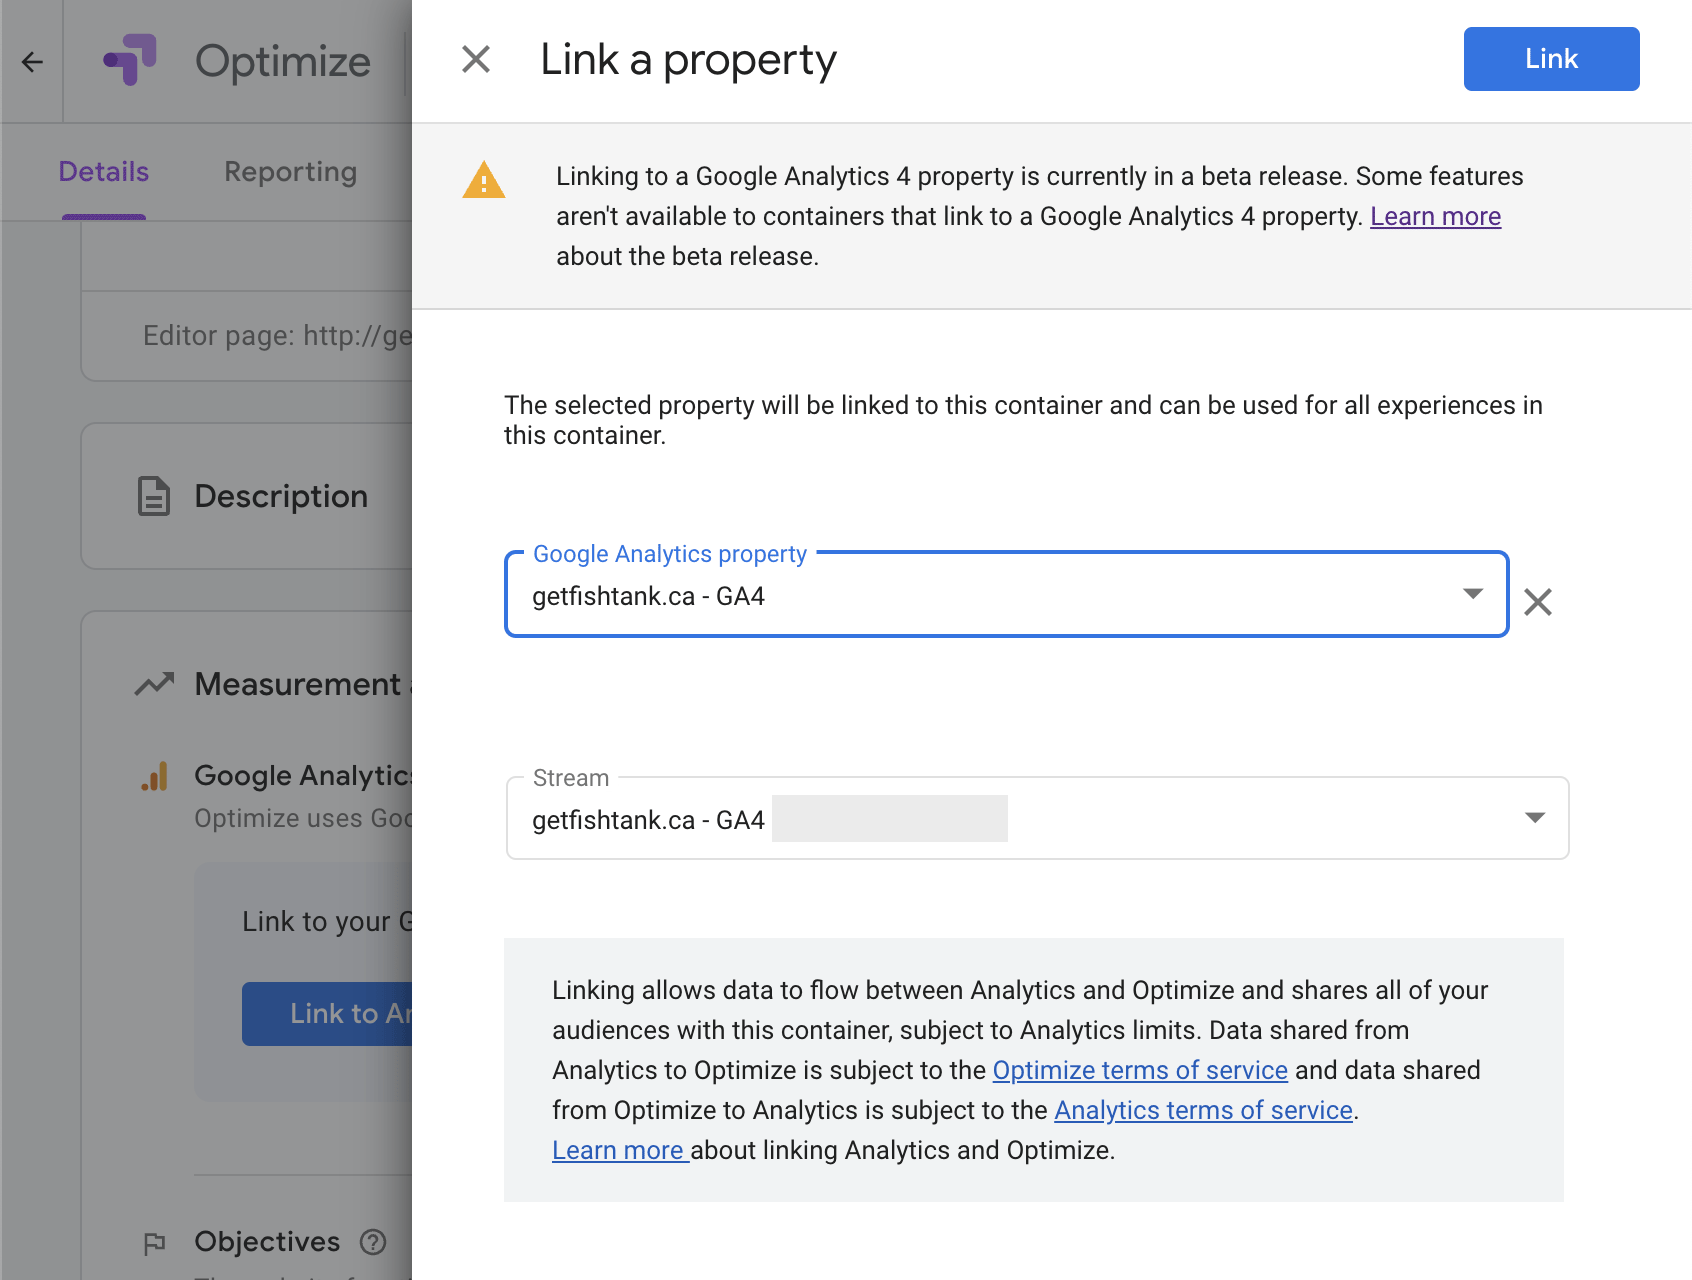
3. Once your property is linked, select the Stream from the second dropdown list below. Click Link.
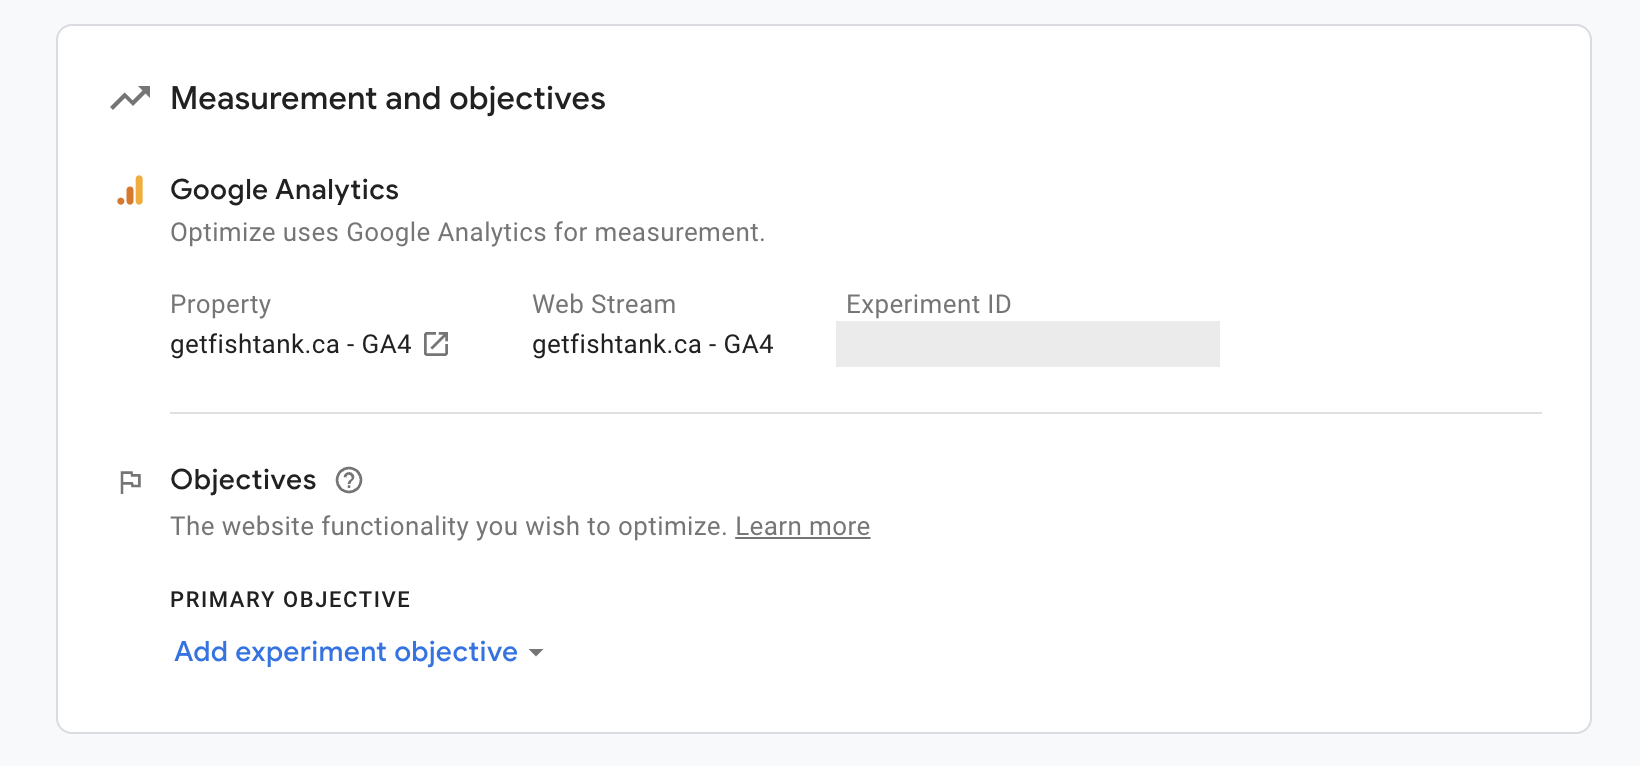
4. Once that is complete, your Optimize container will be connected to your GA4 account. Now we are ready to install the Optimize code using GTM.
Installing A Google Tag Manager Container
If you require some assistance installing your GTM container, read our blog here.
Creating A Google Optimize Account
If you’re new to Google Optimize or curious what the new features included with Google Analytics 4 (GA4), read our other blog here.
Once your Google Optimize account is created, we are going to connect our Google Analytics account to Google Optimize. Then we will install Google Optimize on our website using Google Tag Manager.
Configuring Google Optimize in Tag Manager
Let’s begin by opening our GTM account where we want to configure our Google Optimize account.
1. Under the Tag section, click New
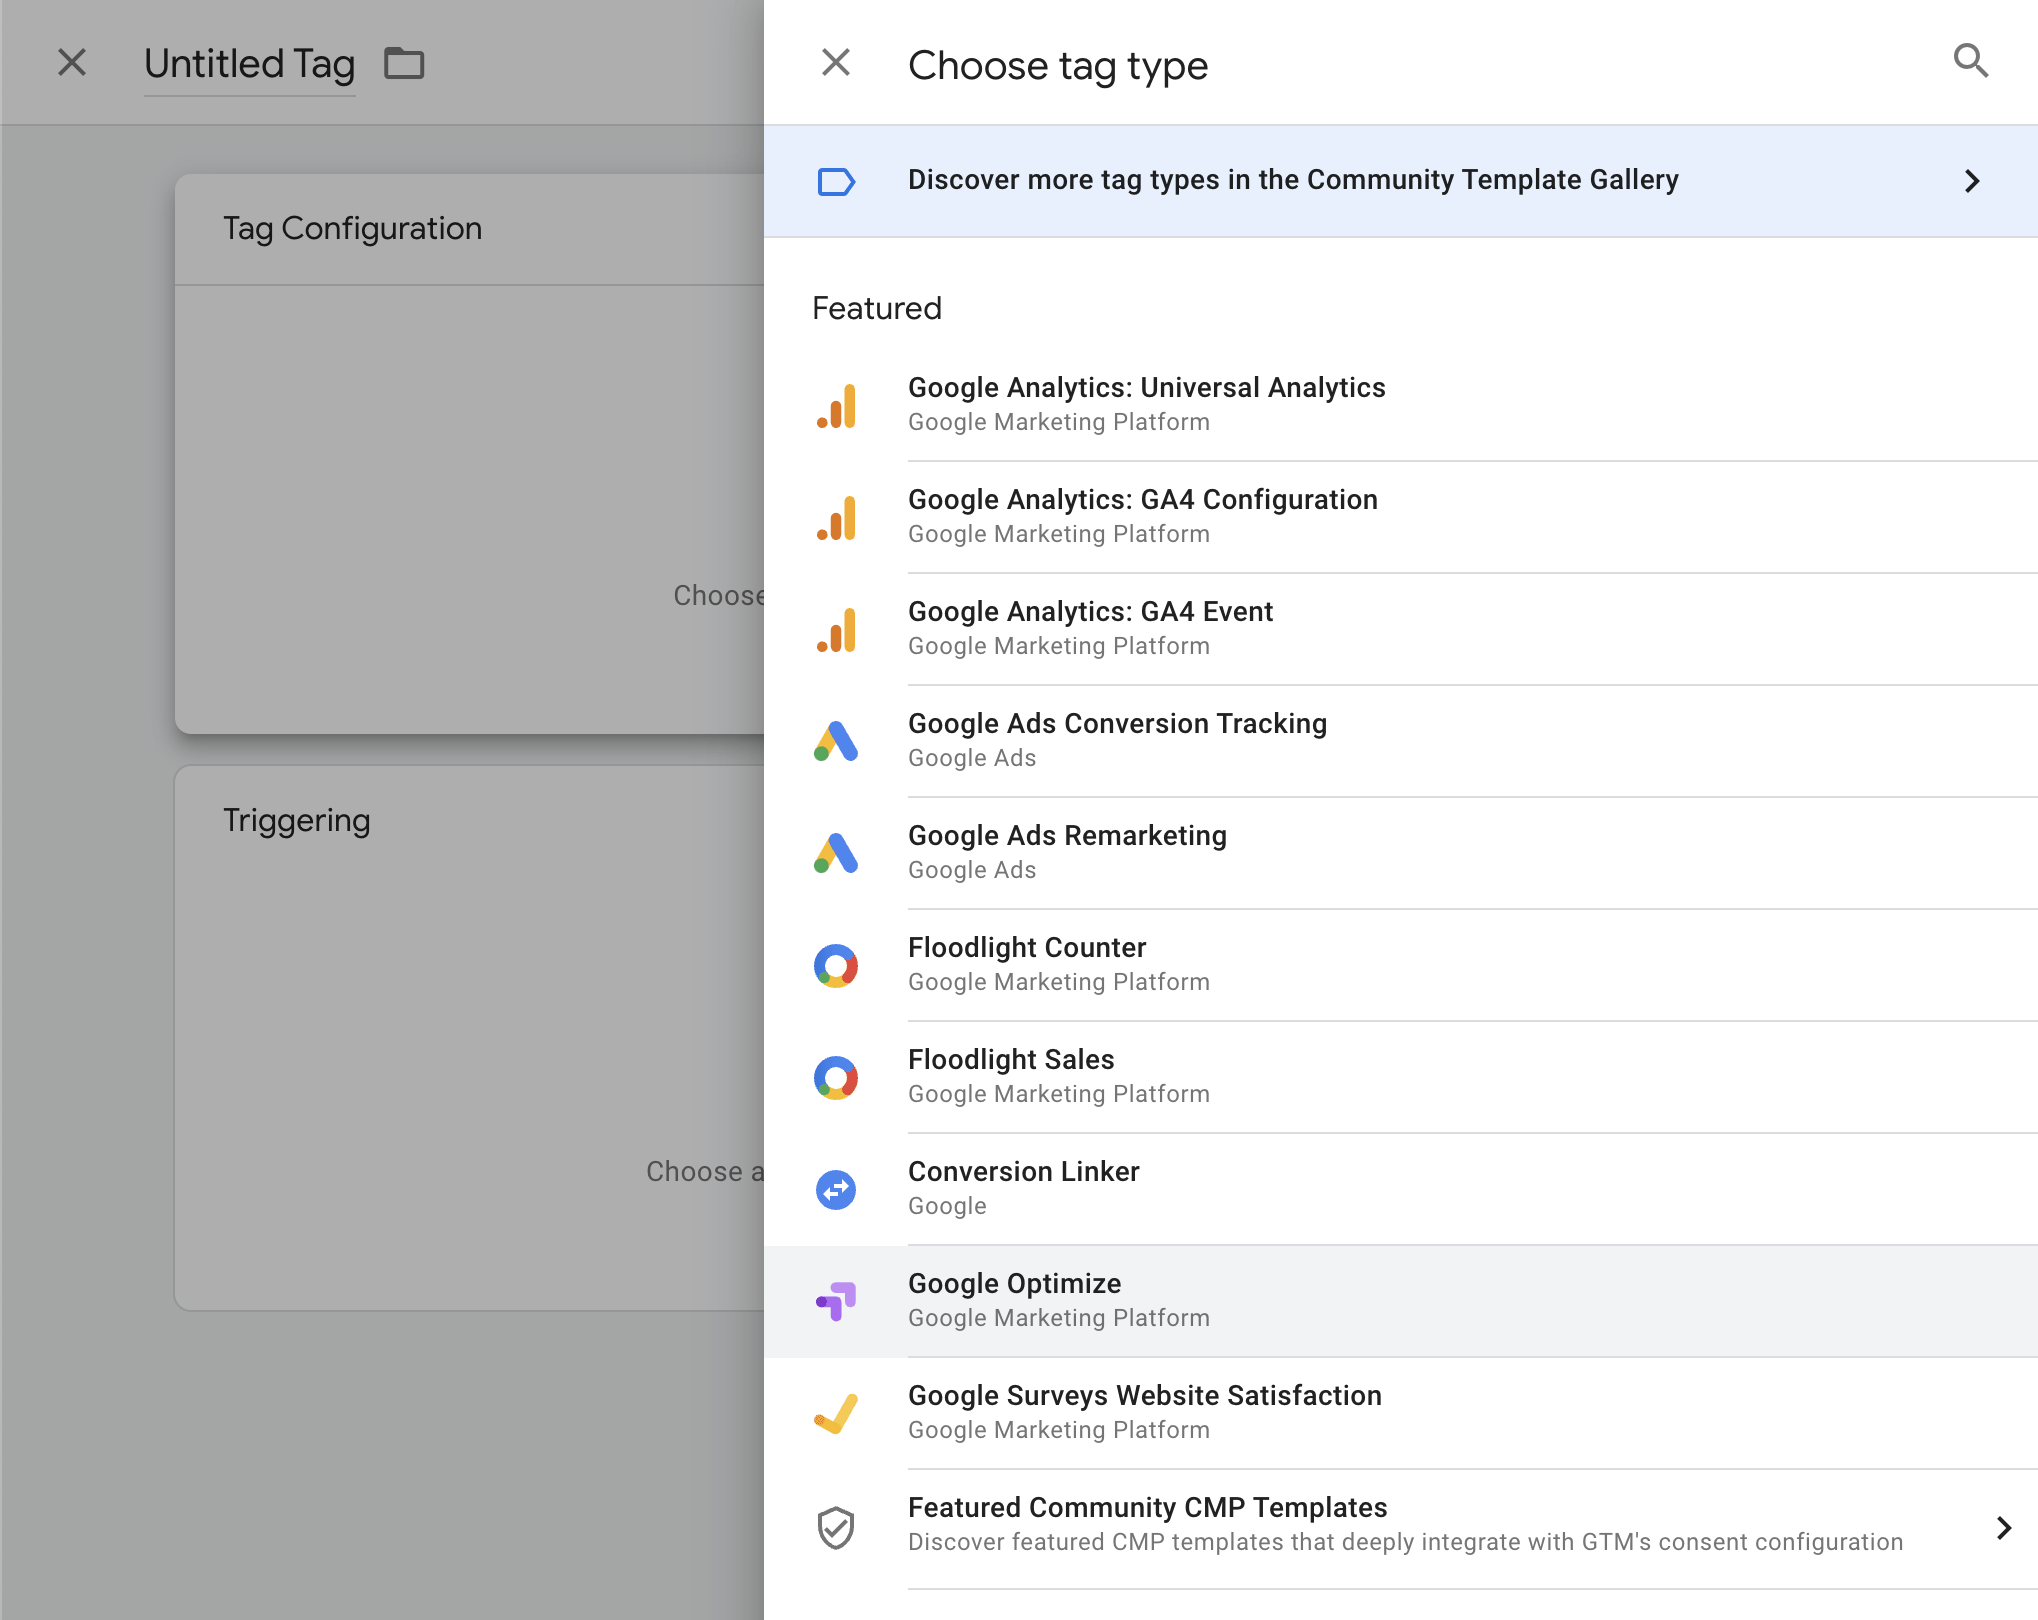
2. Click Tag Configuration and select the Google Optimize tag type in the list of Featured tags
3. Input your Google Optimize container ID in the tag configuration. You can find this under *Container details* in your Optimize container settings
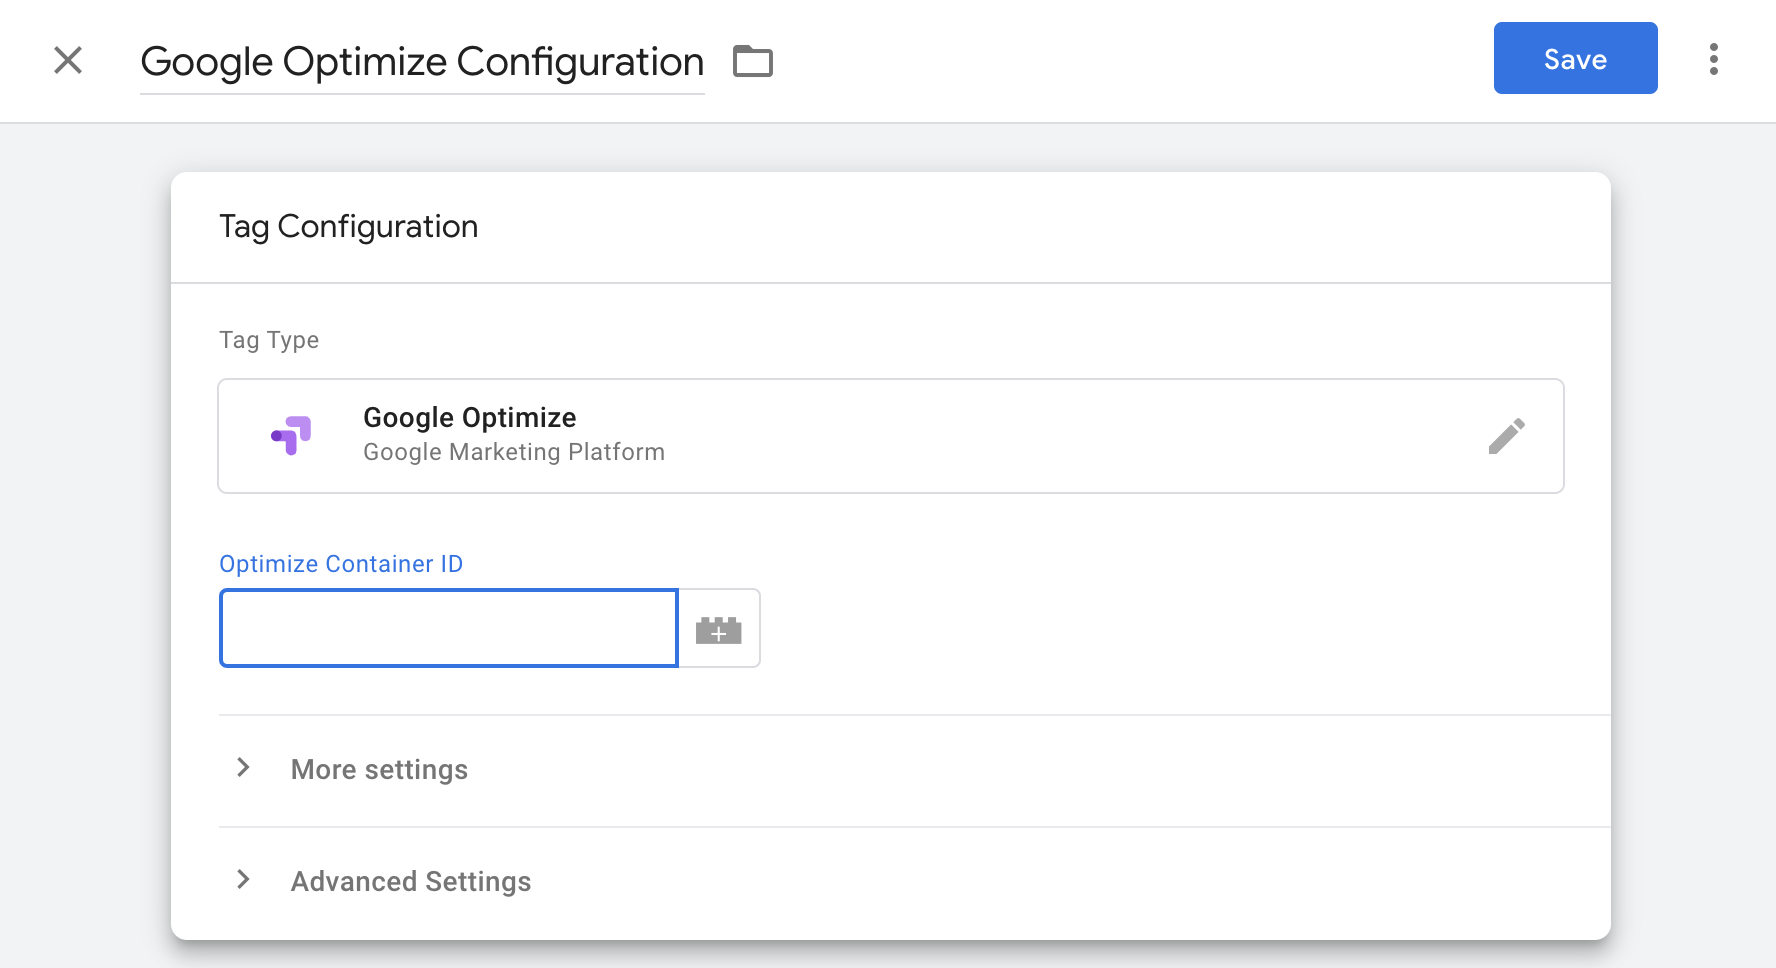
4. Click the Trigger Configuration section and select All Page Views
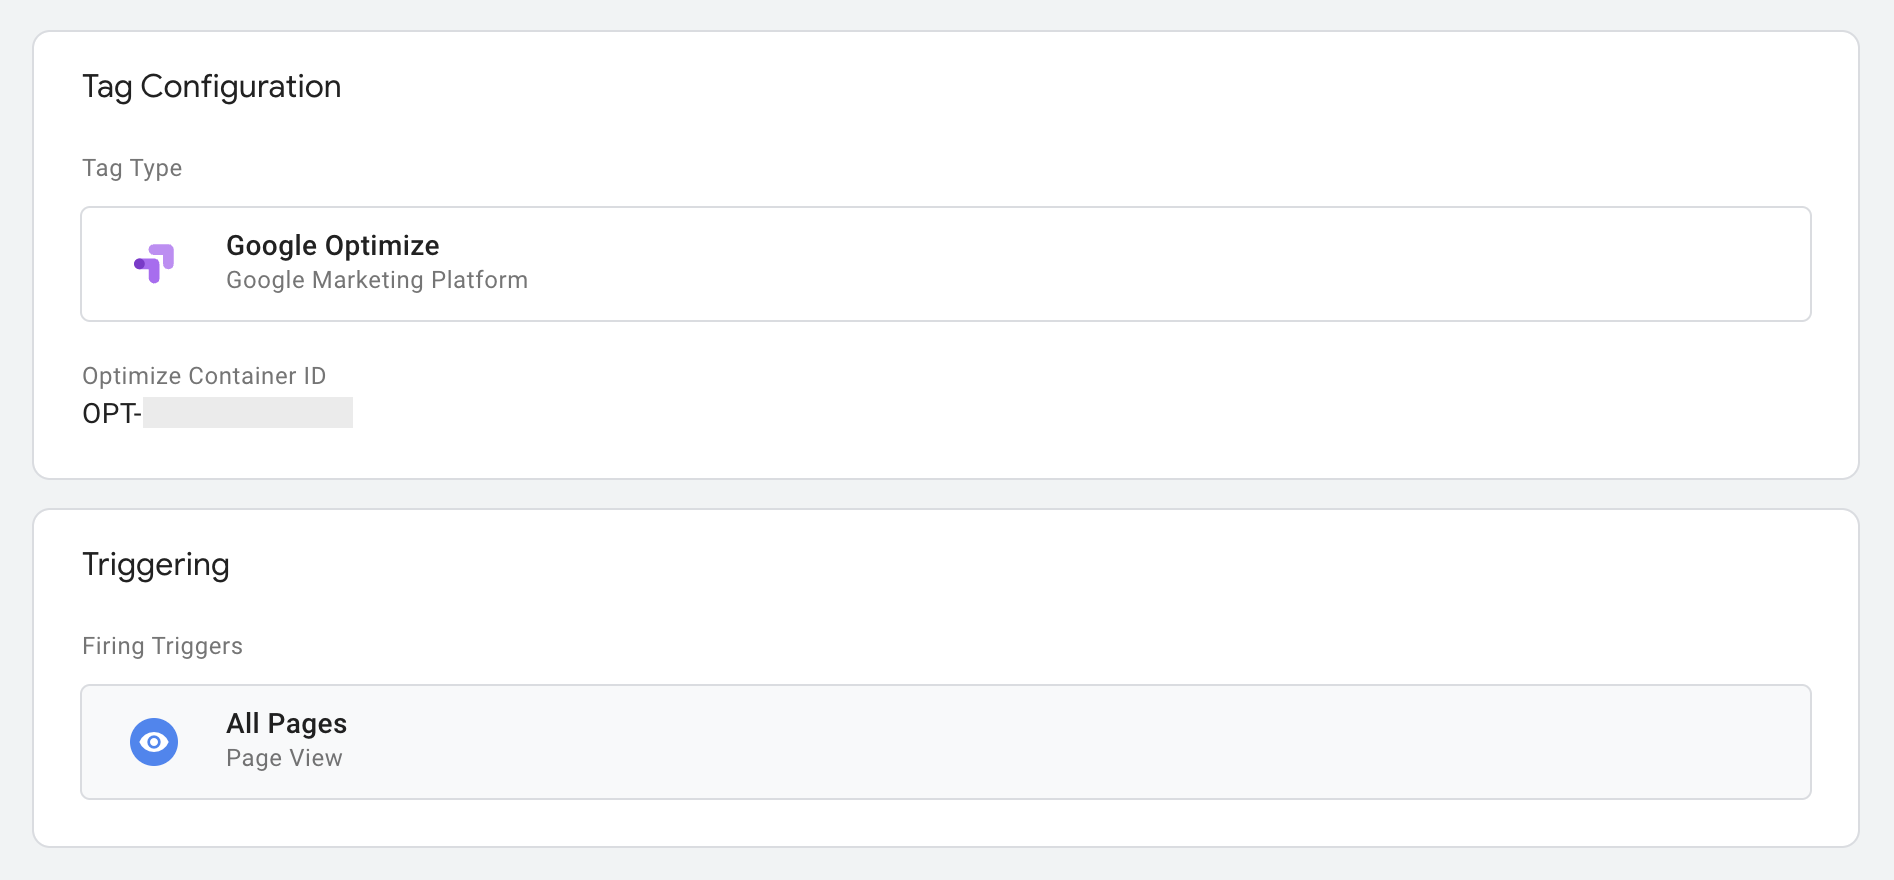
5. Click Save
6. Publish your GTM container by clicking Submit in your workspace
Checking Our Google Optimize Installation
To check if your Google Optimize installation was successful, return to your container and scroll to the bottom of the page.
You should see a green checkmark next to your Optimize Installation under the Settings section if your installation was successful.

If you don't click, Check Installation to get your container to refresh and check again.

The last thing we need to install is the Chrome extension which is required to use the visual editor and installation diagnostics for Google Optimize. However, it's not needed to create redirect experiments or view reports.
Click Install Extension to add it to Chrome.

From there, a Google Web Store window should open with the Google Optimize Chrome extension ready for you to install. Click Add to Chrome.

Let's Start Optimizing
Now that we've installed the Google Optimize code on our website, its time to start creating experiences! Head over to our next blog to learn how to create an A/B test in Google Optimize.


