The changes to set up Azure Active Directory haven’t changed very much in the past few years, but getting them into Sitecore has. These days everyone has their own good deployment processes and files for the content management and the content deliver servers, or got them from Sitecore themselves. Customizing the Identity server is rare though, and not everyone has good code for that, or in-depth knowledge to set it up themselves.
Configuring Sitecore for Azure AD
In case you are here for the Sitecore setup, my colleague David has written two excellent articles on configuring Sitecore and Azure AD itself. See this article for the bulk of the setup, and this article for surprising behavior from the default user builder. These changes are still current for Sitecore as of the time of this article, and likely will continue to be good for a long time yet.
Building the Bridge Into Docker
You’ve got your setup now, and managed to deploy it to your CM server. Remember to budget lots of time for testing, Azure AD authentication requires every step to be just right. Now, it’s likely you haven’t had to make any changes to the docker setup in a long time, or possibly never! Where do you put your shiny new XML configuration file for the identity server? I found it simplest to add an Identity.csproj file to my solution, and wire it into the Docker build steps.
The project only contains one file:
sitecore/Sitecore.Plugin.IdentityProvider.AzureAd/Config/Sitecore.Plugin.IdentityProvider.AzureAd.xml
That might sound like overkill, but it’s much simpler for the next part of the process.
Here’s an example Dockerfile for the solution build:
# escape=`

ARG BASE_IMAGE
ARG BUILD_IMAGE

FROM ${BUILD_IMAGE} AS prep
SHELL ["powershell", "-Command", "$ErrorActionPreference = 'Stop'; $ProgressPreference = 'SilentlyContinue';"]

# Gather only artifacts necessary for NuGet restore, retaining directory structure
COPY *.sln nuget.config Directory.Build.targets src\Project.Website\packages.config \nuget\
COPY src\ \temp\
RUN Invoke-Expression 'robocopy C:\temp C:\nuget\src /s /ndl /njh /njs *.csproj *.scproj packages.config'

FROM ${BUILD_IMAGE} AS builder

ARG BUILD_CONFIGURATION

SHELL ["powershell", "-Command", "$ErrorActionPreference = 'Stop'; $ProgressPreference = 'SilentlyContinue';"]

# Create an empty working directory
WORKDIR C:\build

# Copy prepped NuGet artifacts, and restore as distinct layer to take better advantage of caching
COPY --from=prep .\nuget .\
RUN nuget restore

# Copy remaining source code
COPY src\ .\src\

# Copy transforms, retaining directory structure
RUN Invoke-Expression 'robocopy C:\build\src C:\out\transforms /s /ndl /njh /njs *.xdt'

# Build XConnect with file publish
RUN msbuild .\src\Project.XConnect\XConnect.csproj /p:Configuration=$env:BUILD_CONFIGURATION /p:DeployOnBuild=True /p:DeployDefaultTarget=WebPublish /p:WebPublishMethod=FileSystem /p:PublishUrl=C:\out\xconnect

# Build website with file publish
RUN msbuild .\src\Project\Website.csproj /p:Configuration=$env:BUILD_CONFIGURATION /p:DeployOnBuild=True /p:DeployDefaultTarget=WebPublish /p:WebPublishMethod=FileSystem /p:PublishUrl=C:\out\website

# Build identity with file publish
RUN msbuild .\src\Project.Identity\Identity.csproj /p:Configuration=$env:BUILD_CONFIGURATION /p:DeployOnBuild=True /p:DeployDefaultTarget=WebPublish /p:WebPublishMethod=FileSystem /p:PublishUrl=C:\out\identity

FROM ${BASE_IMAGE}

WORKDIR C:\artifacts

# Copy final build artifacts
COPY --from=builder C:\out\website .\website\
COPY --from=builder C:\out\transforms .\transforms\
COPY --from=builder C:\out\xconnect .\xconnect\
COPY --from=builder C:\out\identity .\identity\
I’ve only had to add two lines here, the msbuild line with Identity.csproj and the COPY line to move the artifacts, which is just the one file.
Then there is are a few changes to the Dockerfile for the Identity server, likely called “id” in your codebase. This is the original version, it’s very bare bones.
# escape=`

ARG BASE_IMAGE

FROM ${BASE_IMAGE}
Our updated version, which grabs the files from the COPY command up above:
# escape=`

ARG BASE_IMAGE
ARG SOLUTION_IMAGE

FROM ${SOLUTION_IMAGE} as solution
FROM ${BASE_IMAGE}

SHELL ["Powershell", "-Command", "$ErrorActionPreference = 'Stop'; $ProgressPreference = 'SilentlyContinue';"]

WORKDIR C:\Identity
COPY --from=solution \artifacts\identity\ .\
ENTRYPOINT ["dotnet", "Sitecore.IdentityServer.Host.dll"]
The COPY command here overwrites the original XML file with our new file, and the entrypoint is actually unchanged, it just needs to be explicitly called out now. You can check in the container to make sure the file was deployed, but that’s the whole thing!
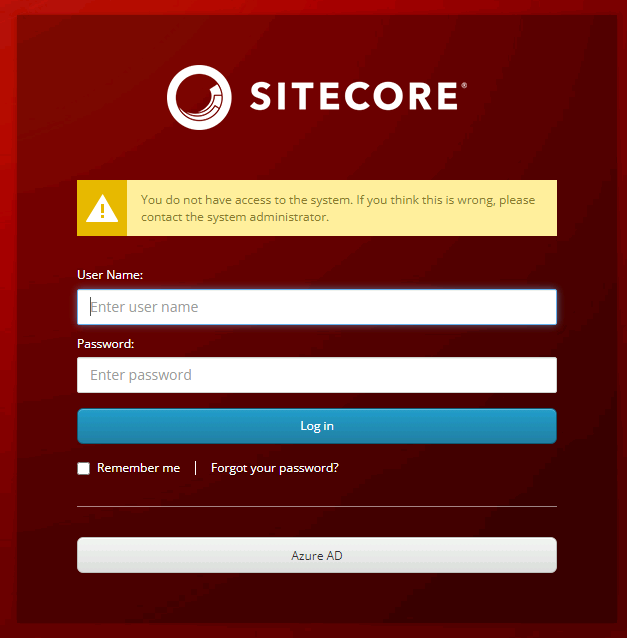
You Do Not Have Access to the System
Here’s a surprise that might happen to you. It’s not related to Docker but it’s still good to know.

Azure AD might return hasGroups:true instead of the group id. That’s why you see this error message. This happens when the user belongs to more than five groups. You can test against https://jwt.ms to see if that’s the case.
Microsoft has a couple options to fix the problem. https://learn.microsoft.com/en-us/entra/identity-platform/optional-claims#configure-groups-optional-claims "Groups assigned to the application" is one option, and the other is a group filter here: https://learn.microsoft.com/en-us/entra/identity/hybrid/connect/how-to-connect-fed-group-claims#group-filtering
Safe on the Other Side
That covers the whole process. Create your XML file, link it into the solution Dockerfile, pull from the solution into the Identity Server image, and you’re done. Different solutions may have different details, but you can generalize from this. For example, your solution build might start with the entire sln file, and you wouldn’t need the msbuild command just for the Identity.csproj file.


