How to Secure Solr as PaaS in Azure With Basic Auth
Learn a quick and easy way to enhance the security of Solr as PaaS in Azure with basic authentication.
Start typing to search...
If you are using Solr as a Platform as a Service (PaaS) in Azure and want to enhance its security, then Basic Authentication can be a quick and easy solution. Basic Authentication is a widely used authentication mechanism that requires a username and password to access a resource. It is simple to implement and configure, making it a great choice for securing your Solr instance. Before we start, if you don’t have Solr installed in Azure, then check out our blog on how to install Solr as an App Service for Sitecore Azure PaaS. Alright, let’s get started!
Note: You can follow this guide to secure any Azure App Service with Basic Auth and is not limited to Solr only. Also, this guide has NOT been tested against Linux-based WebApps and is only tested against Windows-based WebApps.
Open your favourite code editor with a blank file and name it applicationHost.xdt. Paste the following code and save it to your desired location, for e.g. C:\Solr.
<?xml version="1.0"?>
<configuration xmlns:xdt="http://schemas.microsoft.com/XML-Document-Transform">
  <location path="%XDT_SITENAME%" xdt:Locator="Match(path)">
    <system.webServer>
      <rewrite xdt:Transform="InsertIfMissing">
        <allowedServerVariables xdt:Transform="InsertIfMissing">
          <add name="RESPONSE_WWW_AUTHENTICATE" xdt:Locator="Match(name)" xdt:Transform="InsertIfMissing" />
        </allowedServerVariables>
        <rules xdt:Transform="InsertIfMissing">
          <rule name="BasicAuthentication" stopProcessing="true" xdt:Transform="InsertIfMissing" xdt:Locator="Match(name)">
            <match url=".*" />
            <conditions>
              <add input="{HTTP_AUTHORIZATION}" pattern="^Basic ZmlzaHRhbmtzb2xyOlNvbHJTZWN1cmVQYXNzd29yZA==" ignoreCase="false" negate="true" />
            </conditions>
            <action type="CustomResponse" statusCode="401" statusReason="Unauthorized" statusDescription="Unauthorized" />
            <serverVariables>
              <set name="RESPONSE_WWW_AUTHENTICATE" value="Basic realm=Project" />
            </serverVariables>
          </rule>
        </rules>
      </rewrite>
    </system.webServer>
  </location>
</configuration>
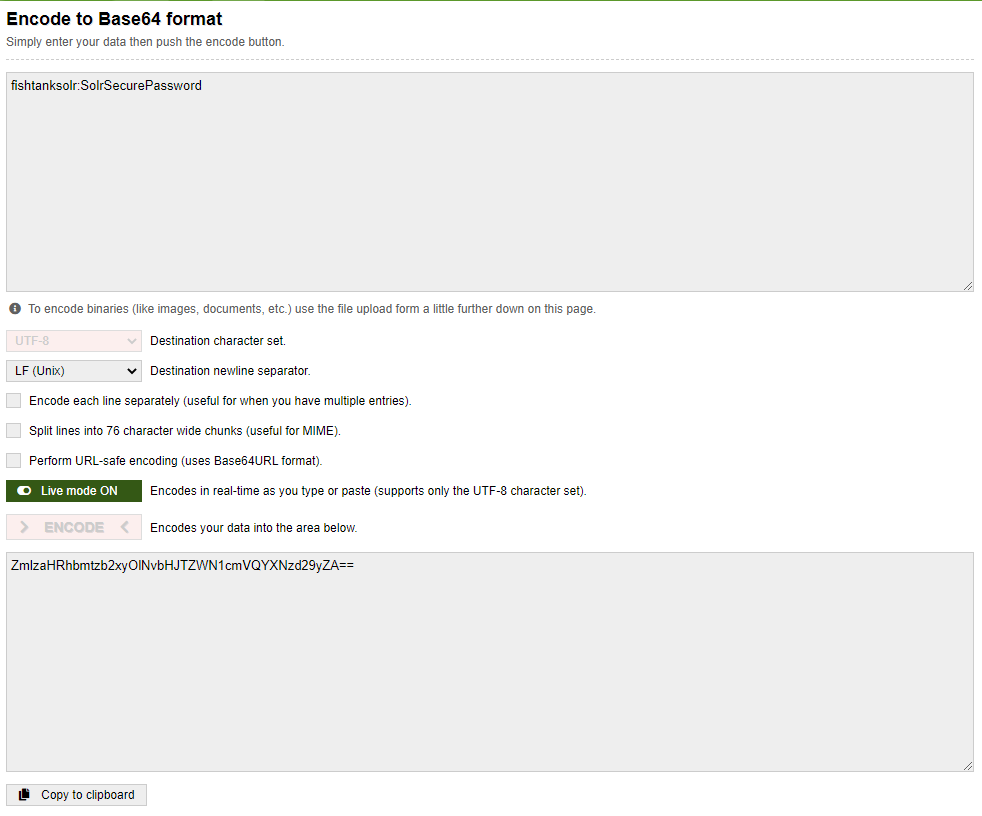
The current configuration for username is fishtanksolrand password is SolrSecurePassword. If you wish to change it, then visit any base64encode website and encode your desired username and password like shown below.

Make sure to format it as username:password and paste the resultant encoded string inside the pattern parameter. DO NOT remove the ^Basic that is in the parameter.
<add input="{HTTP_AUTHORIZATION}" pattern="^Basic <YOUR ENCODED STRING>" ignoreCase="false" negate="true" />
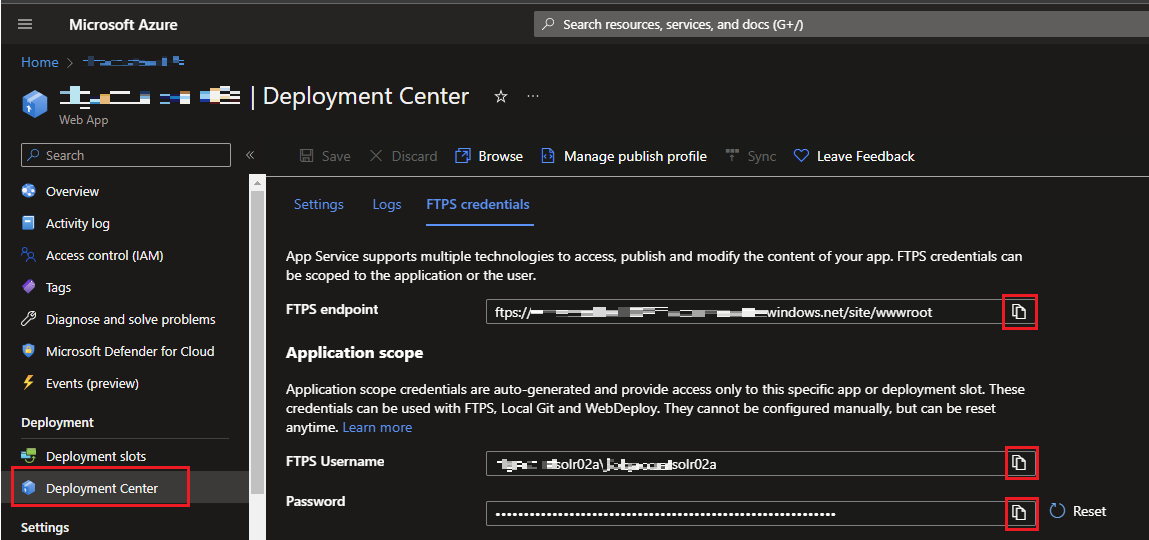
I’ll keep it simple and use FilzeZilla to deploy this file via FTP. So, grab your FTPS credentials for your WebApp from Deployment Center.

Open FileZilla, copy FTPS endpoint and paste it as Host. FTPS username and Password is self-explanatory.

Click Quickconnect and press OK for any certificate-related pop-up. In the Local site (left pane), go to the location where you’ve saved applicationHost.xdt, in our case that is C:\Solr. In the Remote site (right pane), go to /site folder. Right-click on applicationHost.xdt and click Upload.

Once your file is deployed, restart your app service and Solr should be secured with Basic Auth.

That’s folks! Securing Solr is a MUST for any organization and this blog post provides a quick and effective way to do so. Remember, this guide is not limited to Solr only as the Basic Auth is applied at the WebApp level and can be used to secure any Windows-based Azure WebApp. If you wish to use the Basic Authentication plugin for securing Solr, then check out our guide on how to secure Solr using Basic Authentication and Rule-Based Authorization plugin.
Happy decoding!