What Are Sitecore Webhooks?
Sitecore Webhooks provide a powerful way to integrate Sitecore CMS with external systems in real time, enabling seamless workflow automation and content synchronization. They act as event-driven notifications that send an HTTP request (usually a POST request) to a predefined endpoint when an event occurs.
These webhooks are mostly useful for:
- Synchronizing external systems with Sitecore content updates
- Logging and monitoring changes
-
Automating processes based on Sitecore actions
With Sitecore Webhooks for content publishing, organizations can streamline headless CMS workflows, enhance system interoperability, and improve digital experience management.
Three Types of Webhooks
Two of the three webhooks primarily focus on workflow actions, while the third is centered around Sitecore events.
1. Webhook Event Handler
This is your basic "notify me when something happens" webhook. For instance, imagine you want to know every time someone creates a new webpage. Simply set up an event handler webhook, and you'll get an HTTP POST notification whenever that occurs.
2. Webhook Submit Action
This type focuses on workflow state changes. If you want to notify your marketing team when content moves to the "approved" state, a webhook submit action has got you covered.
3. Webhook Validation Action
This webhook type acts as a gatekeeper, allowing external services to approve or reject workflow state changes. Imagine integrating with a compliance checking service that must approve content before publication – that's exactly what validation actions enable.
In this blog, we’ll focus on the Webhook Event Handler, specifically for the Publish Item Event and how to set it up in Sitecore.
Setting Up Sitecore Webhooks
To configure webhooks in Sitecore:
- Navigate to /sitecore/system/Webhooks in the Sitecore Content Editor.
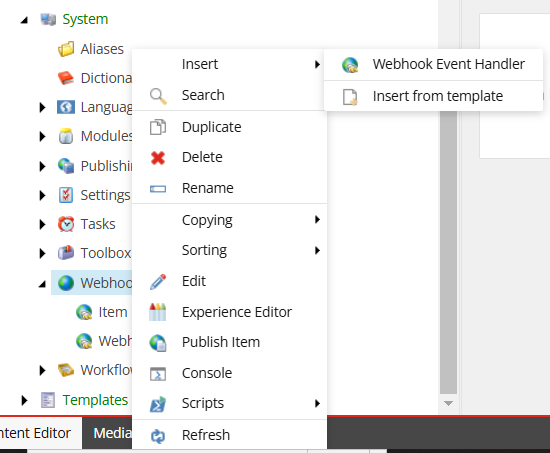
- Create a new Webhook Event Handler.
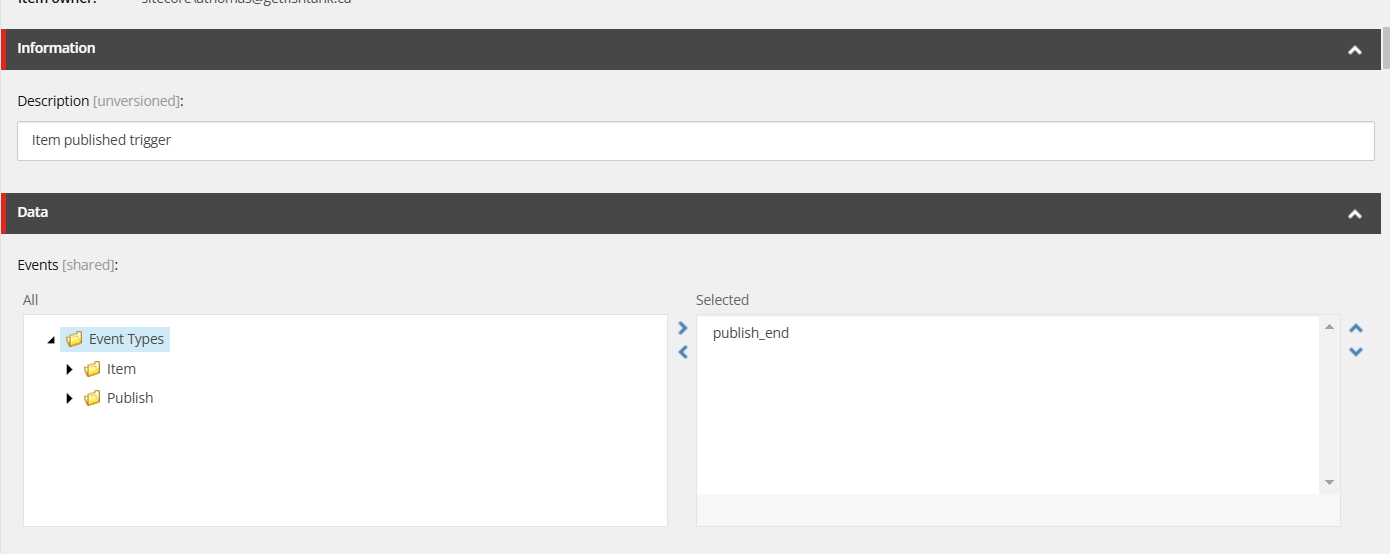
- Provide the Description field with what a particular webhook does.
- Define the Events that should trigger the webhook (e.g.,
item:publishedfor the publish event). - Set Rule in the rule field editor if required. I set it so that it is triggered only when items under a particular parent item is published.
- Check the Enabled checkbox to make the webhook active.
- Specify the Endpoint URL where the webhook should send the data.
- Set the Authorization for the endpoint if required:
a. Authorization types can be created at the path /sitecore/system/Settings/Webhooks/Authorizations.
b. Once created it is going to show up in the Authorizations droplist.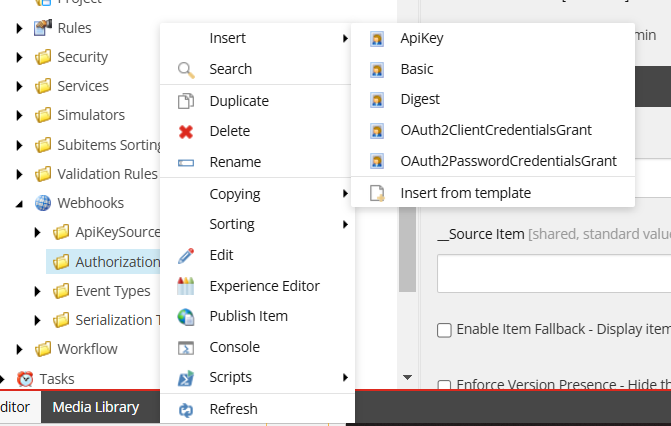
-
Set the Serialization Type as either JSON/XML. Here I have selected JSON as my payload serialization.
-
Save and publish the webhook.

The Publish Item Event
The item:published event is one of the most commonly used triggers in Sitecore webhooks. It fires whenever an item is published, making it useful for:
- Content synchronization with third-party systems (e.g., a headless CMS or marketing automation tool)
- Clearing cache in external applications
- Notifying teams or triggering further content workflows
Handling the Publish Event in Webhooks
When a Sitecore item is published, the webhook will send a payload to the configured endpoint. A typical webhook payload for Item Publish looks like as in the below JSON.
It’s important to note that the payload varies for different events. In the case of the item:published event, the key field is RootItemId (as opposed to ItemId in other item-related events). This is crucial for correctly handling the payload.
{
    "EventName": "publish:end",
    "PublisherOptions": {
        "CompareRevisions": true,
        "Deep": false,
        "FromDate": "2023-03-10T19:58:10.98Z",
        "Mode": "SingleItem",
        "PublishDate": "2025-01-20T20:52:42.453Z",
        "PublishingTargets": [
            "{8E080626-DDC3-4EF4-A1D1-F0BE4A200254}"
        ],
        "RepublishAll": false,
        "RecoveryId": "70b7e8dc-0794-4c15-a787-3c6e16c6d977",
        "SourceDatabaseName": "master",
        "TargetDatabaseName": "experienceedge",
        "RootItemId": "c30bf38d-4417-4353-a492-78bea288c46f",
        "UserName": "sitecore\\[email protected]",
        "WillBeQueued": true,
        "Languages": [
            "en"
        ]
    },
    "WebhookItemId": "985853a8-fd16-4a06-bb8d-ecafd9dae81f",
    "WebhookItemName": "Webhook Event Handler"
}
Now we have got the item ID and other details of the publish. So this information maybe used to notify external applications. In our case we use it to get these items into the Coveo index.
Making Sitecore Smarter with Webhooks
Webhooks offer a simpler and more efficient approach to handling events and integrating with external systems, reducing the need for complex custom development. Their easy setup and flexibility make them an essential tool for automating event-driven tasks and improving development workflows. The item:published event is particularly useful, providing key publishing information that can be leveraged for tasks like Coveo indexing.
It’s a simple way to make Sitecore work smarter!
Thanks for reading!