Using Docker To Setup Solr For Sitecore In An Azure App Service
Introducing The FishStix Method
Start typing to search...
I've always wanted to automate the setup of Solr in a Sitecore Azure PaaS environment. At the very least I wanted to simplify the process of setting up Solr for PaaS, resulting in something reliable, simple, cost-effective & production-ready for everyone.
There are options for Solr in the Azure Marketplace. I tried a few and became frustrated with their complexity & limitations. There is also SearchStax who provides commercial Solr hosting tailored to Sitecore. But what else is there?
For the most part, we all run a PowerShell script (thank you Jeremy!) and magically see Solr working in our development environments. I would like to do that for our Sitecore PaaS environments as well.
This same itch previously drove me to get Solr running on a Windows App Service in Azure. And people built upon that. I know a lot of people have used it for non-production environments, but I wanted to push this idea much further.
We’re going to leverage the power of Azure & Docker to pull in a rock-solid version of Solr while using Docker Compose to inject the commands we need to prepare Solr for Sitecore. The good part is, you don’t need to know anything about Docker or Docker Compose.
To differentiate this from my previous Solr App Service work, I'm referring to this as the FishStix method. (Send hate mail to SearchStax and Corey Smith for the name inspration :)
This is exclusive to Solr 8.1.1 for Sitecore 9.3 PaaS but I'll be releasing this for more versions very soon.
A quick overview of the benefits of this approach:
Indeed. This is one of the things I'm most excited about. When I set a timer, I can get this setup from scratch in less than 50 seconds. It's really only 2 steps. Once it’s configured, the first initialization takes approximately 2 minutes.
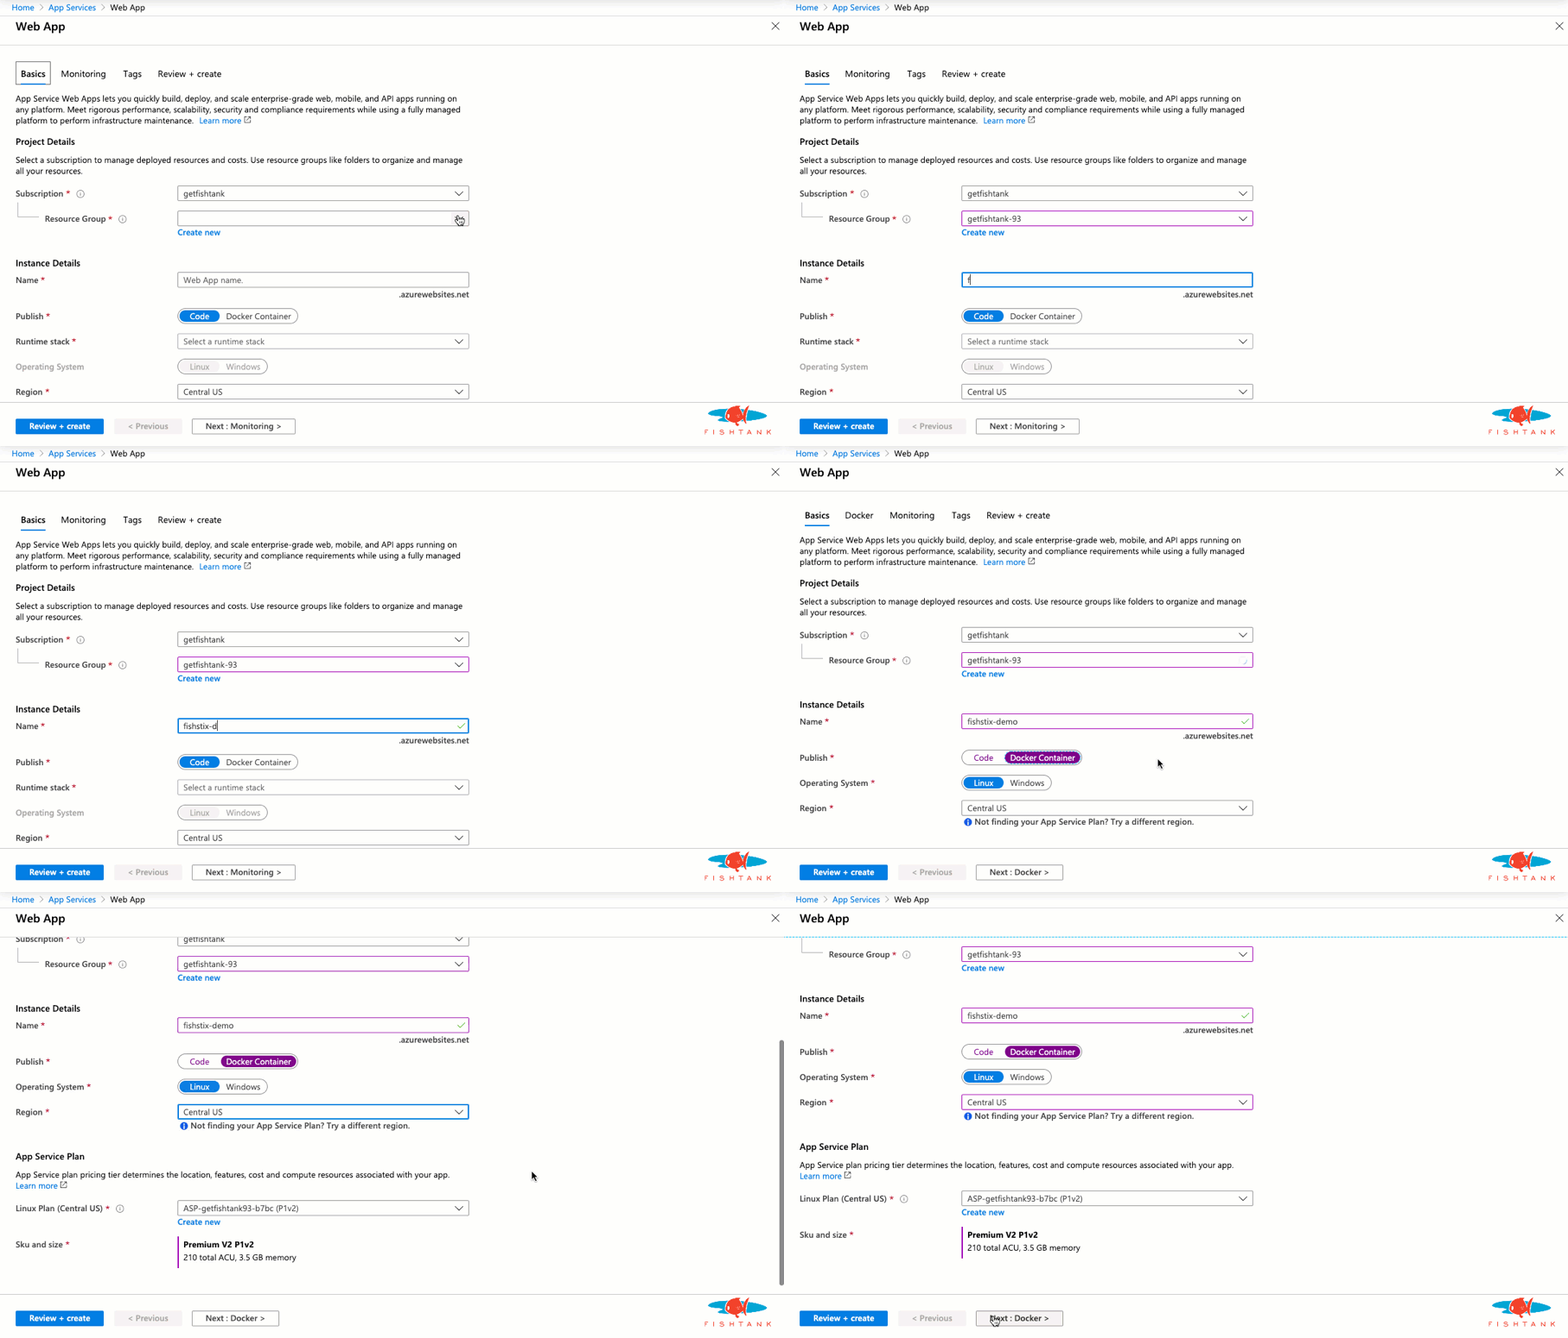
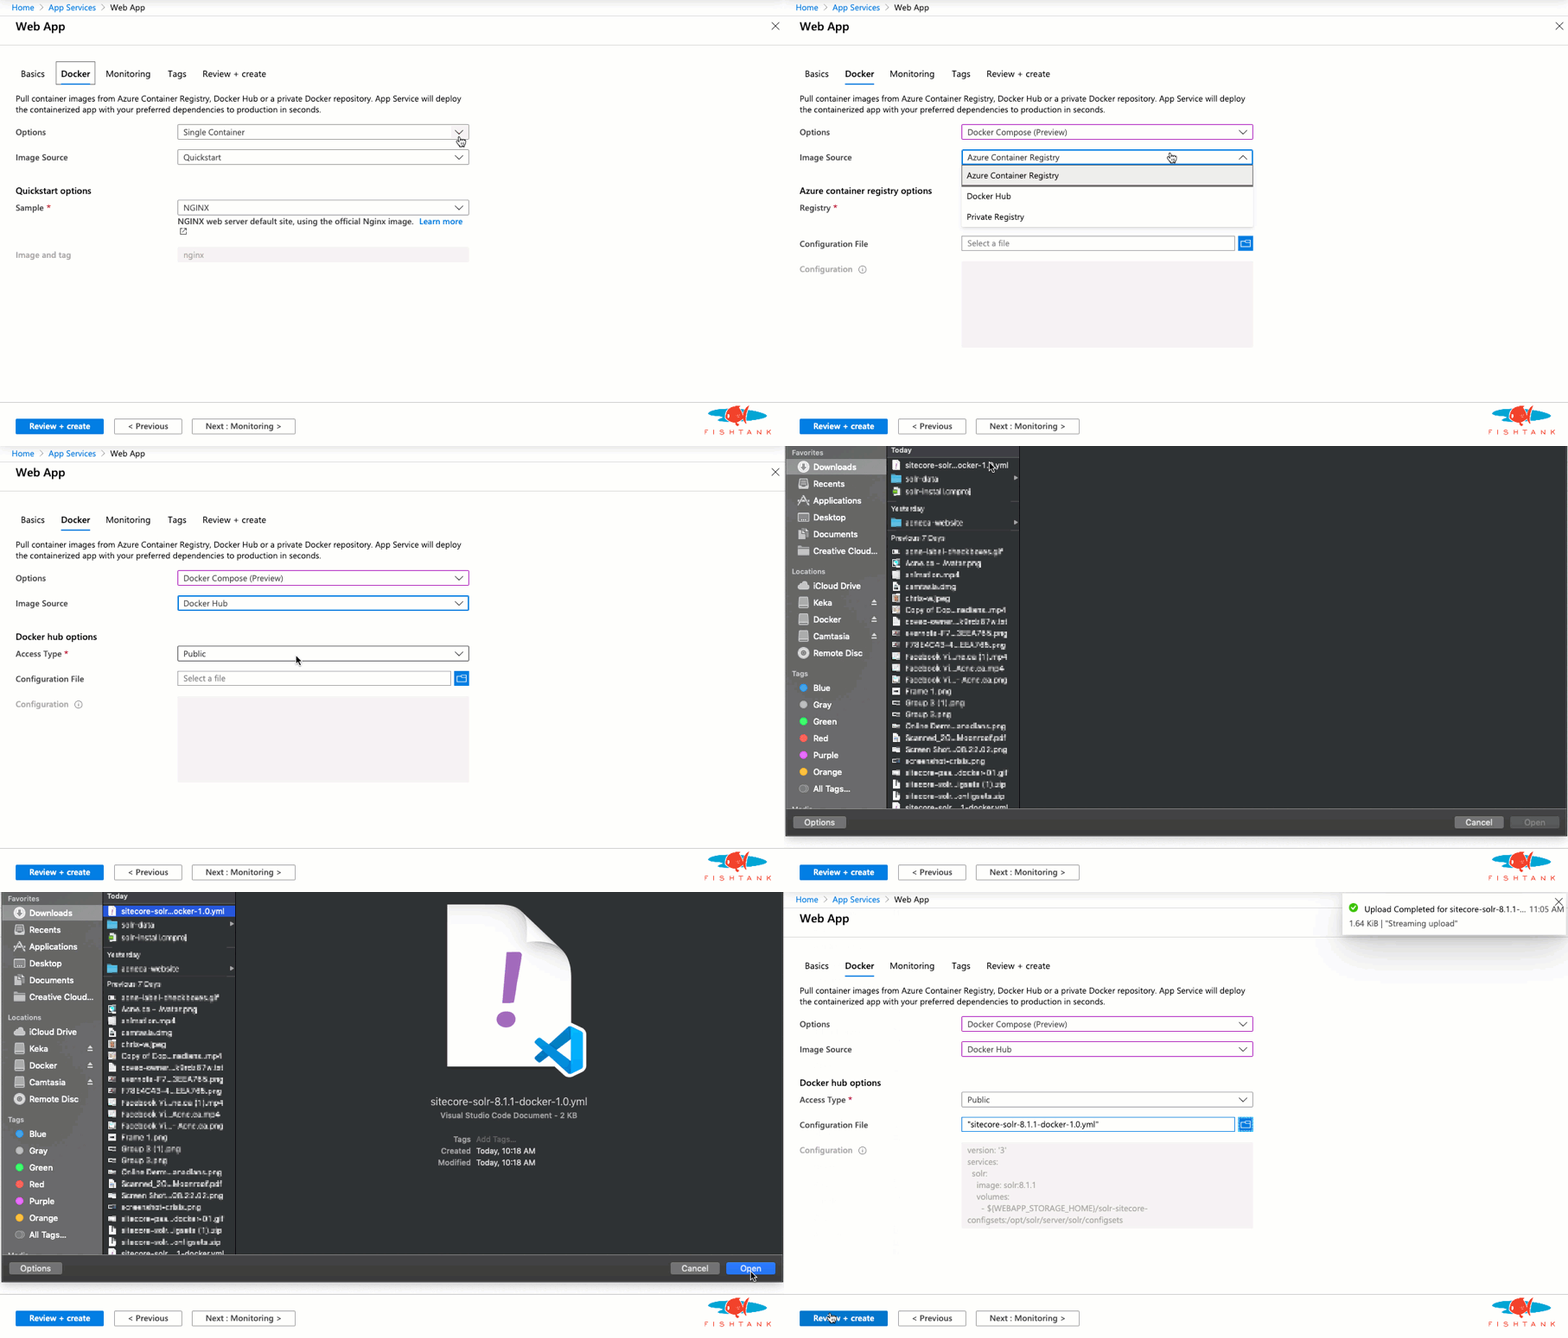
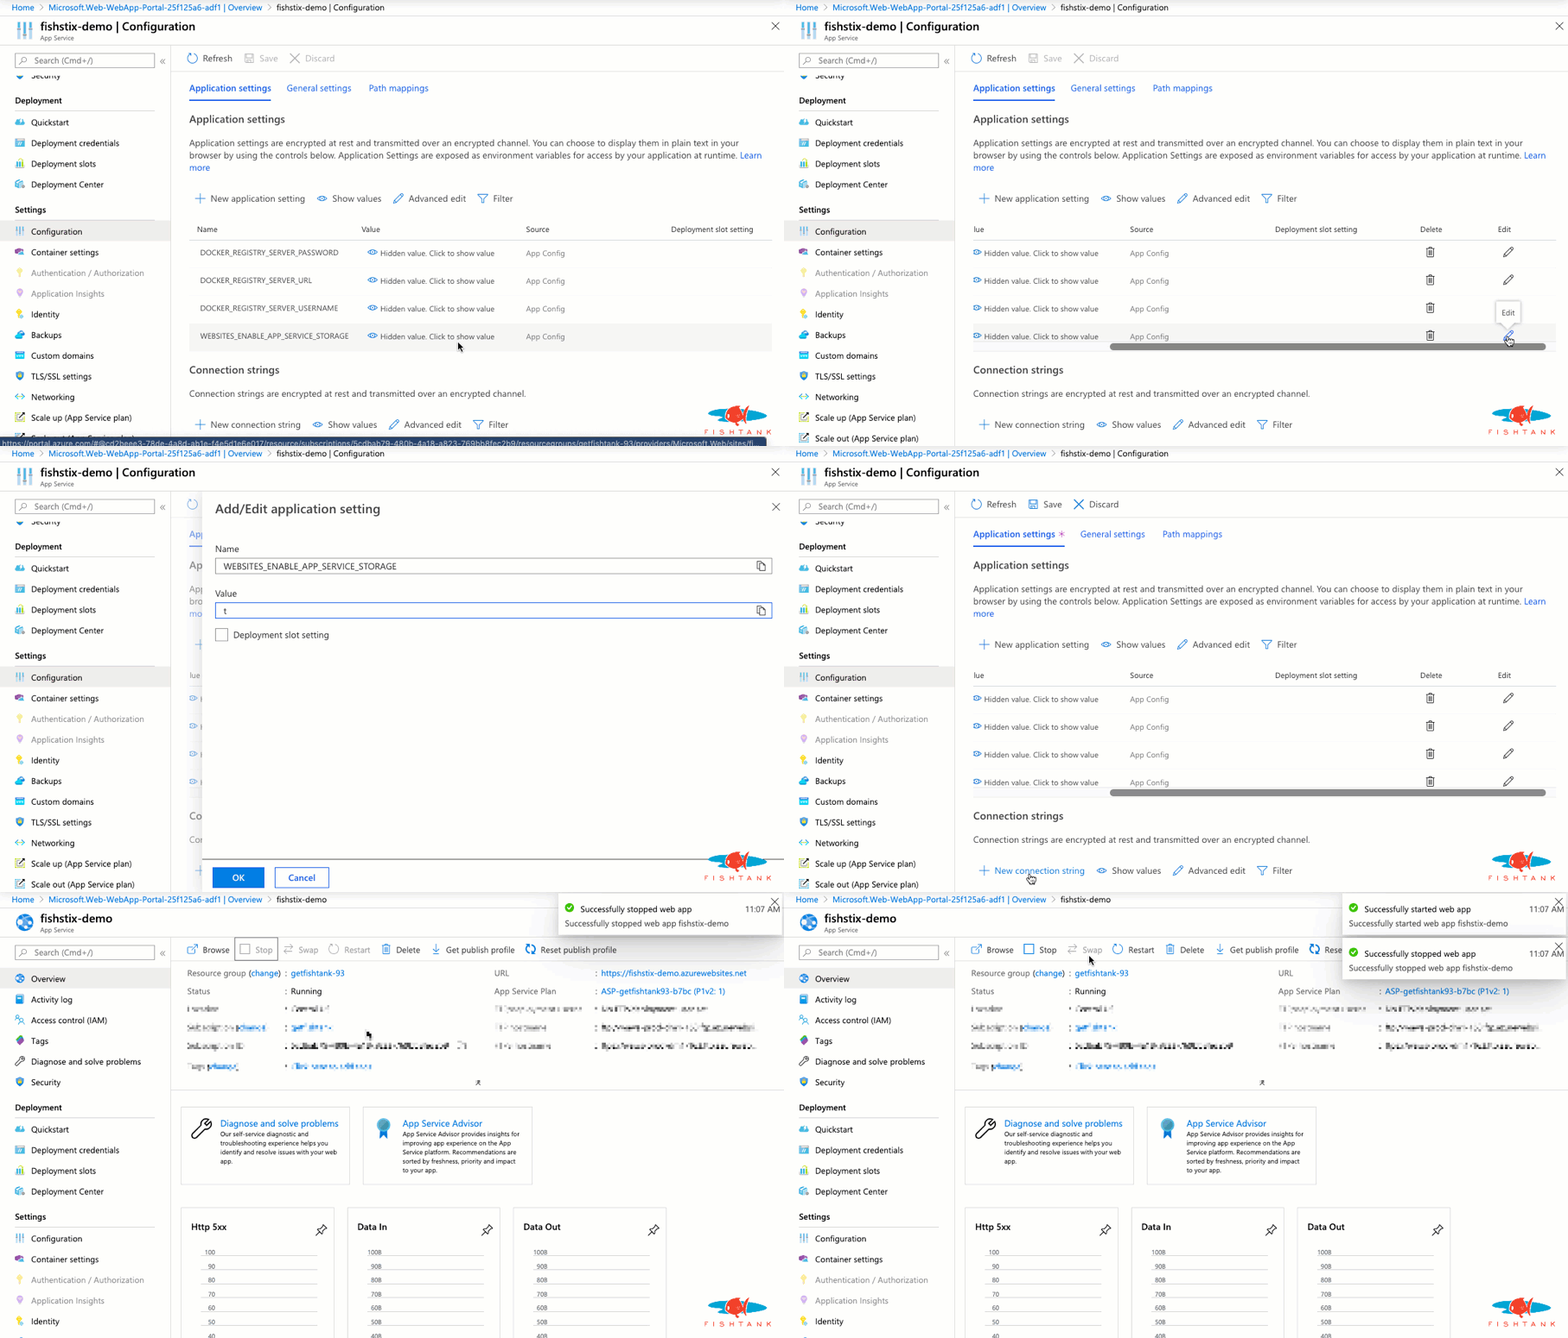
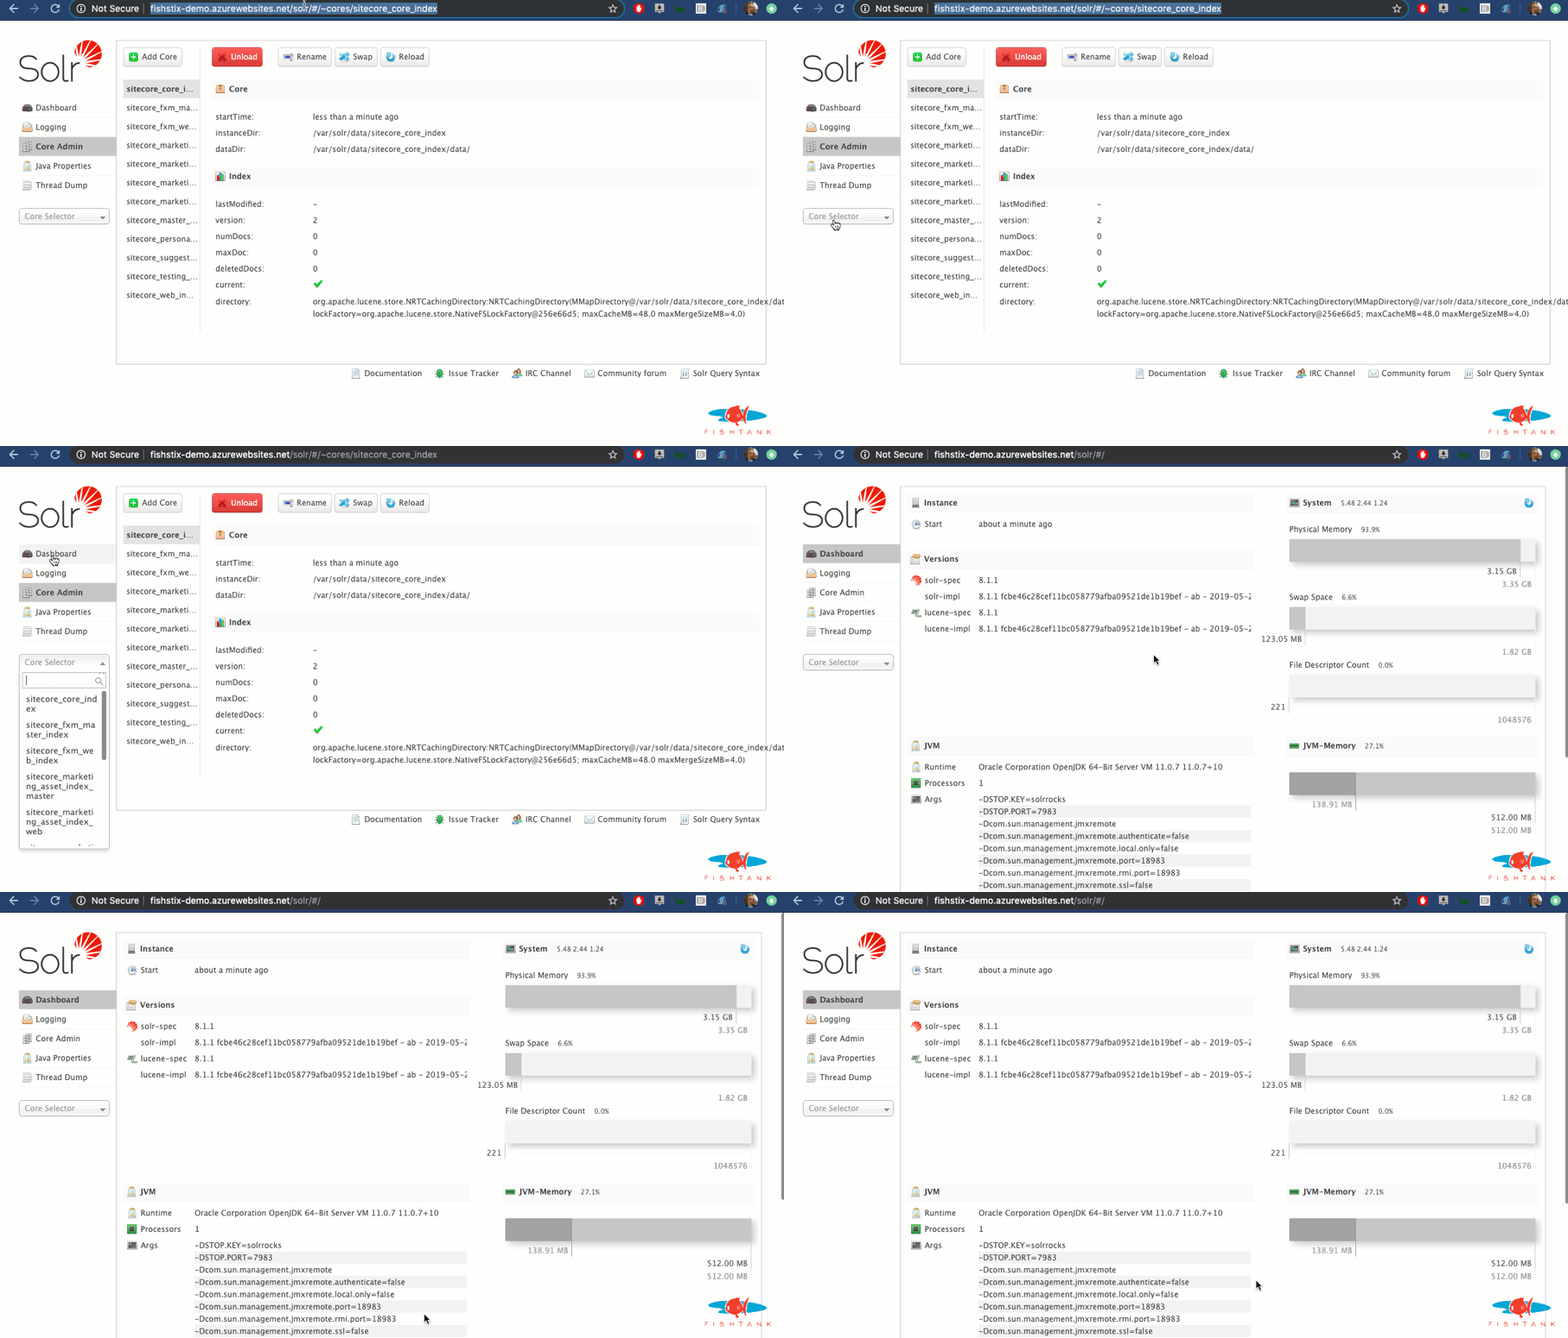
And we're done! Here as a look at the Solr instance running with the expected URL and cores.
To deploy with Basic Authentication use this Docker Compose file sitecore-solr-8.1.1-auth-docker-1.0.yml in step 1B.
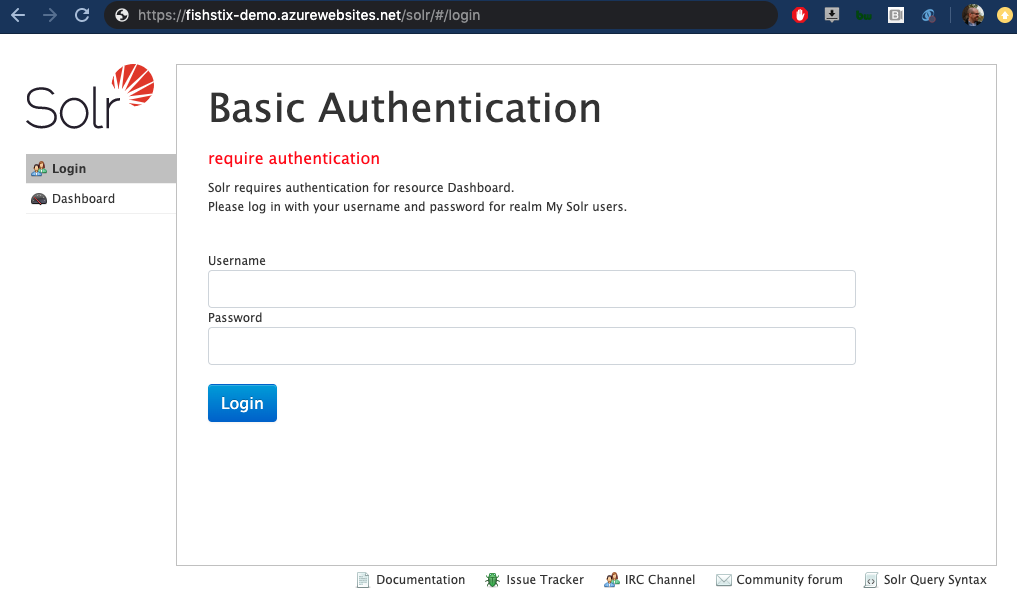
Solr will deploy with the universal default user:pass combo of solr:SolrRocks. To create more secure credentials, read this follow-up article from me on changing the default user credentials in Solr.
This is what's inside the security.json file used here.
{
    "authentication":{
    "blockUnknown": true,
    "class":"solr.BasicAuthPlugin",
    "credentials":{"solr":"IV0EHq1OnNrj6gvRCwvFwTrZ1+z1oBbnQdiVC3otuq0= Ndd7LKvVBAaZIF0QAVi1ekCfAJXr1GGfLtRUXhgrF8c="},
    "realm":"My Solr users",
    "forwardCredentials": false
    },
    "authorization":{
    "class":"solr.RuleBasedAuthorizationPlugin",
    "permissions":[{"name":"security-edit",
        "role":"admin"}],
    "user-role":{"solr":"admin"}
    }
}
Special care has been taken to not clobber existing security settings on restarts. When you add, remove or modify your users the contents of the above file will on your App Service will change.
If you're running this with Basic Authentication enabled, see Sitecore's documentation on protecting Solr over http.
Alternatively, you can include your username and password in your Solr connection strings: https://solr:SolrRocks@solr-name/solr. This can be specified directly in your ARM template parameters for your PaaS deployment (hat tip to @Sitecorey).
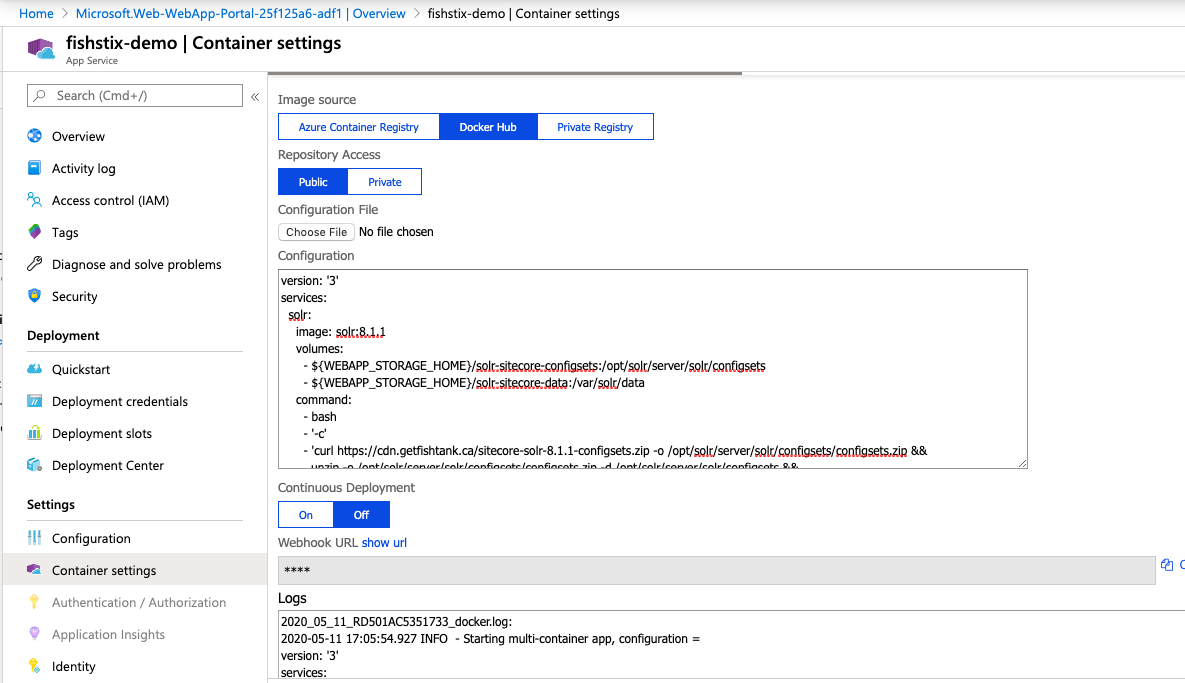
Now that this is setup and running, we can load the Container Settings in Azure and take a deeper look.
A virtual machine virtualizes the hardware that we install operating systems on to. A Docker container virtualizes the operating system that we install software onto. By comparison Docker containers are lightweight and software-focused. They allows us to create software-level images (containers) that contain all dependencies needed to run a piece of software. Best of all, the containers run in isolation.
Leveraging Docker gives us a pristine Solr instance with very low effort. It's repeatable, portable, maintained by the core Solr team and offloads a lot of the automation.
It also provides a mechanism to script changes to the Solr instance without having to log into it.
A Docker Compose file is used to configure this Solr instance when it loads into the state we need it.
Here it is in full:
version: '3'
services:
    solr:
    image: solr:8.1.1
    volumes:
        - ${WEBAPP_STORAGE_HOME}/solr-sitecore-configsets:/opt/solr/server/solr/configsets
        - ${WEBAPP_STORAGE_HOME}/solr-sitecore-data:/var/solr/data
    command:
        - bash
        - '-c'
        - 'curl https://cdn.getfishtank.ca/sitecore-solr-8.1.1-configsets.zip -o /opt/solr/server/solr/configsets/configsets.zip &&
        unzip -o /opt/solr/server/solr/configsets/configsets.zip -d /opt/solr/server/solr/configsets &&
        precreate-core sitecore_core_index /opt/solr/server/solr/configsets/sitecore &&
        precreate-core sitecore_master_index /opt/solr/server/solr/configsets/sitecore &&
        precreate-core sitecore_web_index /opt/solr/server/solr/configsets/sitecore &&
        precreate-core sitecore_marketingdefinitions_master /opt/solr/server/solr/configsets/sitecore &&
        precreate-core sitecore_marketingdefinitions_web /opt/solr/server/solr/configsets/sitecore &&
        precreate-core sitecore_marketing_asset_index_master /opt/solr/server/solr/configsets/sitecore &&
        precreate-core sitecore_marketing_asset_index_web /opt/solr/server/solr/configsets/sitecore &&
        precreate-core Sitecore-sitecore_testing_index /opt/solr/server/solr/configsets/sitecore &&
        precreate-core Sitecore-sitecore_suggested_test_index /opt/solr/server/solr/configsets/sitecore &&
        precreate-core sitecore_personalization_index /opt/solr/server/solr/configsets/sitecore &&
        precreate-core sitecore_fxm_master_index /opt/solr/server/solr/configsets/sitecore &&
        precreate-core sitecore_fxm_web_index /opt/solr/server/solr/configsets/sitecore &&
        precreate-core xdb /opt/solr/server/solr/configsets/xconnect &&
        precreate-core xdb_rebuild /opt/solr/server/solr/configsets/xconnect &&
        solr-foreground'
Volumes allow us to mount folders in the App Service so they are available inside of the Docker container. In this instance we’re creating a solr-sitecore-configset folder overwriting the existing configset folder used inside the container. We download the required configsets and make them accessible inside of Solr.
We also mount the solr-sitecore-data folder in place of the Solr container's internal data> folder. This allows the indexes to be stored outside of the container on the App Service file system.
It’s critical for the indexes to be stored outside of the container so that they’re not lost when the container restarts (e.g. app service restart).
The first part involving bash -c, opens an inline bash shell with prompt. This is a move that allows us to execute multiple commands with arguments.
Normally we’re limited to 1 command with arguments in Docker. In the case, we’re using bash as our single command passing everything else is as an argument. Quite sneaky.
In Sitecore 9.3 (the initial reference for this approach) the index names deployed into the Sitecore Azure PaaS environment are standardized. If you need to modify the prefix used or add custom indexes, you can update the compose file or add them inline under "Container Settings".
precreate-core prefix_core_index /opt/solr/server/solr/configsets/sitecore &&
precreate-core prefix_master_index /opt/solr/server/solr/configsets/sitecore &&
precreate-core prefix_web_index /opt/solr/server/solr/configsets/sitecore &&
precreate-core custom_index /opt/solr/server/solr/configsets/sitecore &&
If you followed these instructions and still see these errors, please be patient. They shall resolve. When the App Service is created the WEBSITES_ENABLE_APP_SERVICE_STORAGE is false by default which causes a permission issue when mounting the volumes. Once the flag is set to true, the Docker image will be downloaded and built as expected. This will take a few minutes!
This is a typical error you'll find in the log if that flag is not true.
2020-05-11 16:21:00.930 ERROR - Container create failed for yoursolrname_solr_0_f42fed50 with System.AggregateException, One or more errors occurred. (Docker API responded with status code=InternalServerError, response={"message":"invalid volume specification: ':/opt/solr/server/solr/configsets'"}
) (Docker API responded with status code=InternalServerError, response={"message":"invalid volume specification: ':/opt/solr/server/solr/configsets'"}
)
InnerException: Docker.DotNet.DockerApiException, Docker API responded with status code=InternalServerError, response={"message":"invalid volume specification: ':/opt/solr/server/solr/configsets'"}
Here a few additional random things to consider.
It was quite a journey to get this to where it is. I have a lot more to share around the FishStix method. I'll soon be covering automation, supporting all 9.x versions of Sitecore and a deeper dive to into the administration of this approach.
I can be reached on Sitecore Slack and Twitter at @dancruickshank. Thank you for reading!