Getting Started with Sitecore: Navigating Updates and New Features
Sitecore consistently releases updates, ensuring it remains proactive in addressing user concerns and introducing new features. While this demonstrates its commitment to improvement, it also means developers must adapt to an ever-changing environment. In this guide, I'll walk you through the initial steps, provide an overview of Sitecore's updates, and help you navigate the tools and features the platform encourages us to use.
Understanding the New Folder Structure and Key Components
When you start a fresh build, the first thing you'll notice is the architecture—especially the folder structure. It's crucial to understand how everything is organized. Below is an example of the folder structure of the current repository:
xmcloud-foundation-head/
├── .config/
├── .sitecore/
│   └── schemas/
├── .vscode/
├── authoring/
├── headapps/
├── local-containers/
├── .dockerignore
├── .gitignore
├── README.md
├── nuget.config
├── sitecore.json
└── xmcloud.build.json
You might find the changes a bit overwhelming at first, but don't worry. We’ll skip over some of these adjustments and focus specifically on the headapps folder. This folder contains all the sites for the project and should house the frontend code, similar to the <project>/src structure from the old build.
Grabbing the Needed Keys from Sitecore XM Cloud Deploy Platform
Before we can proceed, we need to provide values for our environment variables in development. To do this, we must access our project in the Sitecore XM Cloud Deploy Platform. First, log into the platform and navigate to a project within our organization. Below is a screenshot showing what the interface looks like inside one of the projects.
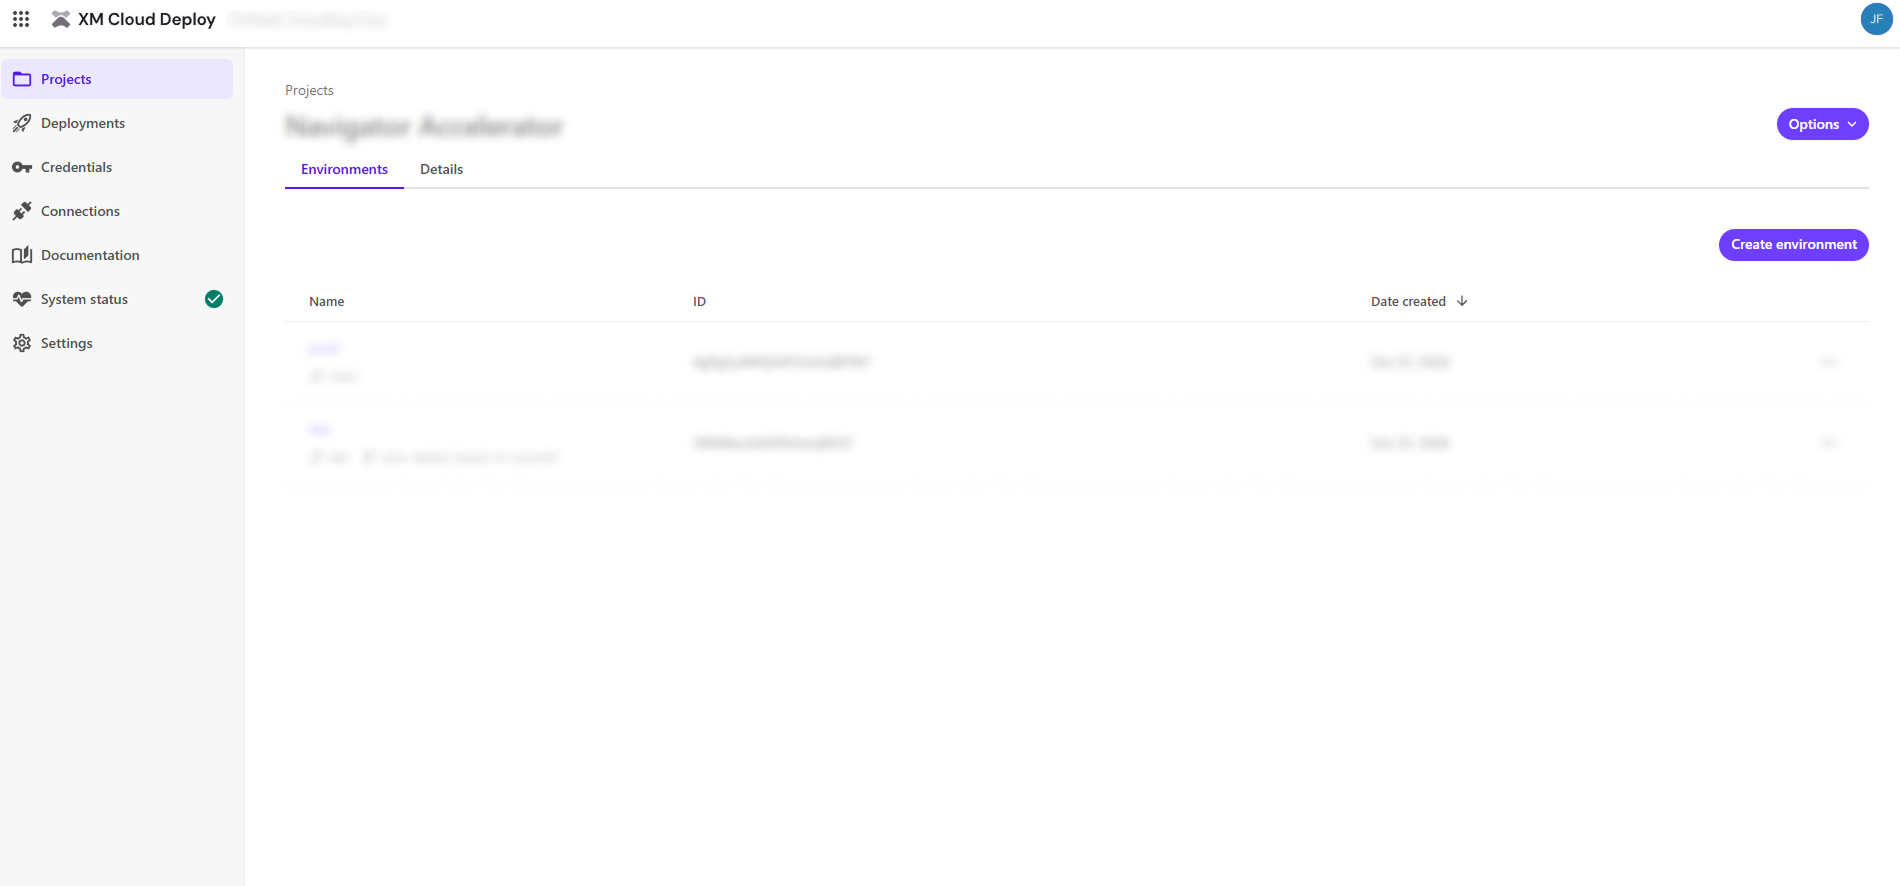
You should already be familiar with accessing this, but if not, I recommend getting used to it, as it will be crucial as we continue developing for Sitecore. Now, let’s proceed by navigating into one of the environments. Below is a screenshot showing what the interface looks like when you select an environment from the previous screen.
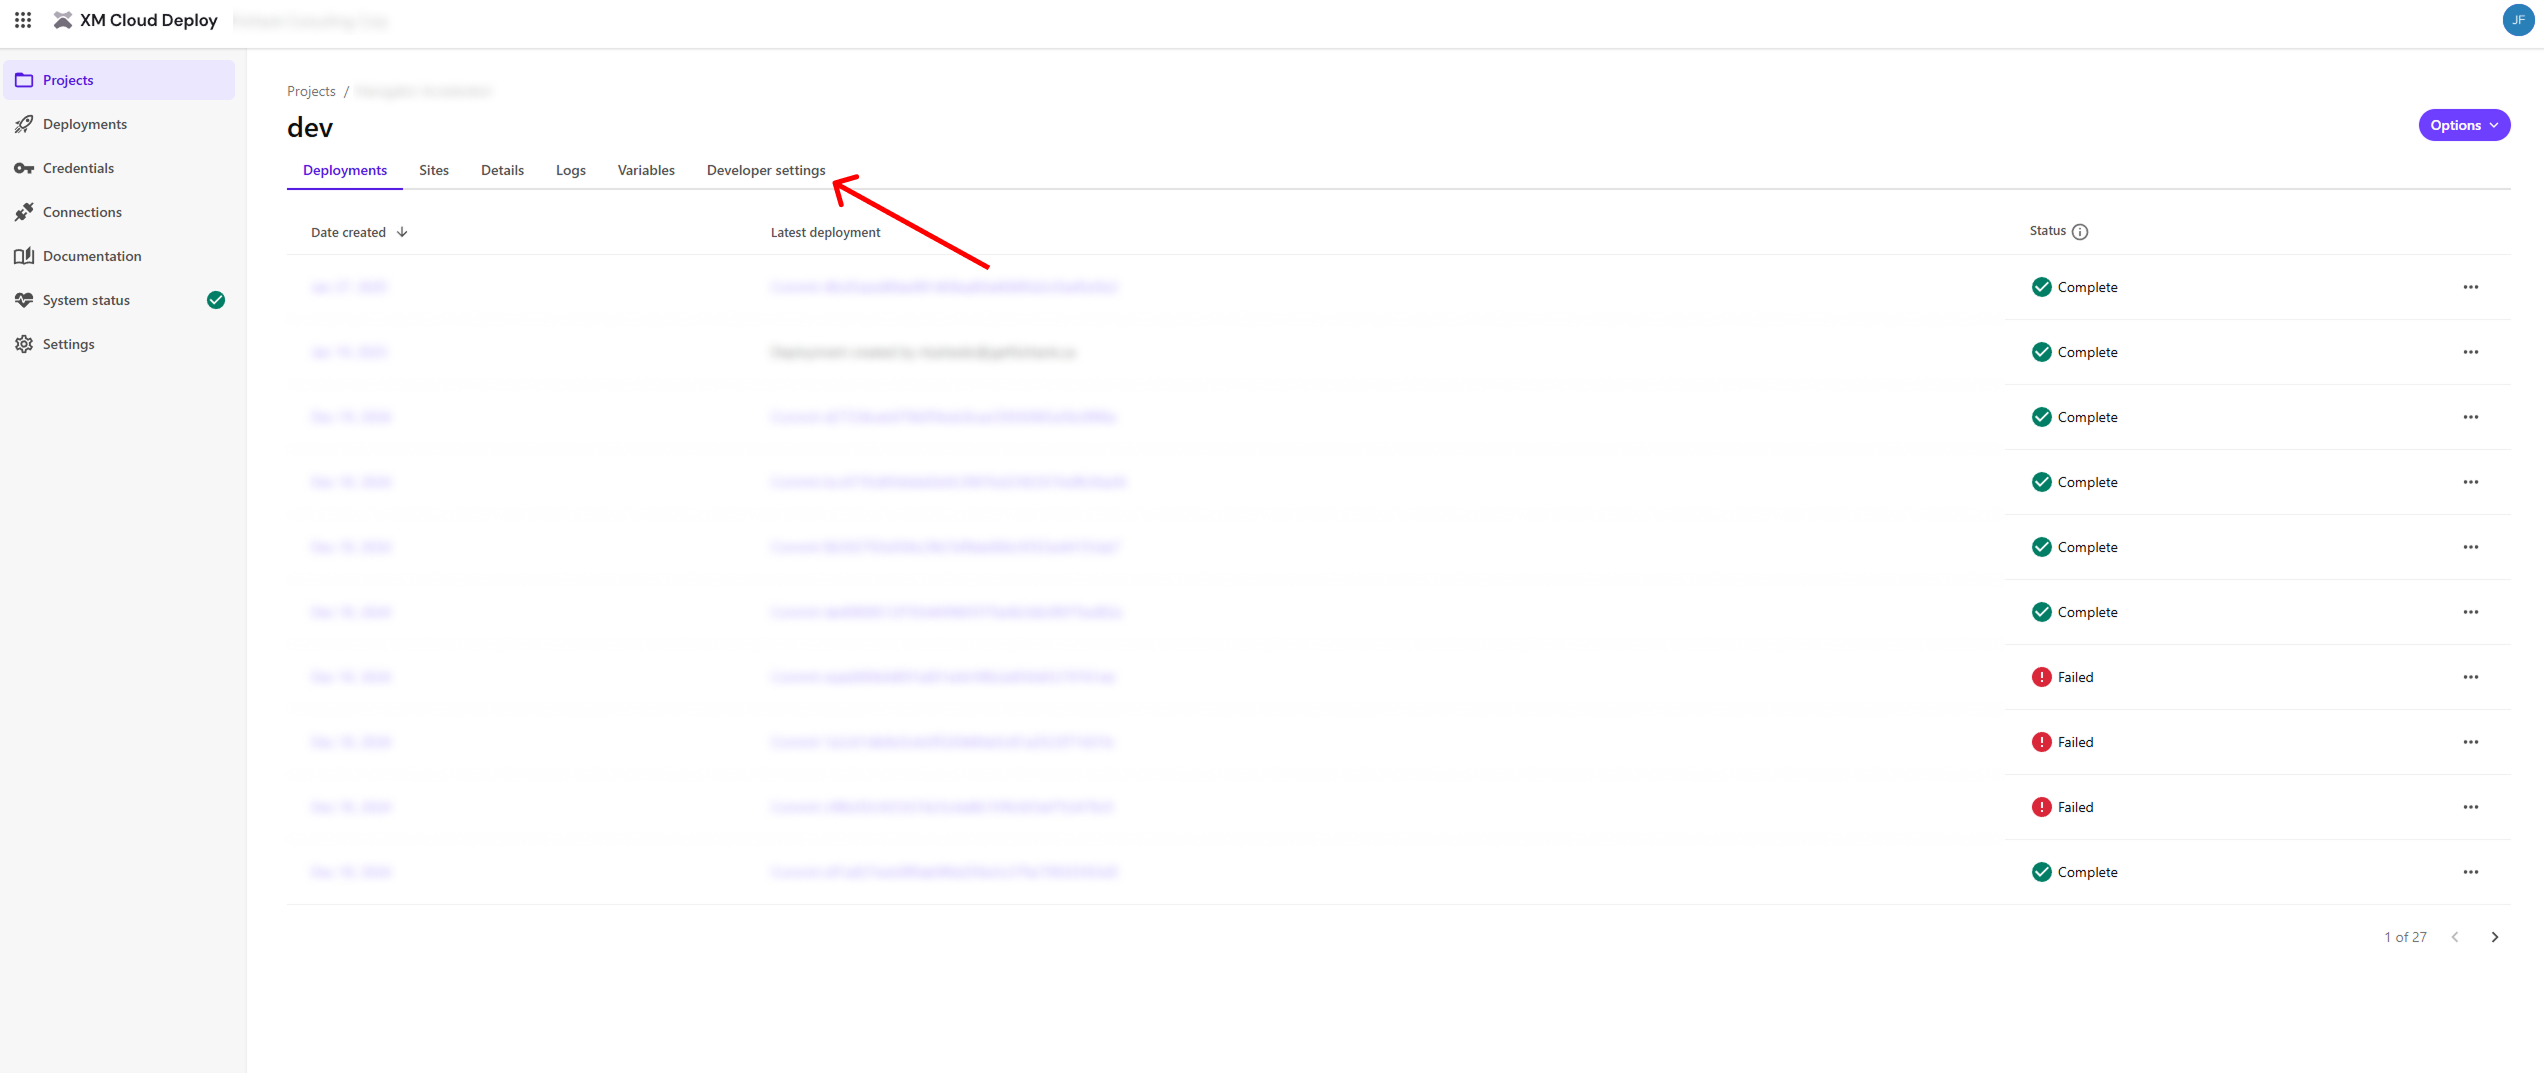
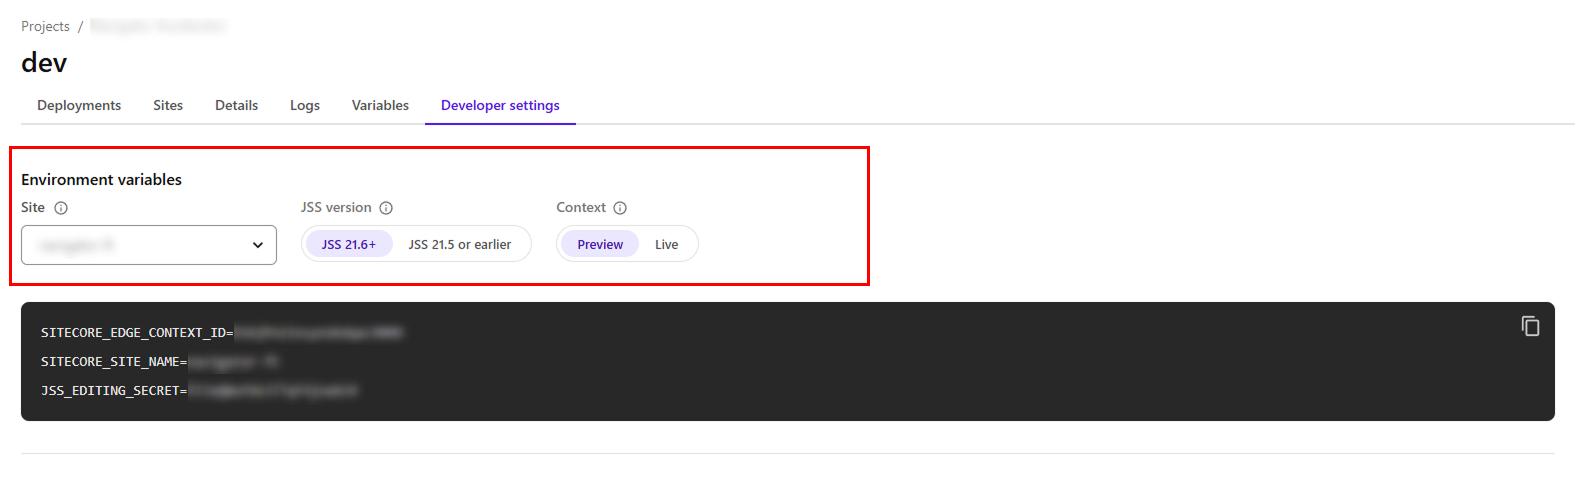
Next, we should access the Developer settings tab. The screenshot above should help you locate it. This will contain all the needed information to get that frontend code running. Below is what you will see once you’re on the tab.
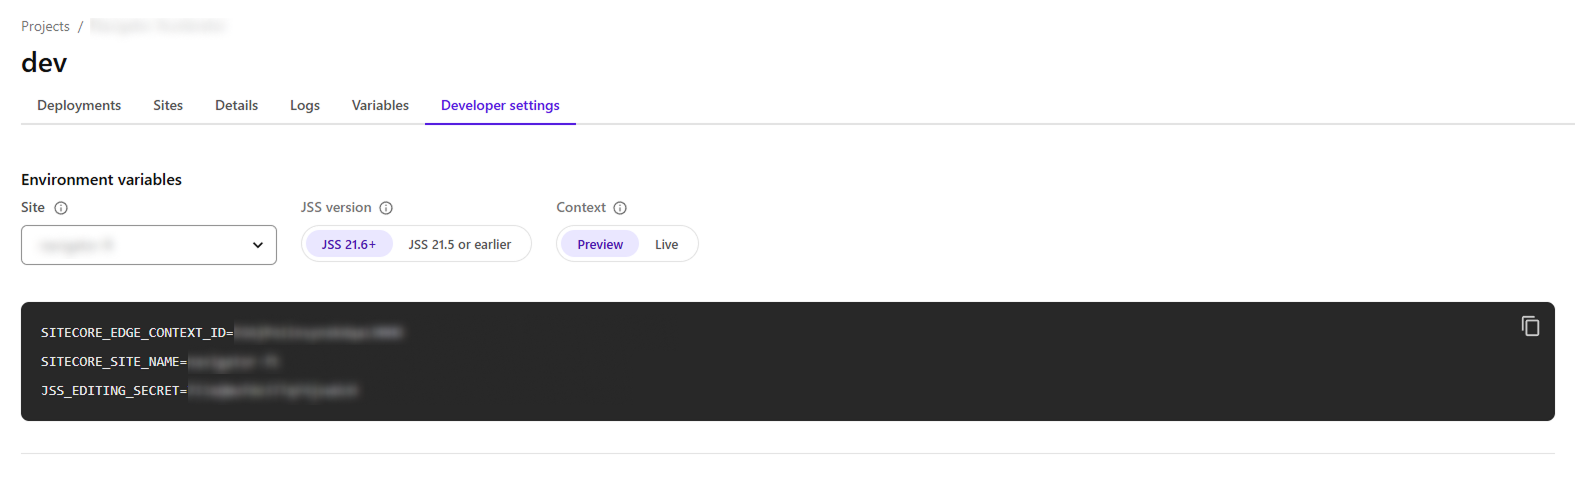
The section just below the tabs allows you to filter and select the environment, content type, and JSS version you want to pull into your local setup. The screenshot below provides a clearer view of how this works.
Another key consideration is whether you want to work with Live or Preview data on your local setup. The Content toggle controls this setting, making it especially useful when testing and developing components before publishing them.
Now, let's proceed with retrieving the necessary environment variables to run your local setup without any backend services or Docker containers. The values provided here are the bare minimum required to get a basic setup running locally. The provided environment variables—SITECORE_EDGE_CONTEXT_ID, SITECORE_SITE_NAME, and JSS_EDITING_SECRET—are essential for your local setup. With these in place, we can return to our frontend code and proceed with getting our local environment up and running.
Navigating the Frontend Folder and Key Updates
Inside the headapps folder, you’ll find another folder named nextjs-starter. Once you open it, you'll recognize much of the structure, as it contains the frontend code similar to what you’re used to. While this setup might seem familiar, it’s important to note that the updates don’t stop here. Sitecore has made additional changes to guide developers toward using new features and best practices. I’ll walk you through some of these updates and explain why they’re worth adopting for your project.
Setting Up Your Local Environment with Sitecore Deploy Platform
In a previous section, we discussed retrieving those essential environment variables. Now, we'll put them to use. Start by creating a new file inside your frontend folder and name it .env.local. This file will override the existing .env and ensure that sensitive data isn't pushed to your repository. Once you've set this up, open your terminal and run the following command:
npm run start:connected
You should now be able to access the site at http://localhost:3000/. If this is a fresh project setup, don't be surprised if you see a blank page. However, if you’ve already authored some pages, they should appear in your local environment.
If you're working with existing code and encountering errors, let's diagnose what's happening. If the errors are related to data fetching via GraphQL, we can help troubleshoot those. The following steps are especially important if your project requires GraphQL queries.
Configuring Additional Environment Variables for Complex Components
To get more complex components working—such as a component that requires a GraphQL query to fetch additional data from Sitecore—you'll need to add more environment variables to your .env.local. The following variables should be included:
- GRAPH_QL_ENDPOINT
- SITECORE_API_KEY
You can retrieve these values from the Sitecore XM Cloud Deploy Platform. Let’s continue by navigating to one of the environments. Once you're inside, go to the Details tab. Below is a screenshot showing what the Details tab should look like, with the relevant sections highlighted for easy reference.
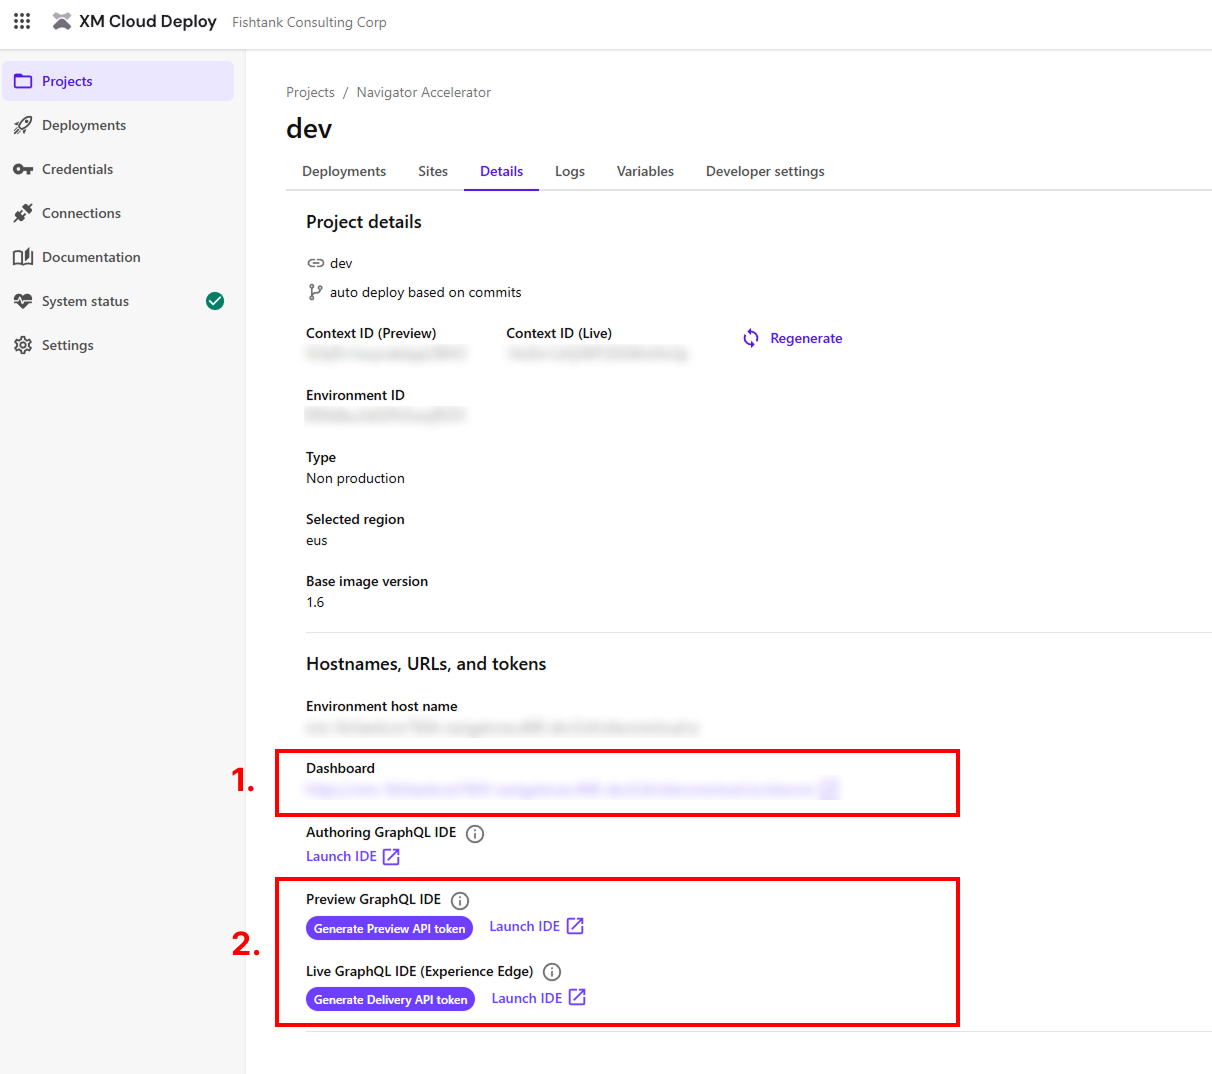
Under the first section, you should be able to find a URL that follows the format below:
https://<unique-domain-here>.sitecorecloud.io/sitecore
This URL is incomplete, so you'll need to append api/graph/edge/ to the end of it. The resulting value will be used for the GRAPH_QL_ENDPOINT.
Next, let's look at the second section, which contains the Preview or Live key values. Depending on your initial setup, click on the Generate Delivery API token button to obtain the necessary data. This will provide the SITECORE_API_KEY variable.
With both of these values in hand, try running your local environment again by executing npm run start:connected.
Seamlessly Switching Environment Variables Across Projects
If you're wondering whether this means any frontend code can access your environment, the answer is yes. By using uniform components across different projects, you can seamlessly switch environment variables to test multiple projects within a single codebase. While you may encounter some broken components if they are unique to a specific project, the setup should generally work for components shared across multiple environments or projects.
Connecting Your Local to the Page Builder
Now that your local environment is up and running, you're ready to start developing components. But the possibilities don't stop there! If you're familiar with the Page Builder—the intuitive interface for authoring your pages—you can connect it to your local setup to pull data from one of our environments and work with live content.
When you access the Page Builder, you’ll see an interface like the screenshot below:
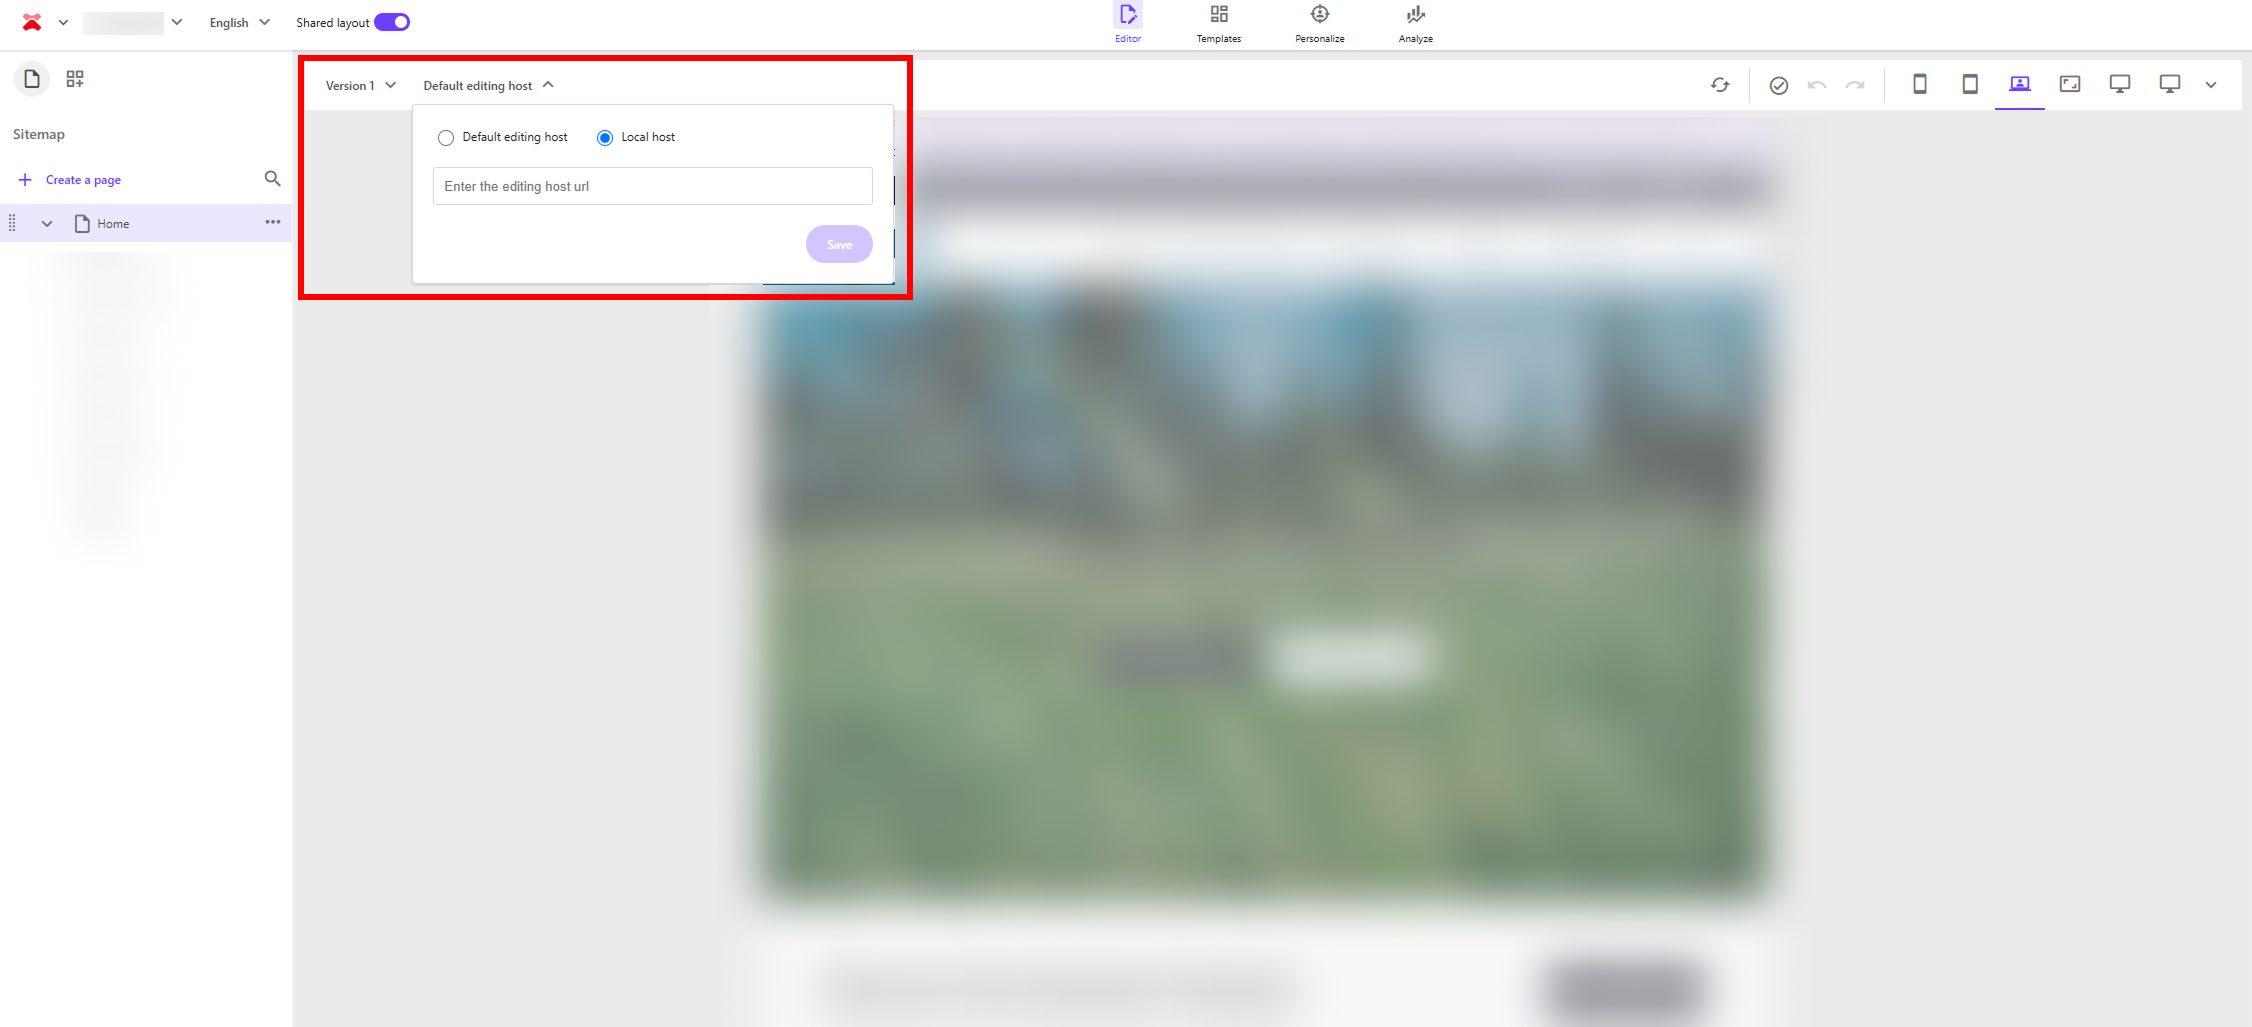
In the screenshot, I’ve already highlighted the section you'll need to configure to connect your local environment. Select the second option, Localhost, and enter your local URL (http://localhost:3000/) in the field. After refreshing the page, everything should work seamlessly—provided your environment variables are set up correctly.
Successfully Setting Up and Connecting Your Local Environment
I’ve provided a detailed walkthrough on setting up your local environment and connecting it to the environment’s Page Builder. While the project structure might vary slightly, once you familiarize yourself with the new setup and configure everything properly, you'll be ready to continue developing your components. If you’d like to explore the repository with the latest updates and builds, you can check the repository here.