In the internet world, a URL redirect allows for one location to be mapped to another, essentially telling the user's browser that the location of the page has now changed, and where they can now find it. This is achieved by providing a virtual ‘link’ between the content’s original location and the new location.
What Are Bulk Redirects?
Bulk redirects, as the term suggests, are basically having the ability to handle numerous redirects in a short amount of time. This was a feature Cloudflare has been working on after customer feedback which asked for a number of redirects to be uploaded through an easy-to-use interface.
Basically asking for a simpler way to upload a large number of redirects. URL redirects were typically implemented as page rules within Cloudflare before, and other solutions such as Cloudflare workers were used to achieve the same objective.
With bulk redirects, this new process is much more simplified now and can be managed more easily, all without having the need to write a single line of code.
Create Bulk Redirects In The Dashboard
Although bulk redirects can also be created via API, for the purposes of this blog I will illustrate how to create bulk redirects by importing a CSV file with URL redirects.
In order to create bulk redirects in the Cloudflare dashboard, 3 things need to happen. Users must:
- Create a Bulk Redirect List
- Add URL Redirects to the list created in step 1.
- Create a Bulk Redirect Rule to enable the URL Redirects in the list
Steps to create a bulk redirect:
- Log in to the Cloudflare dashboard.
- (Optional) In the new dashboard navigation, expand Manage Account.
- Go to Configurations > Lists.
- Click Create new list.
- Enter a list name and description, and select Redirect as the content type.
- Click Create.

The second step is to add URL redirects to the list that was created above in step 1.
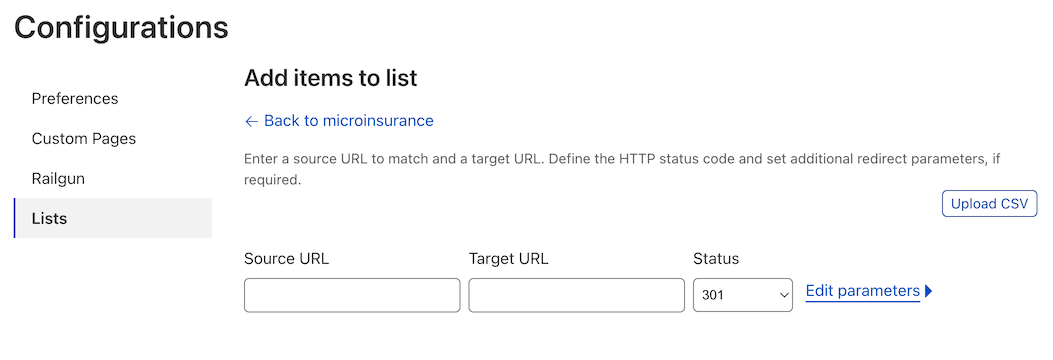
In the dashboard, you can enter URL Redirects one at a time, or have the option to import a CSV file containing several URL Redirects.
How to import a CSV file with URL Redirects:
- Click Upload CSV and select the CSV file you wish to upload.
- The dashboard will display the URL Redirects that were successfully imported from the file. You can manually adjust the displayed records or add/remove URL Redirects before proceeding.
- Click Add to list.

Make sure you follow the right format for lines in the CSV file. For example, the file cannot include a header row with column names.
Almost there. Finally, you need to create a bulk redirect rule to enable the redirects in the list:
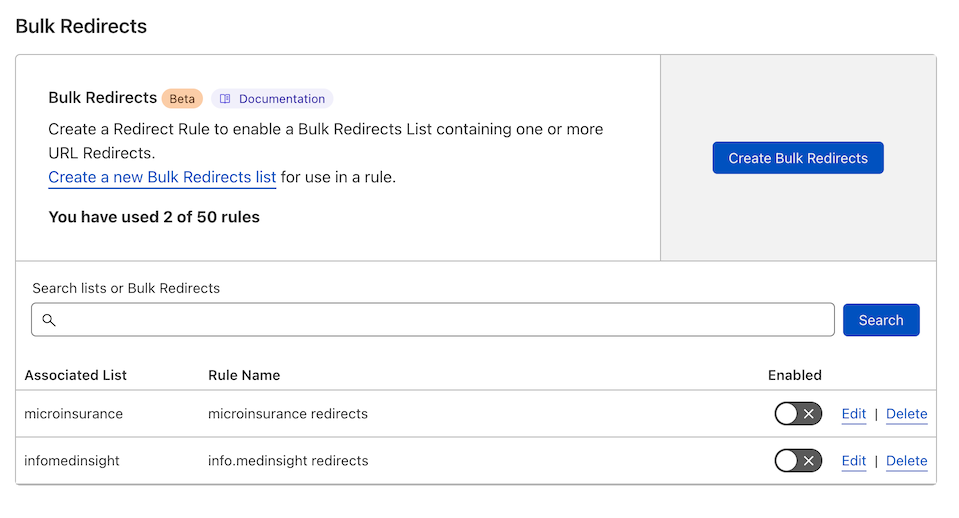
- Go to Account Home > Bulk Redirects.
- Click Create Bulk Redirects.
- Enter a rule description.
- Select the Bulk Redirect List you previously created.
- (Optional) If necessary, edit the rule expression or the list key.
- To save and deploy the Bulk Redirect Rule, click Save and Deploy. If you are not ready to deploy your rule, click Save as Draft.
In conclusion, Bulk Redirects can be extremely useful when handling a significant number of redirects and require minimum effort.
