An email marketing list (AKA mailing list) is a collection of email addresses that have been voluntarily shared by people who want to receive your company's marketing campaigns and messages. Mailing lists are an invaluable asset that allows marketers to:
- Build stronger relationships with your customers (new, existing, and lapsed)
- Track campaign engagement
- Send personalized and highly targeted experiences
In addition, mailing lists enable businesses to collect key customer data, which can be used to analyze and optimize the content of your campaigns for higher conversion rates and greater ROI.
In this blog, I’ll walk you through how to easily create an email list in Sitecore Send*, including the necessary steps to create a list, add members, and manage it.
*Sitecore Send acquired Moosend in 2021. The platforms are essentially the same, though Sitecore Send is geared toward enterprise users, and Moosend is available on a subscription basis.
Create a Mailing List in Sitecore Send
To create a mailing list:
-
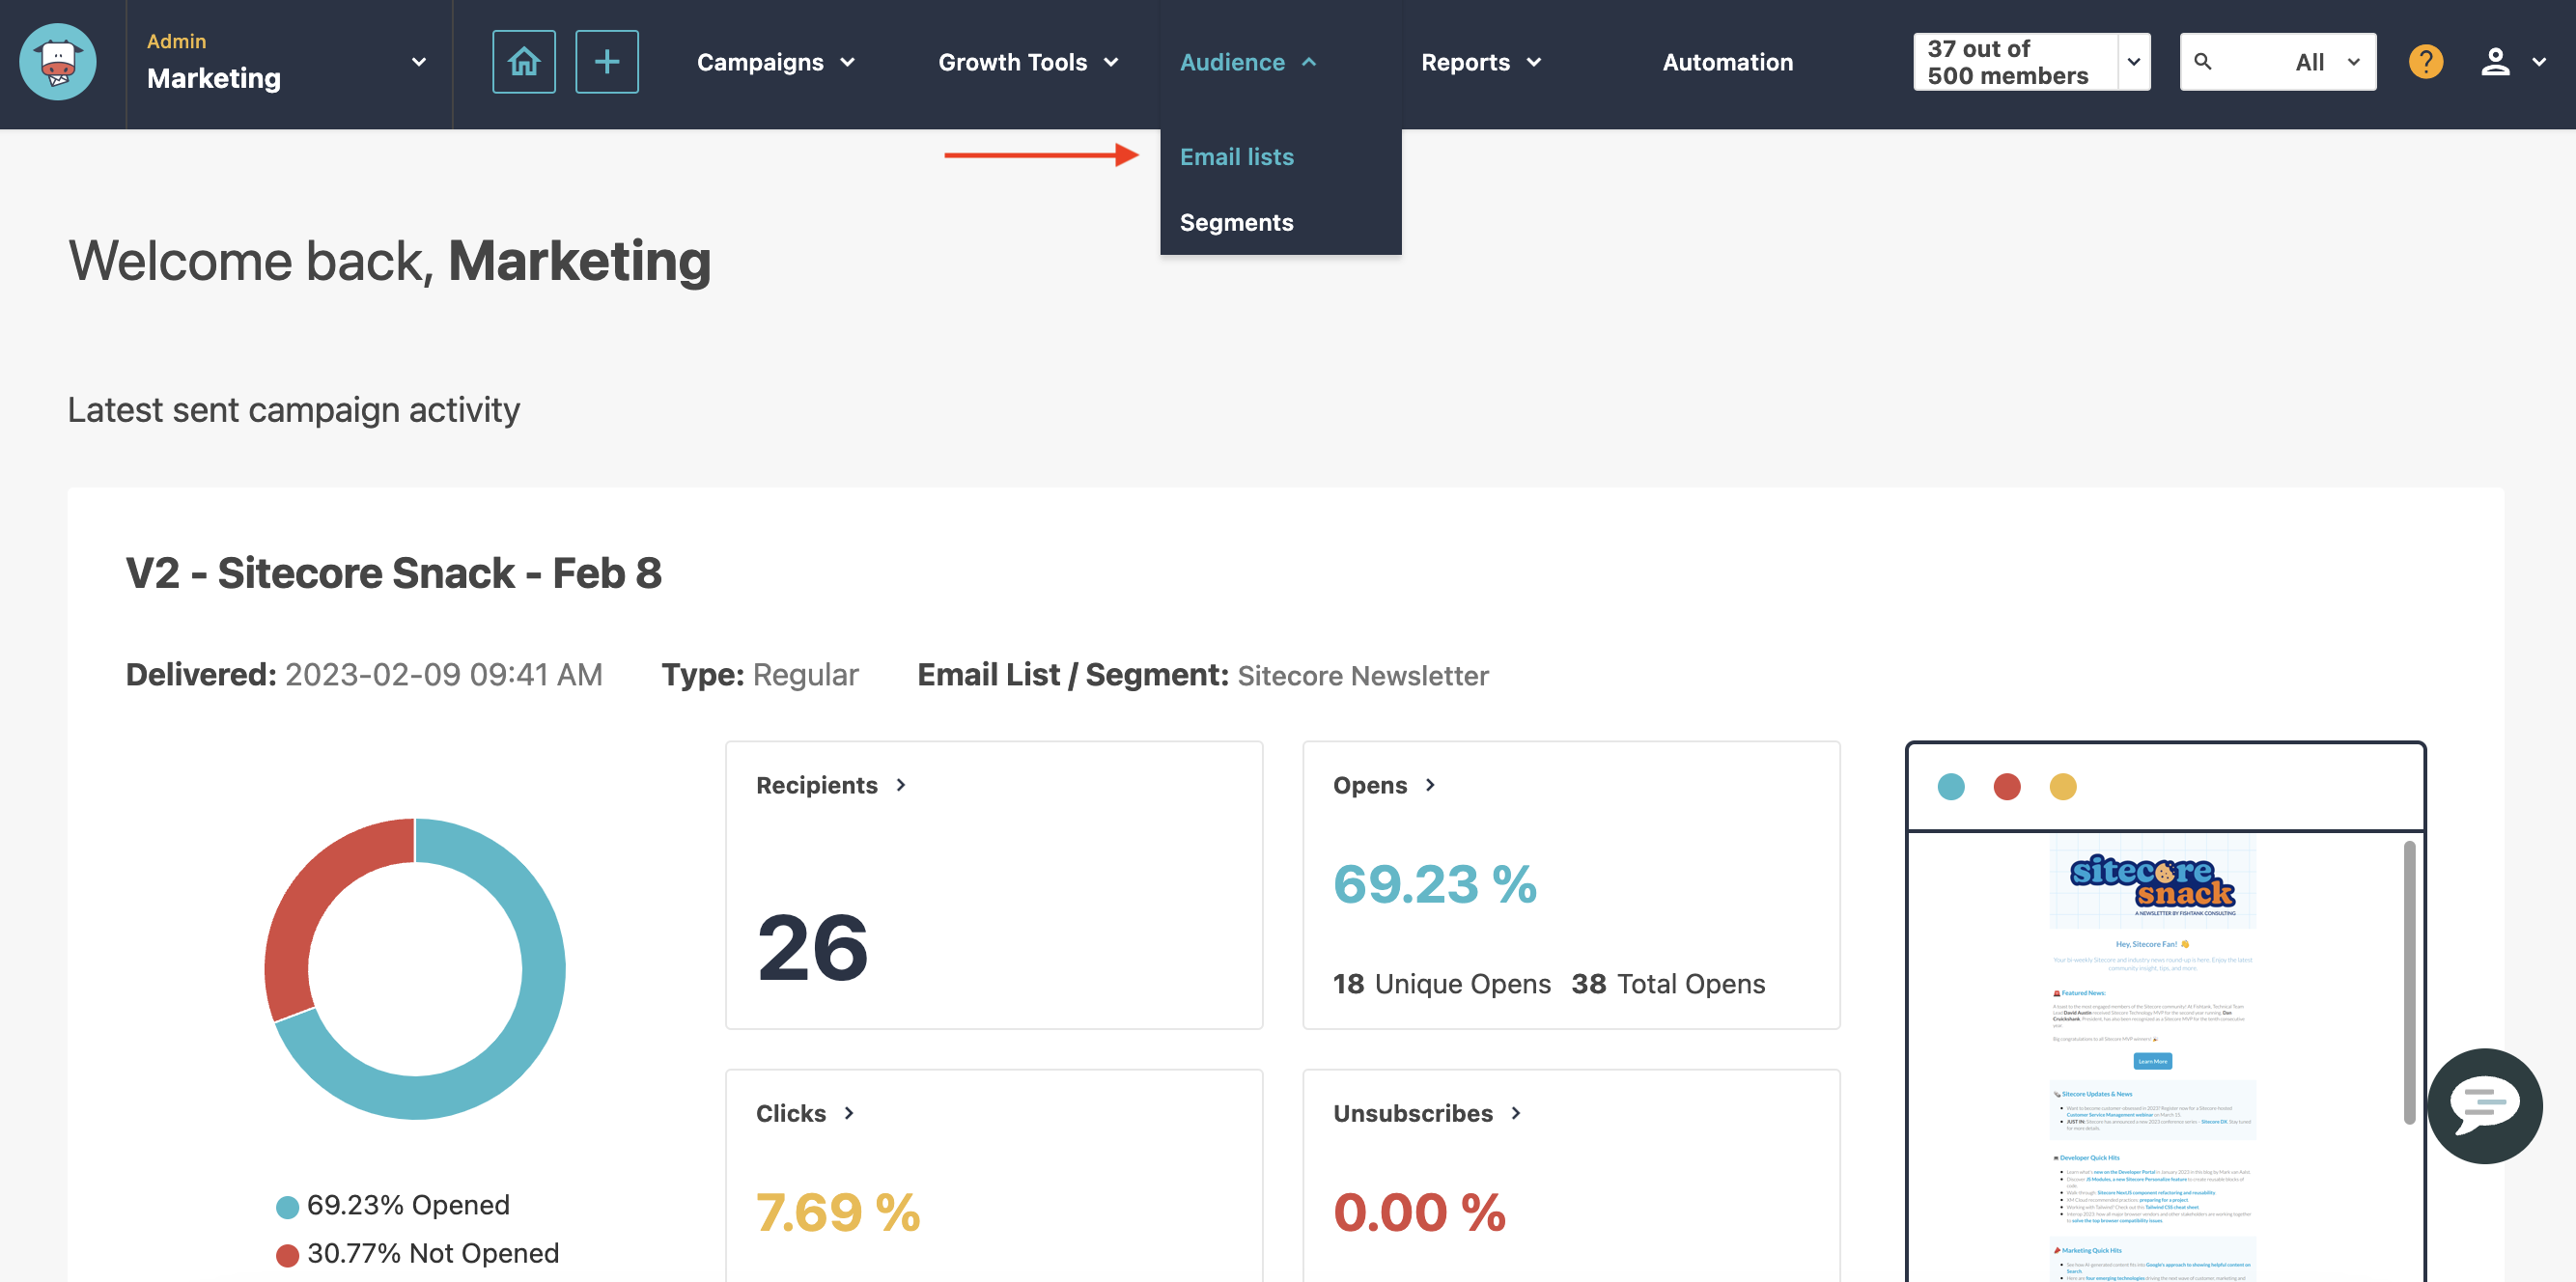
Hover over the Audience tab in the top navigation menu and select Email Lists.

-
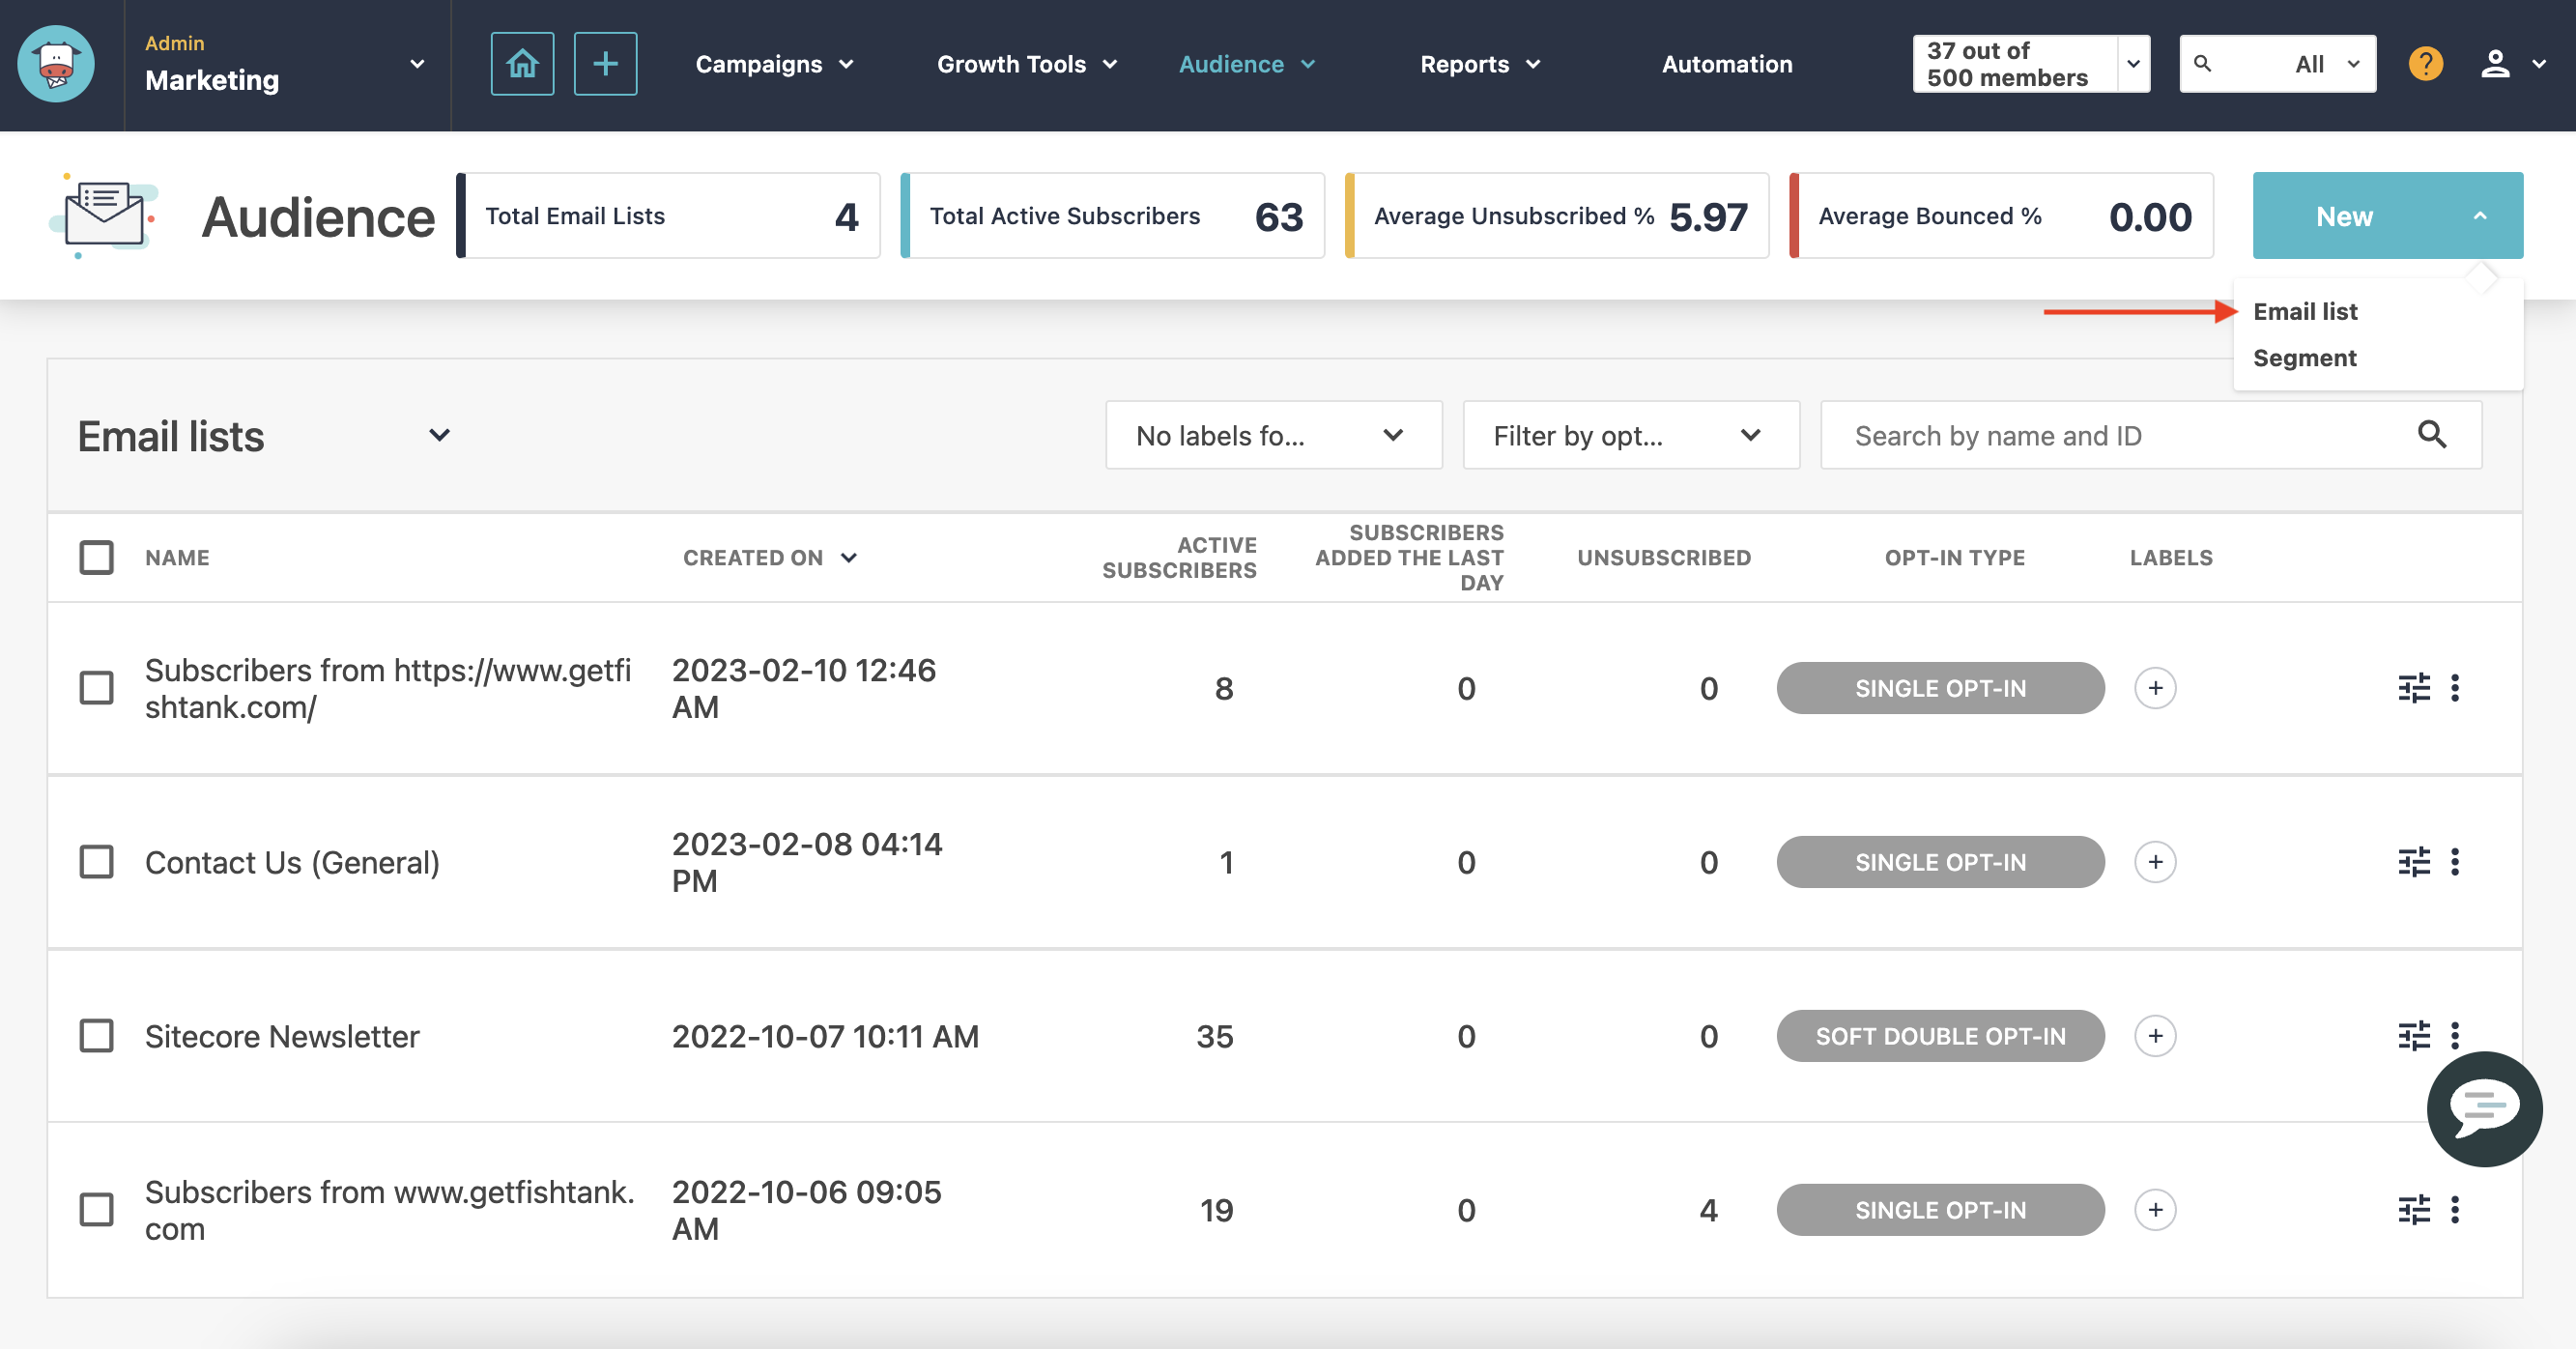
Hover over the New button and select Email list from the drop-down.

-
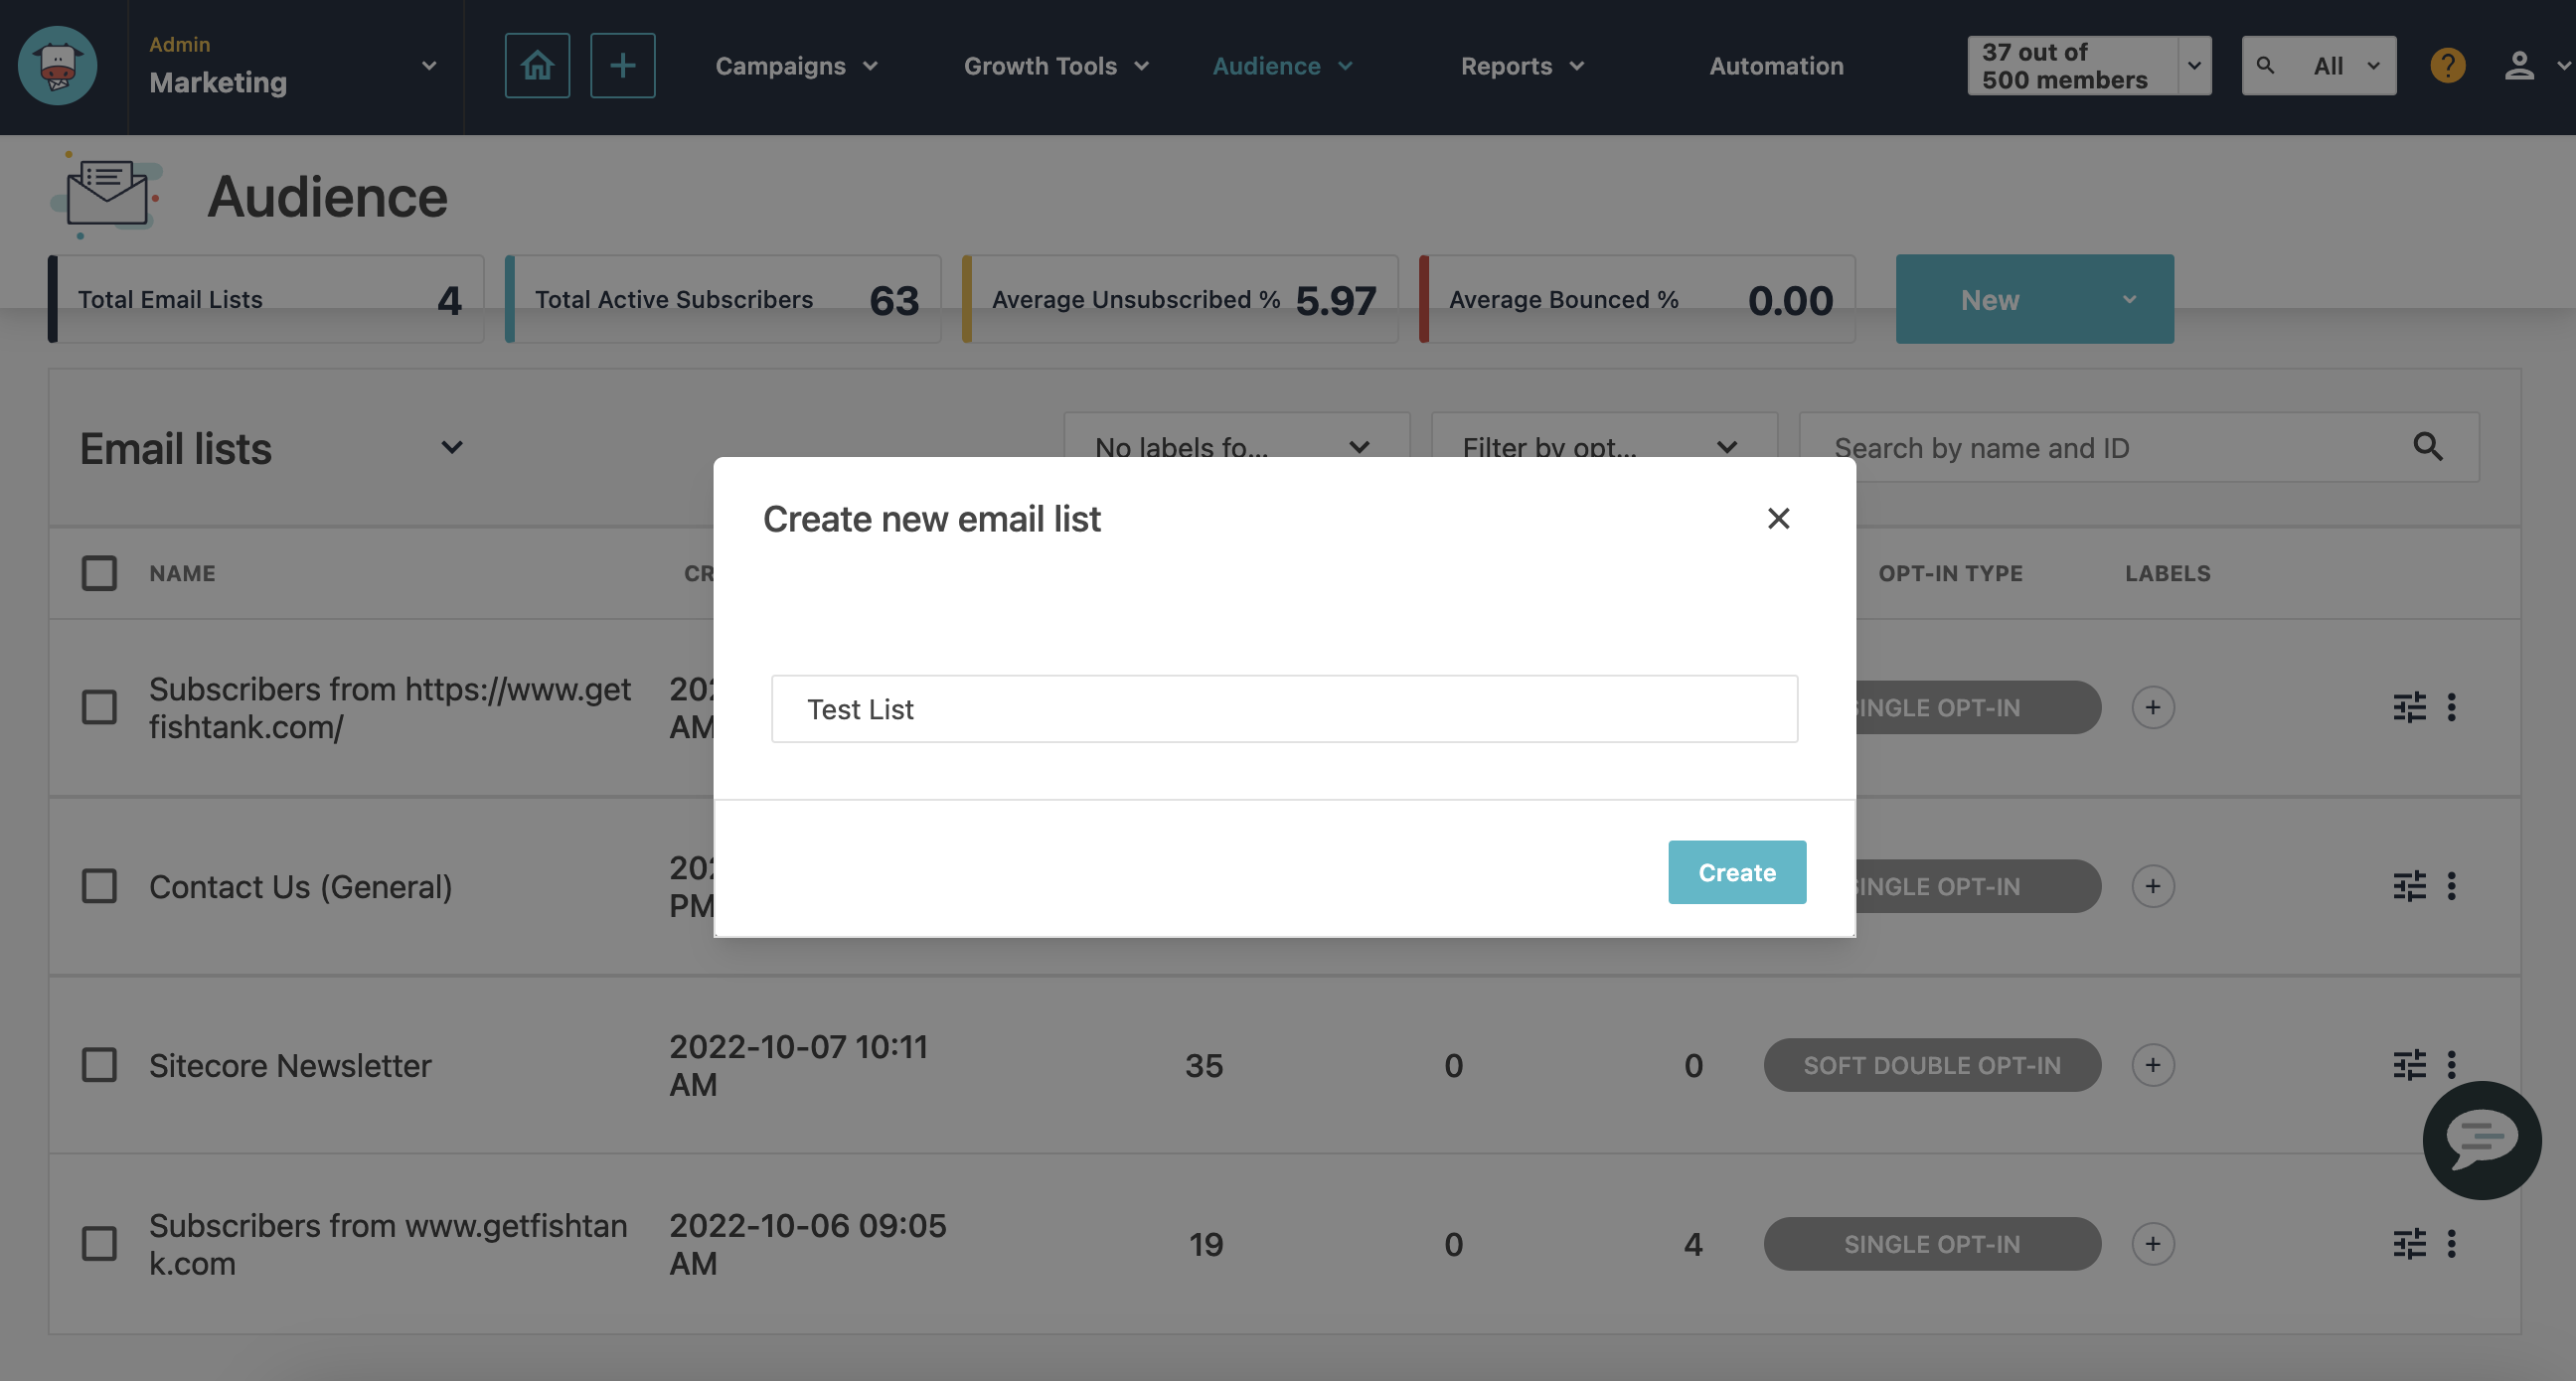
Name your email list and click Create.

-
To add members to your list:
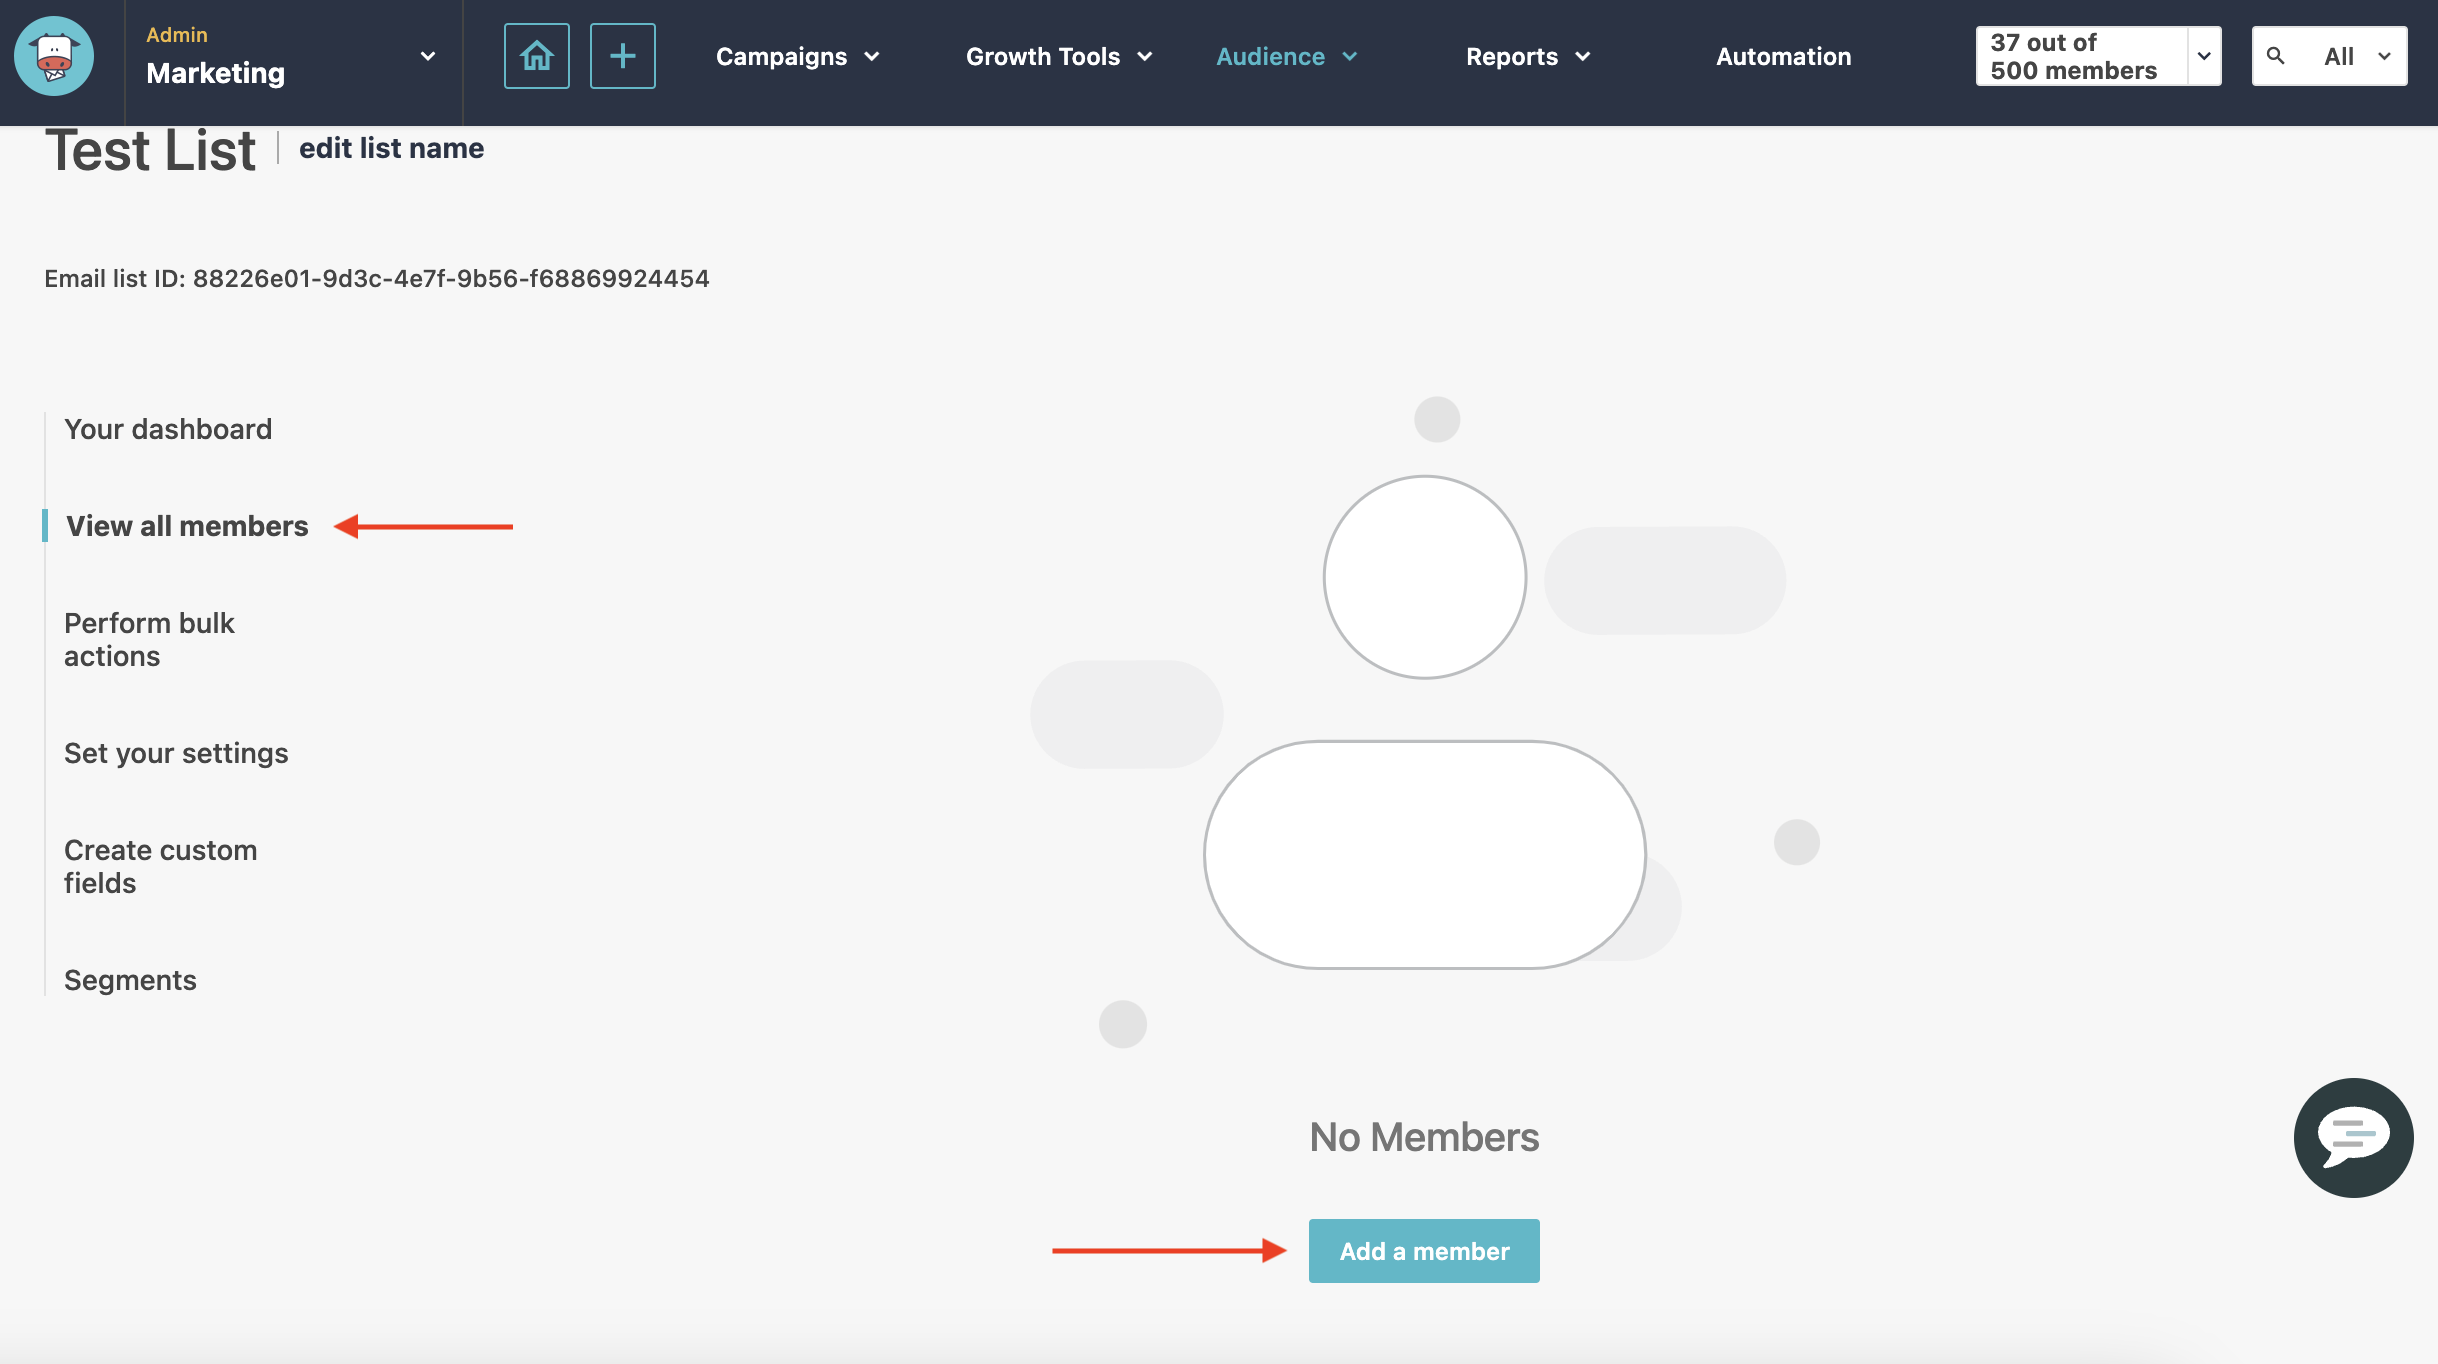
- Manually add members by clicking on View all members in the left navigation pane and then Add a member.

- Start funnelling users into your email list by selecting your new mailing list in the Form Designer of a subscription form. (Want to learn how to create a subscription form? See my blog on creating a basic form in Sitecore Send.)
- Import contacts from files, Google, or Salesforce by using the preset bulk import action. To do this, navigate to Import Members into List from the Perform bulk actions tab on the menu on the left.
Remember, you can only send marketing email messages with active, specific consent from your subscribers.
- Manually add members by clicking on View all members in the left navigation pane and then Add a member.
-
The left sidebar menu includes the following tabs to manage your email list:
- Your dashboard - view statistics of your email list, including growth, source, engagement metrics, and top member locations.
- View all members - see all list members and their details, export your list, delete your list, or add new members.
- Perform bulk actions - import members into your list, archive list members, unsubscribe list members, delete list members, or copy members from another email list.
- Set your settings - adjust your list’s unsubscribe and opt-in settings.
- Sitecore Send offers three opt-in settings: single opt-in, soft double opt-in, and strong double opt-in.
- Create custom fields - add new custom fields or edit existing fields. Custom fields can be used to personalize your email campaigns and segment your email lists based on collected data.
- Segments - create segments to send targeted email marketing campaigns.
Now that your email list is set up, you can start collecting member information and creating segments to send targeted campaigns. Sitecore Send also offers a range of analytics and reporting tools to track the performance of your campaigns. With these tools, you can monitor the success of your campaigns and use the data to refine and optimize them for maximum engagement. Additionally, Sitecore Send offers customer support, so if you ever run into any issues, you can get help quickly.
That’s it! Happy list-making.


