A Visual Overview of Sitecore XM Cloud
Not everyone has access to XM Cloud, but many may be curious about what it looks like and how it works. To help, we’ll start with a step-by-step walkthrough with screenshots to provide a better understanding of the setup process.
After that, we'll take a glance at the completely revamped interface for managing content in XM Cloud, called Sitecore Pages.
Jump to:
Walkthrough: New Project & Site Creation
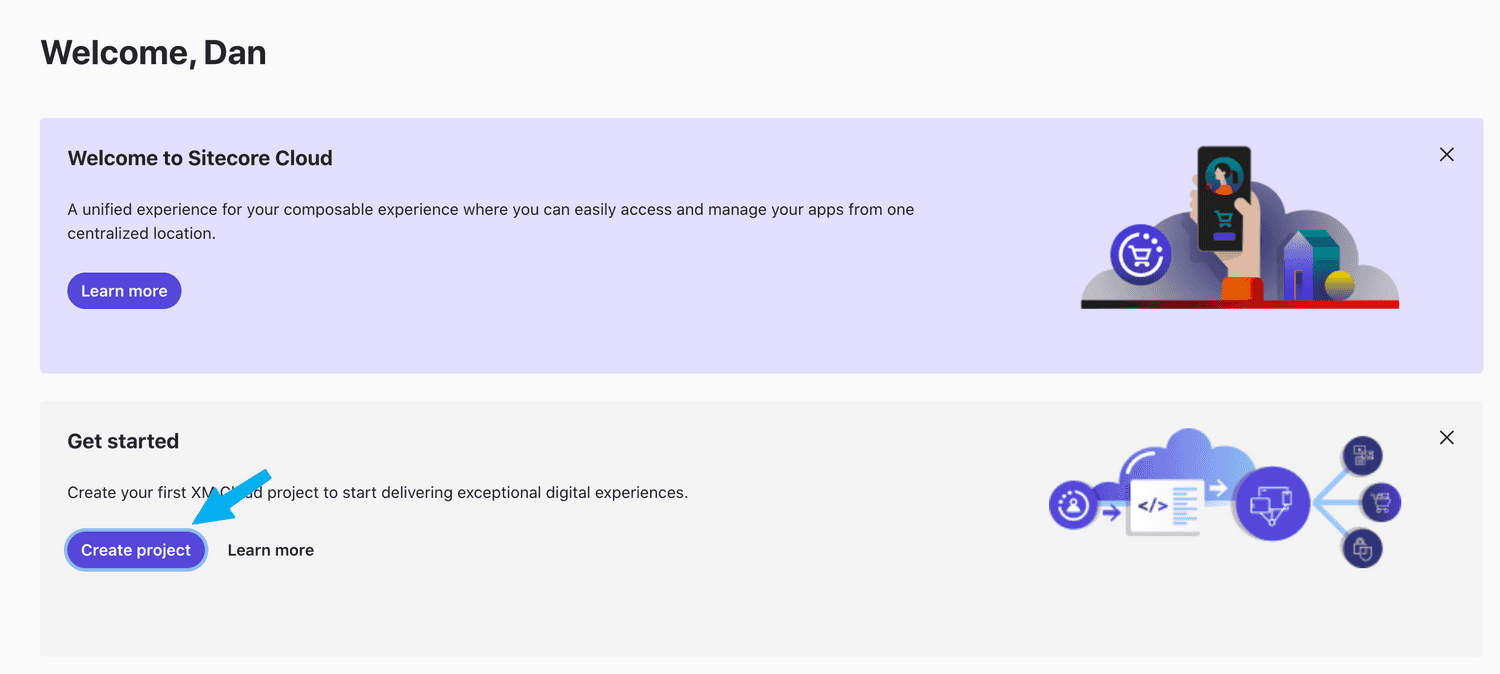
Load portal.sitecorecloud.io and click the
Create project button.
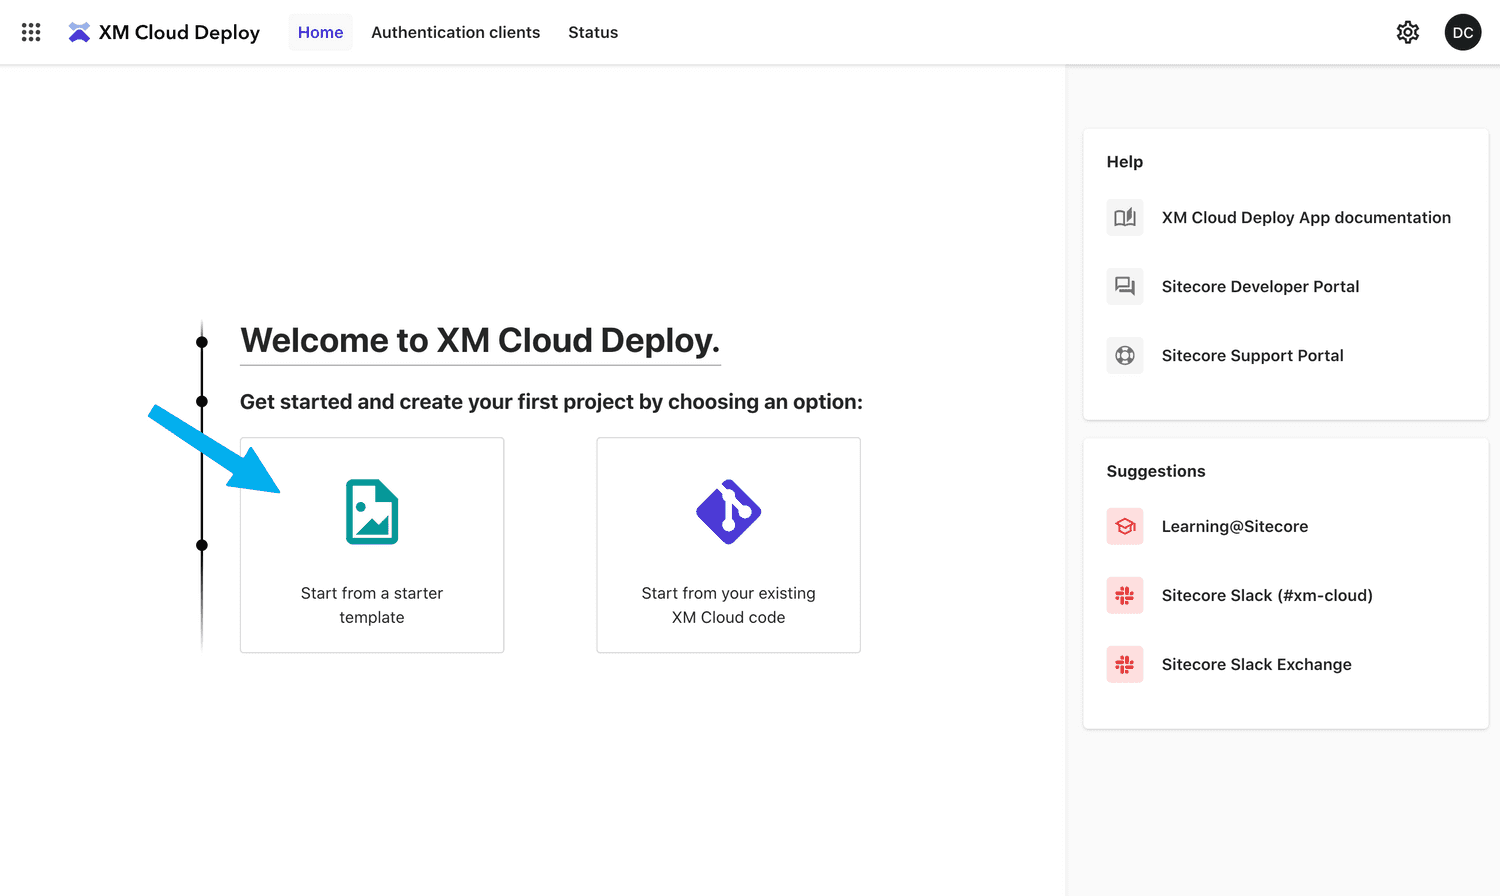
In this case we’re selecting Start from a start template.
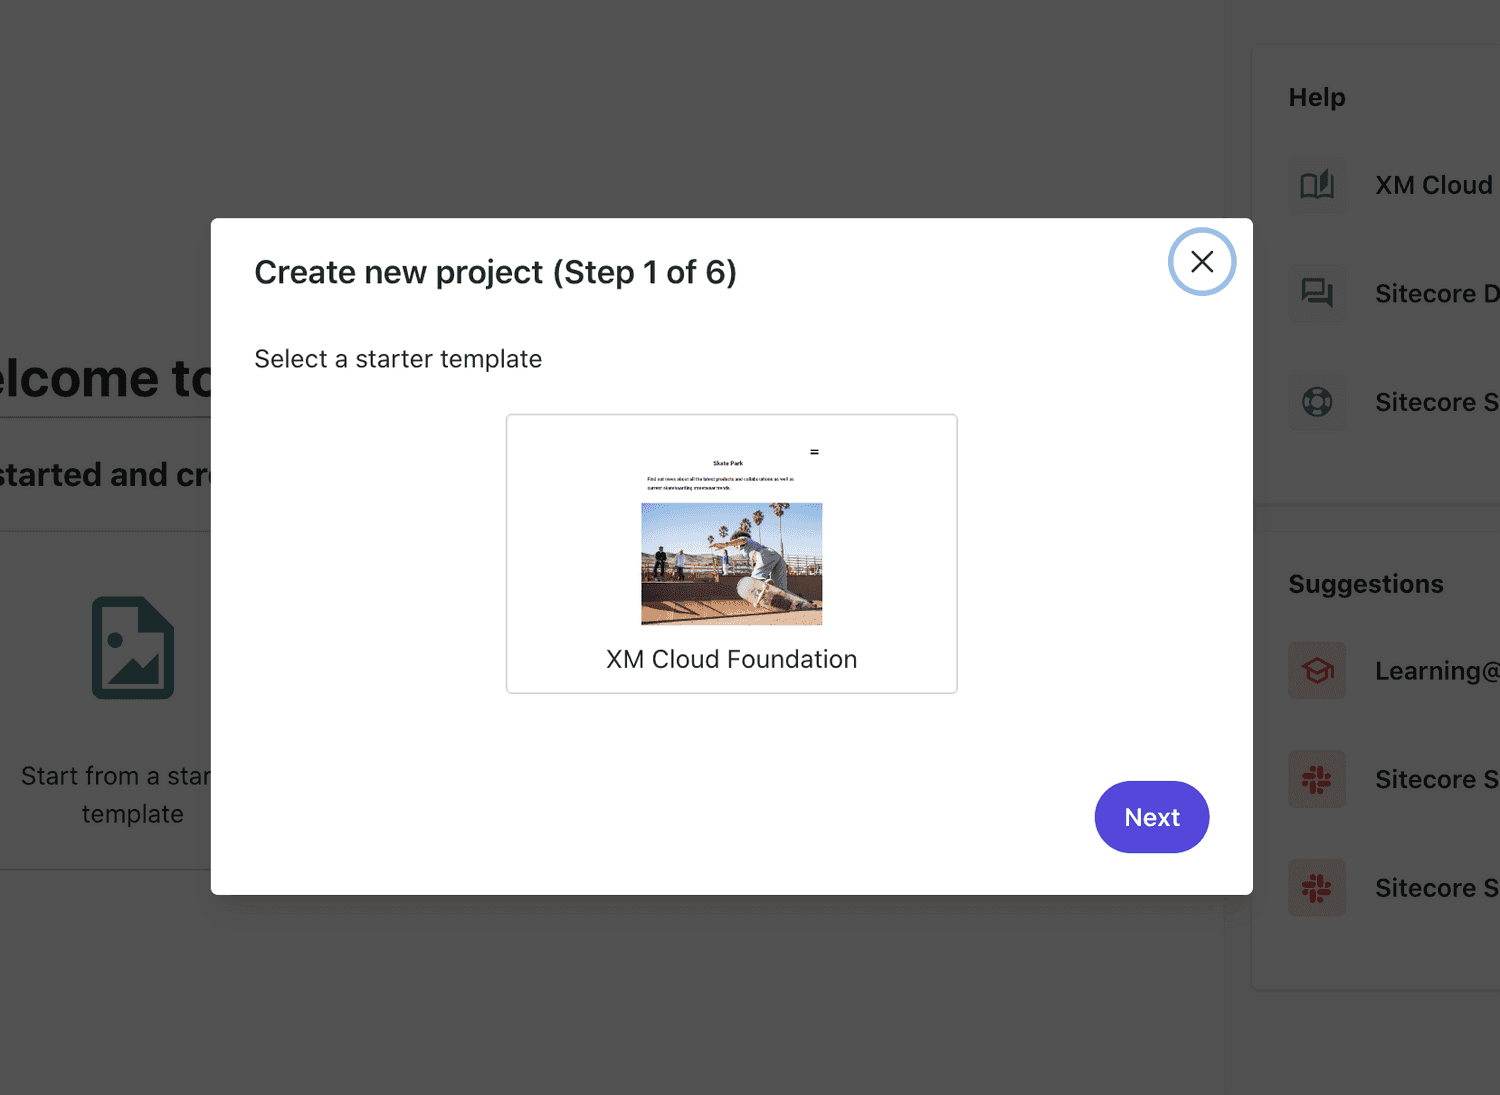
We have a single starter template available, so we select it and click Next.
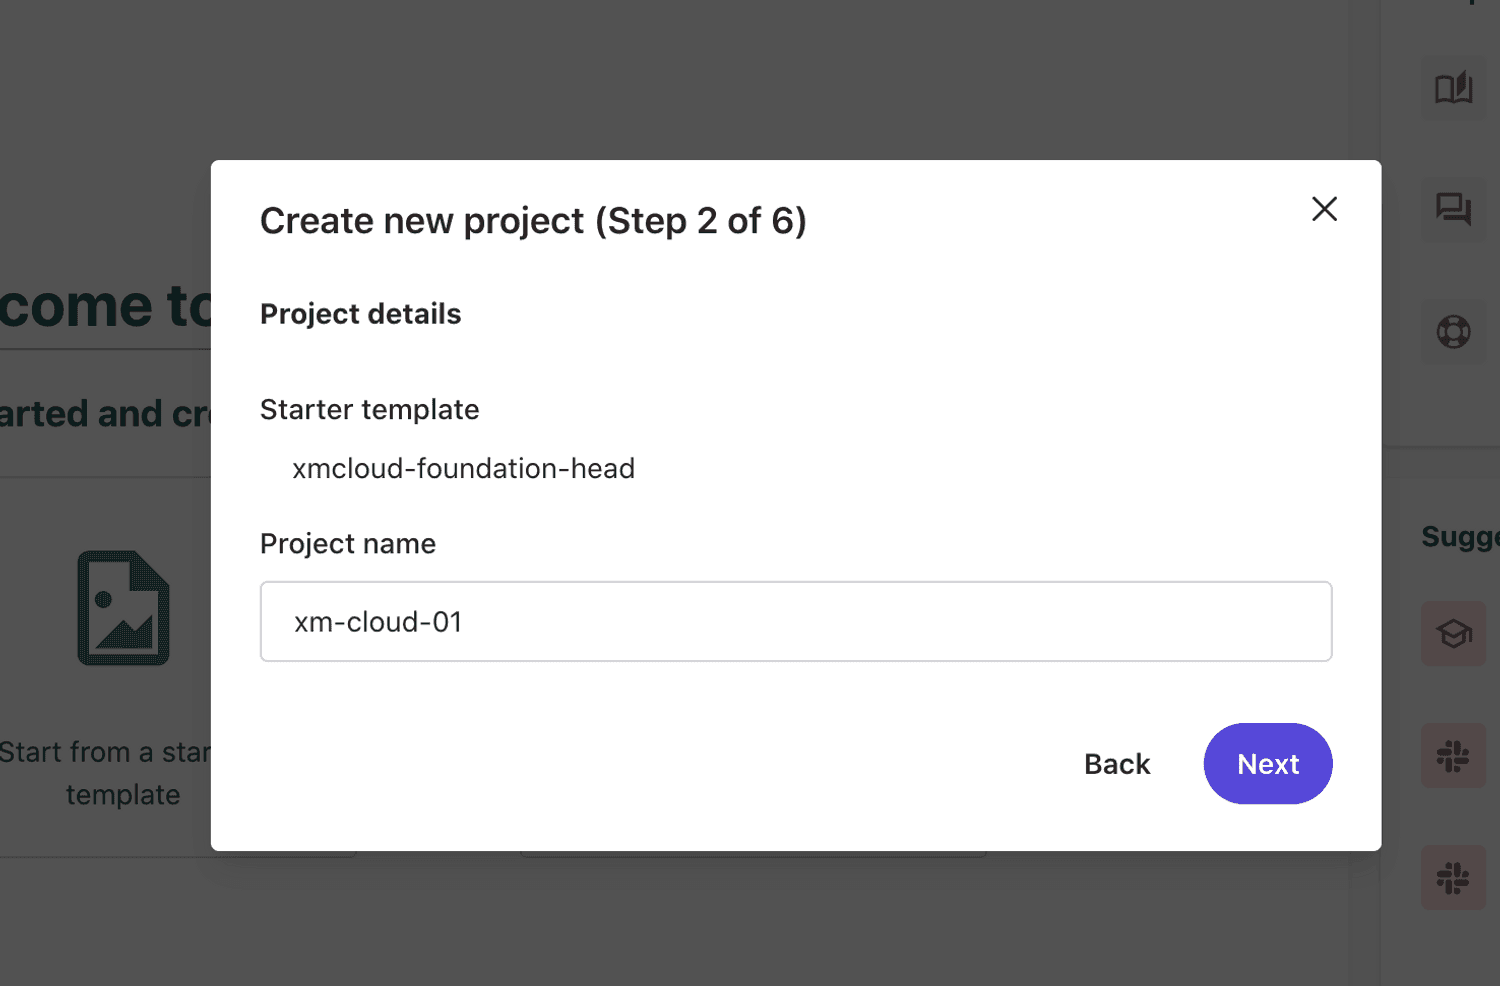
Note that the starter template is the https://github.com/sitecorelabs/xmcloud-foundation-head project found on Github.
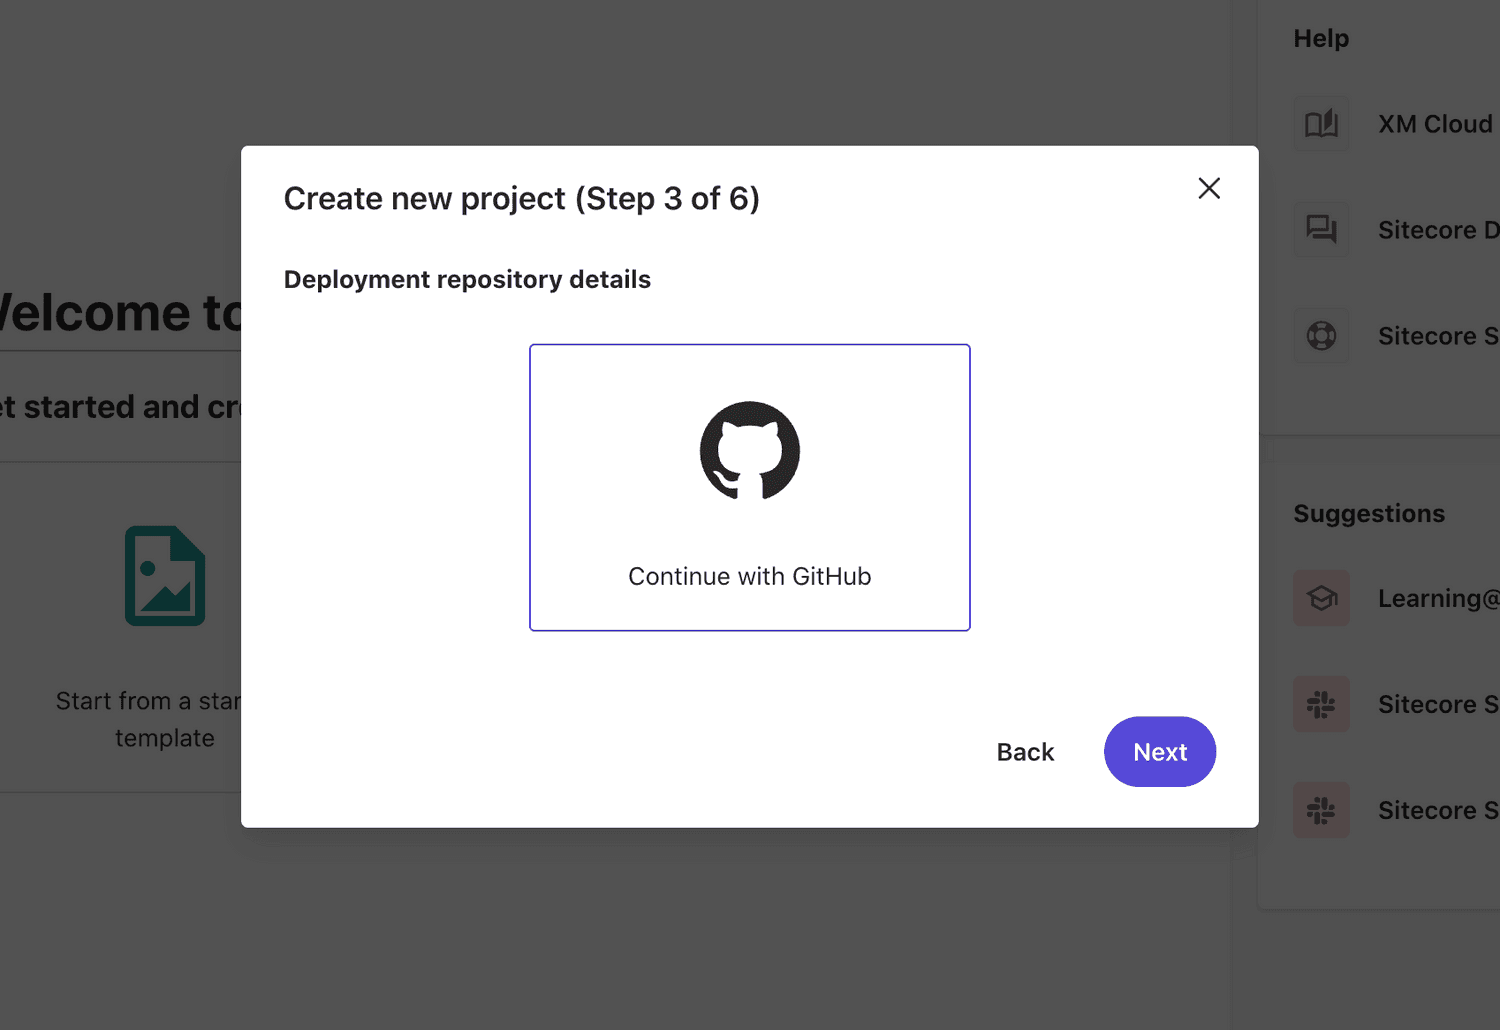
The XM Cloud starter template will be cloned into your own GitHub repository. XM Cloud pull from this new repository to do deployments.
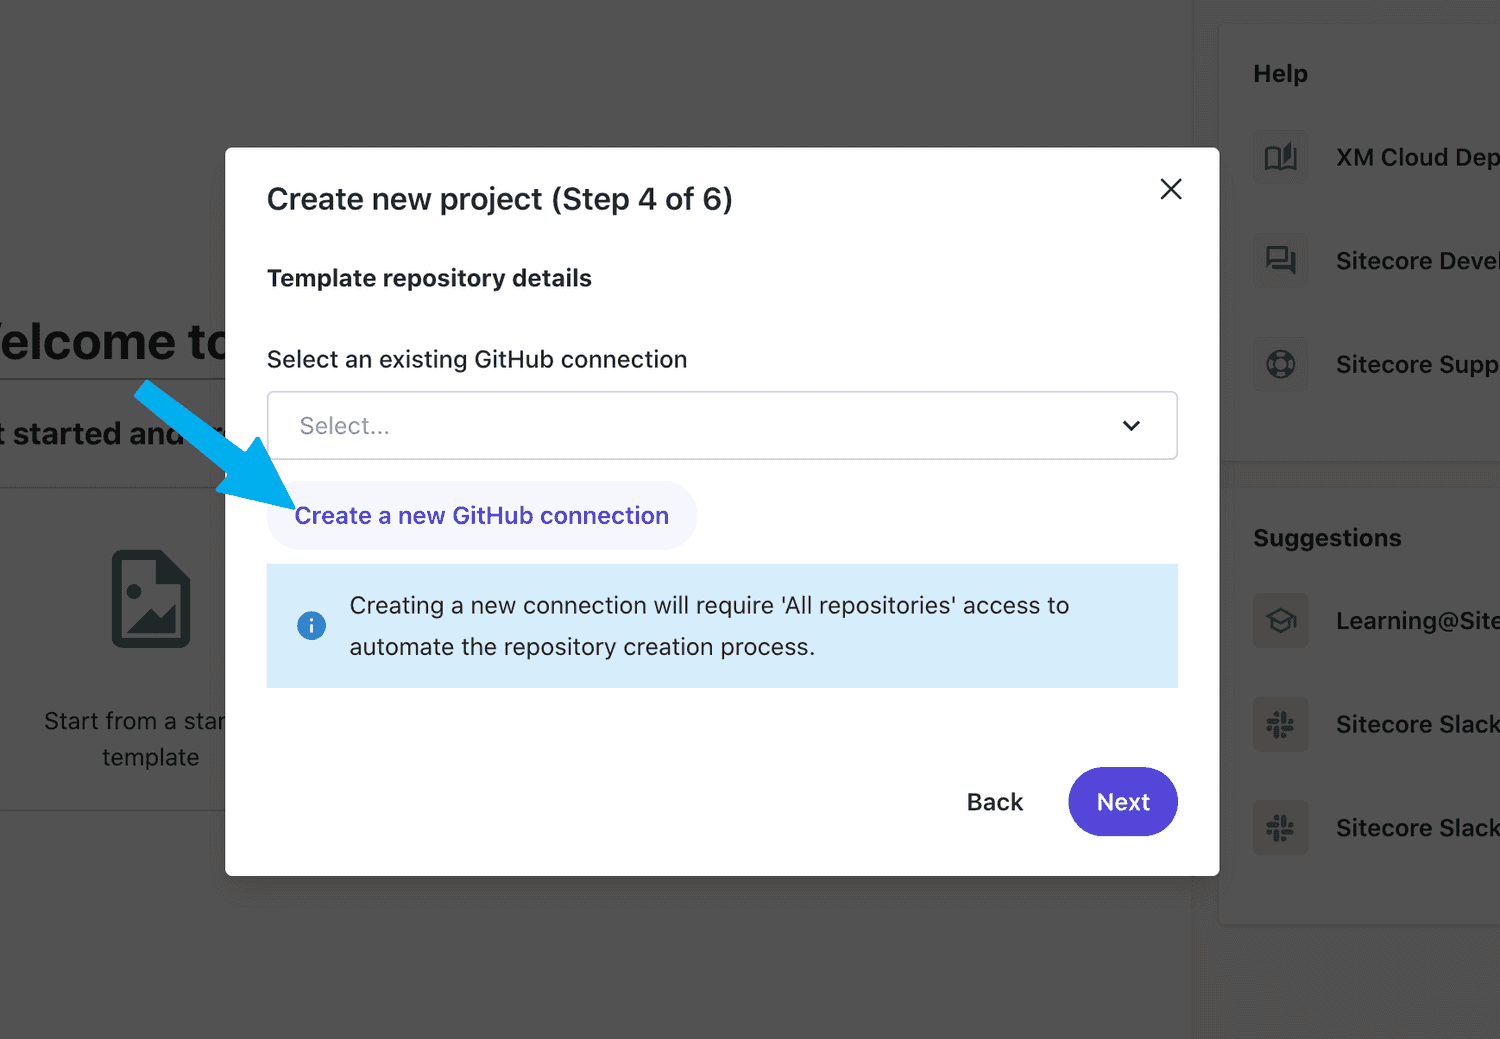
We need to grant XM Cloud permission to interact with our GitHub repo. To do this we
Create a a new GitHub connection.
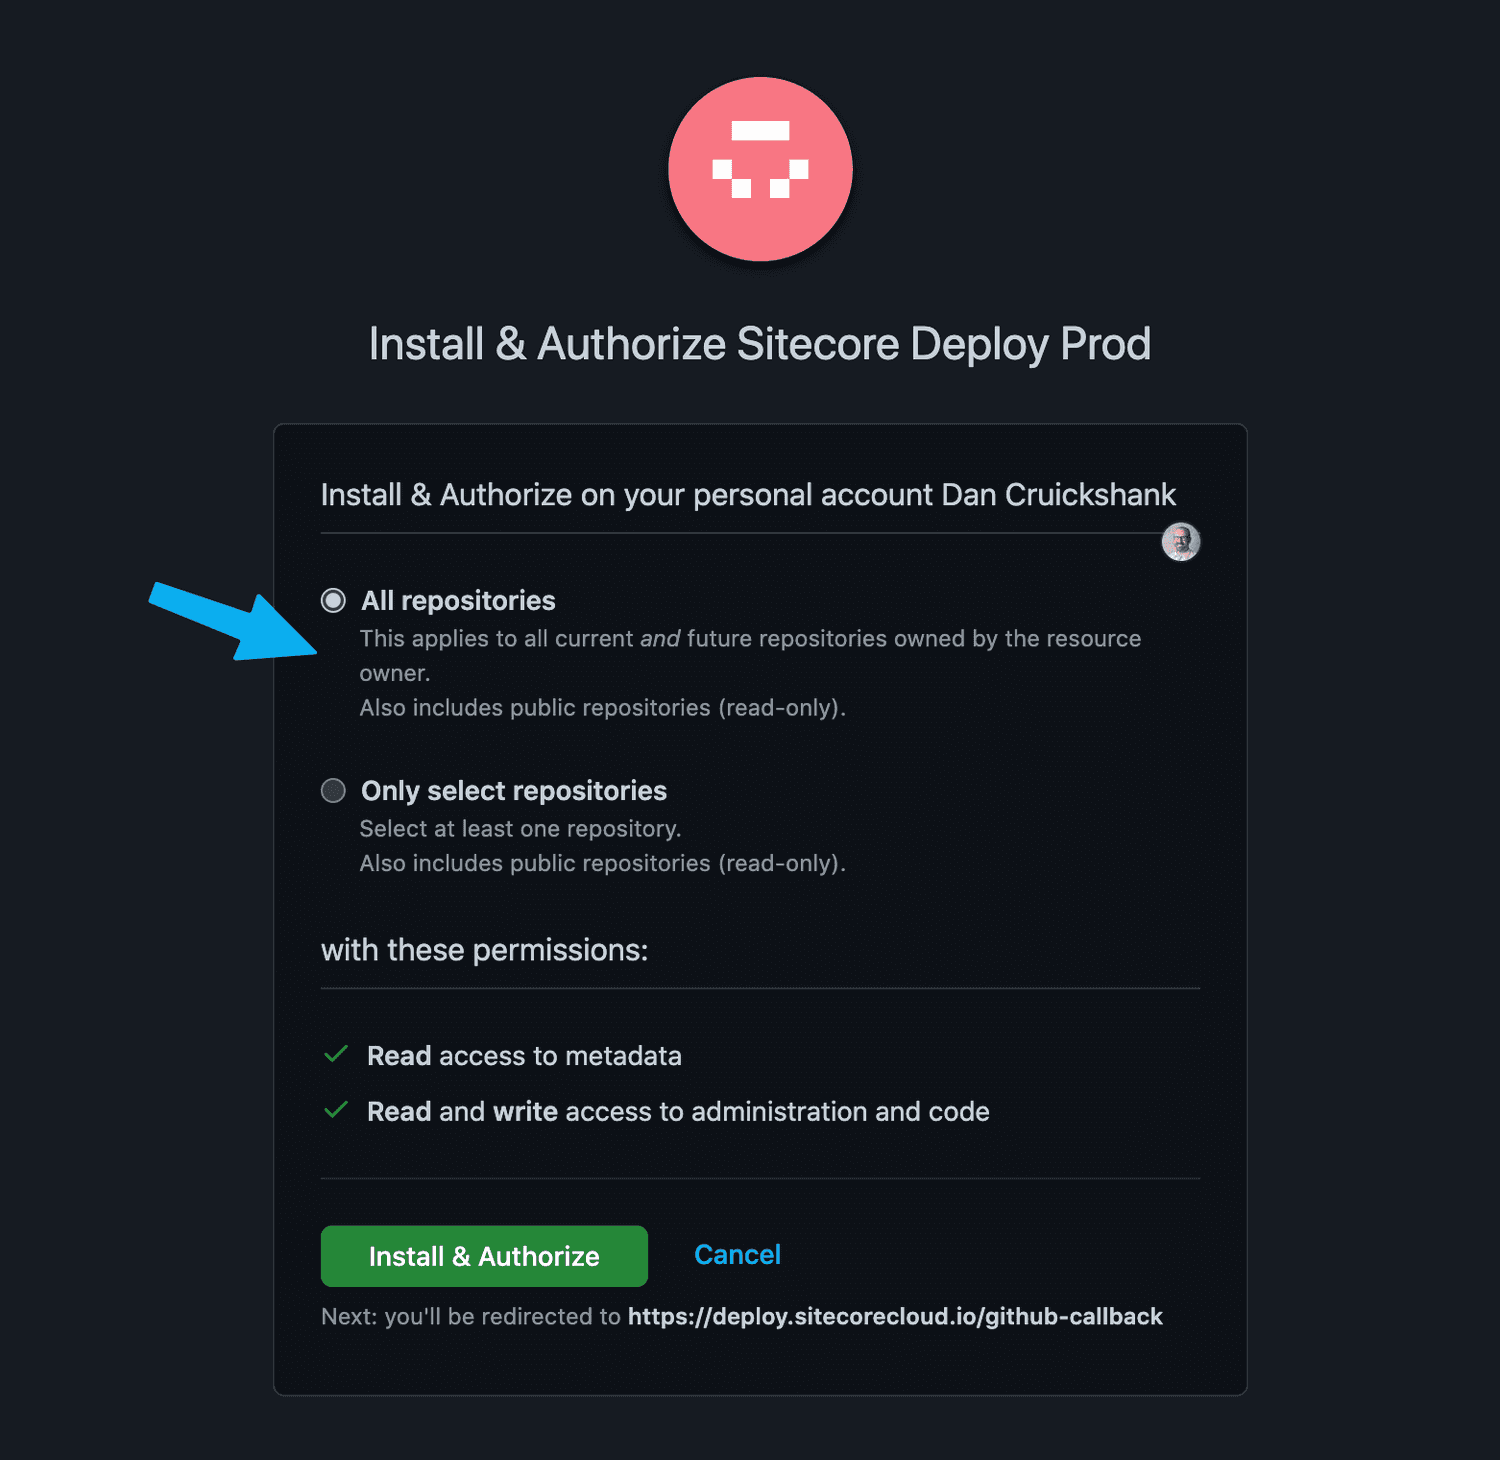
You’ll be redirected to GitHub. In this case I’m already signed in. Sign your life away by clicking Install & Authorize. 🙂
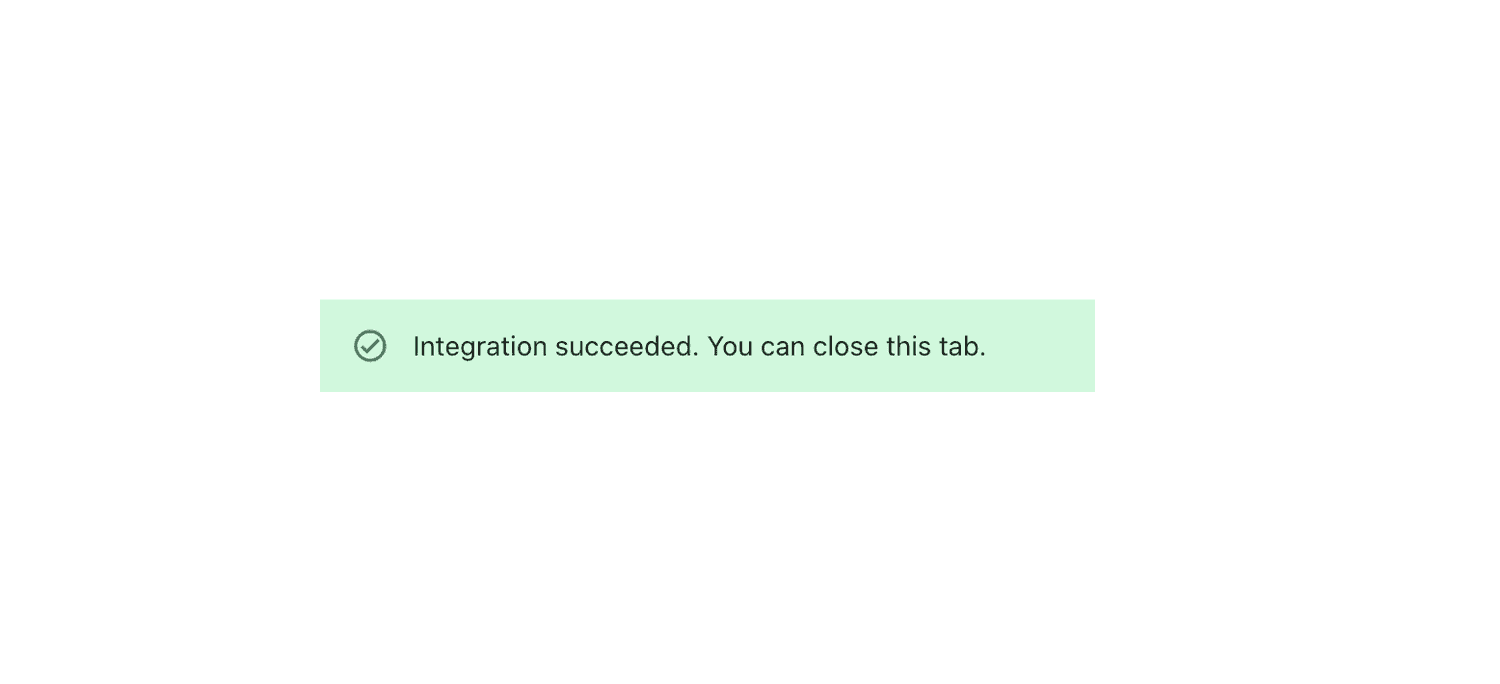
Easy-mode. Integration between my GitHub repository and XM Cloud is confirmed.
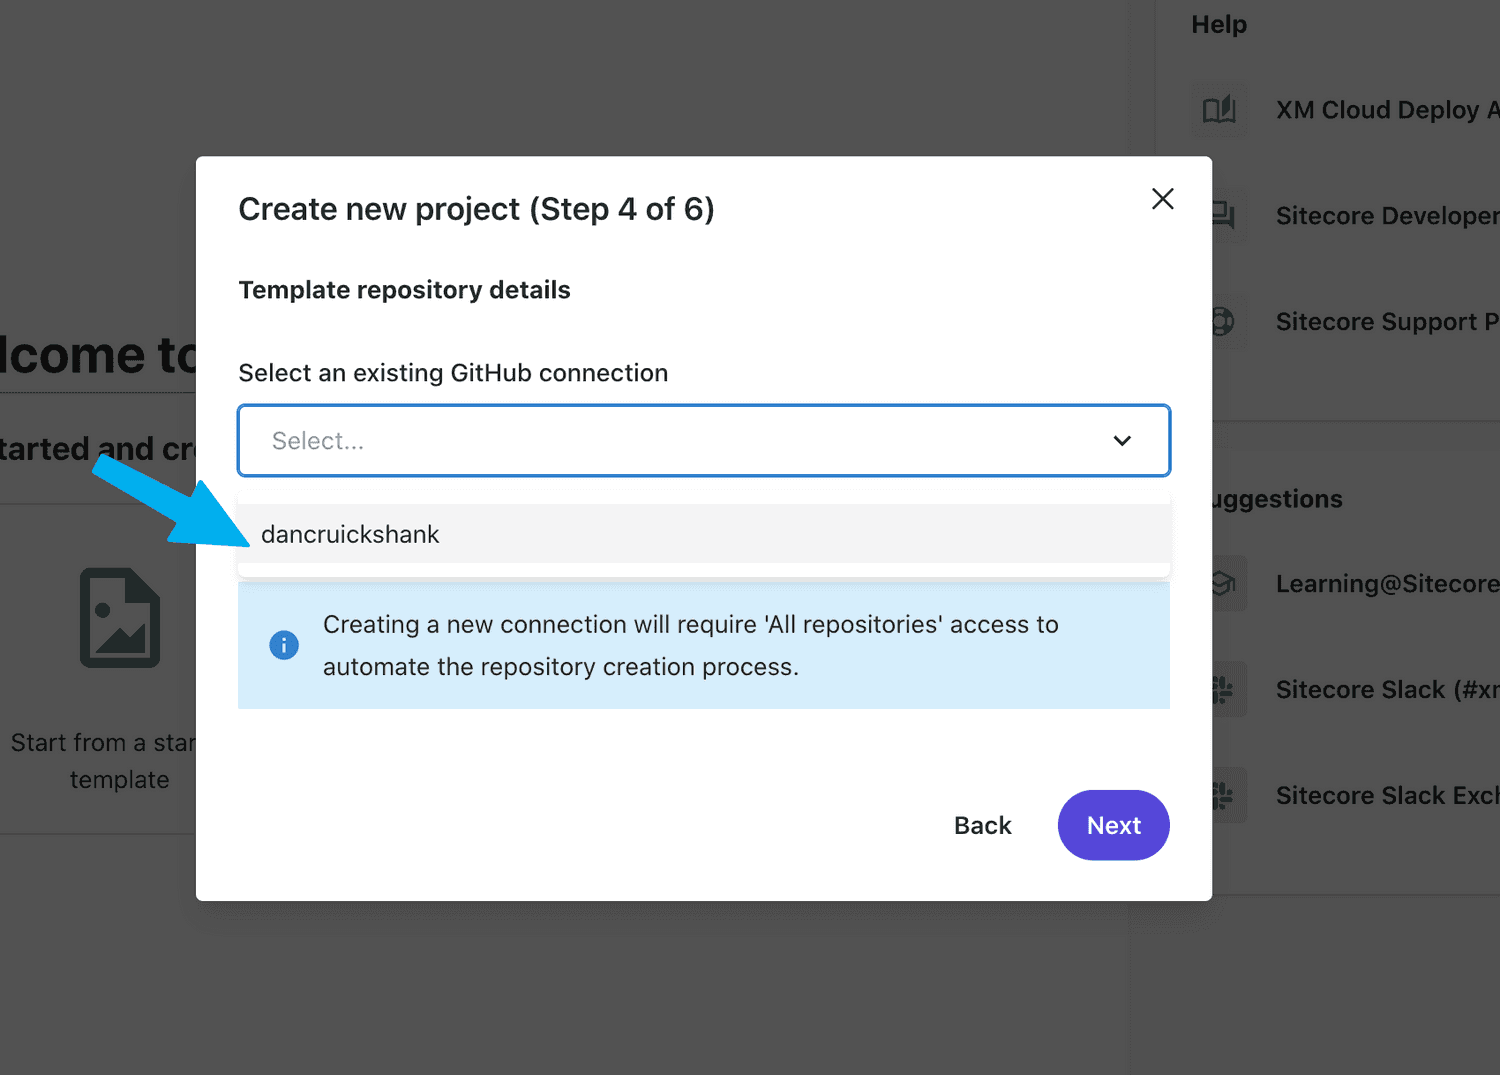
Select my new connection. Click Next.
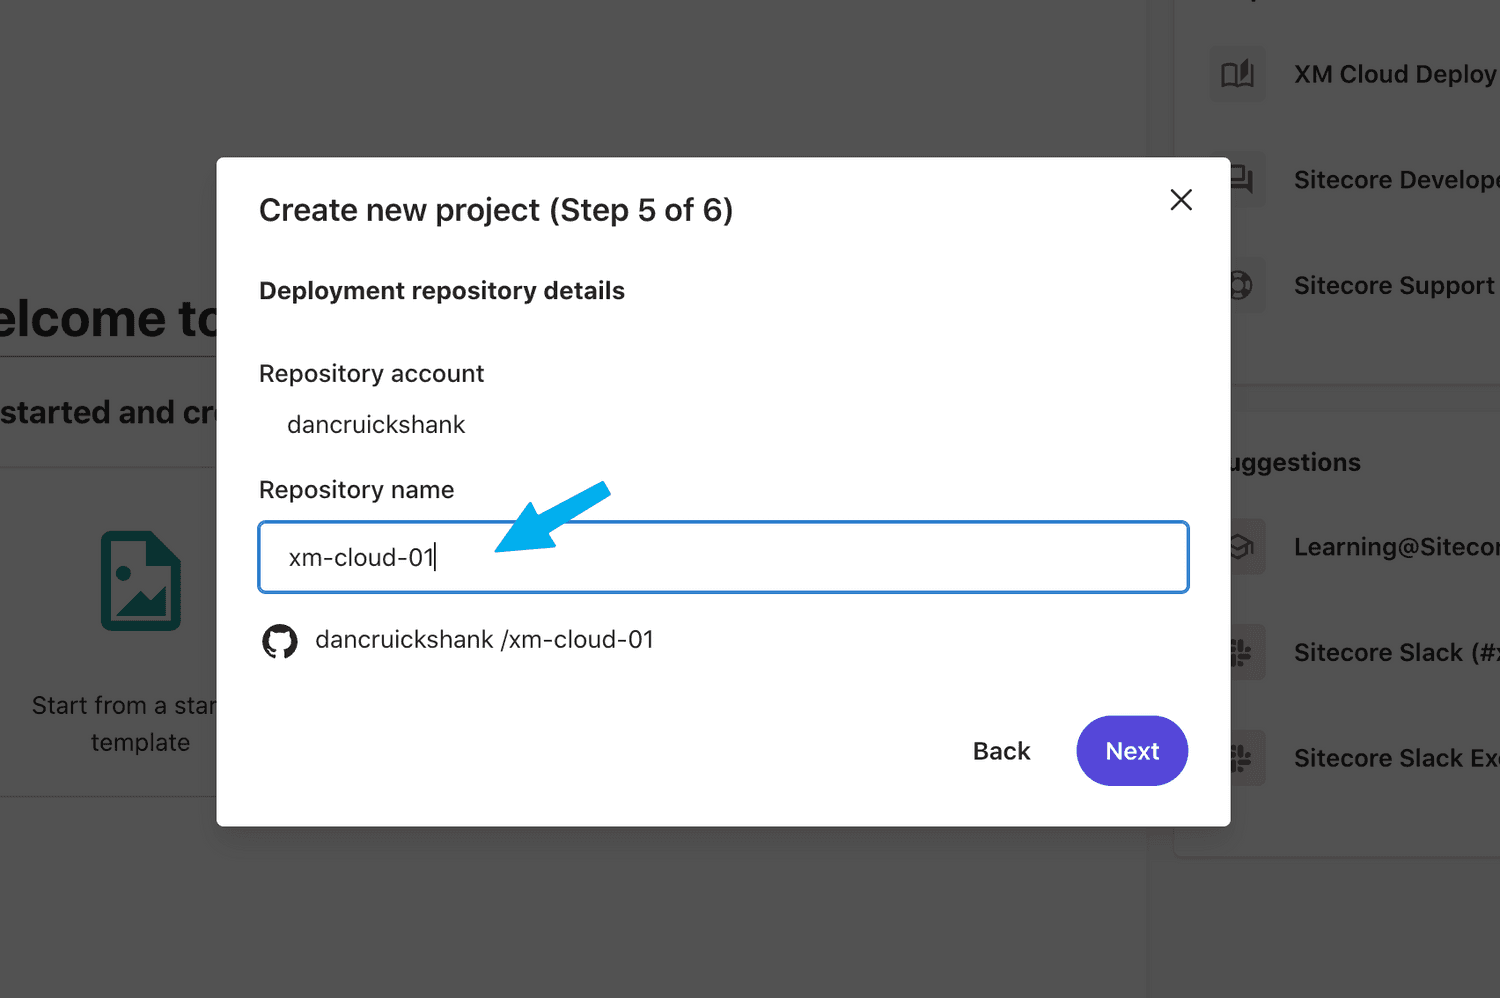
The repository name you enter in this step will be created in GitHub. Do not create your repository ahead of time.
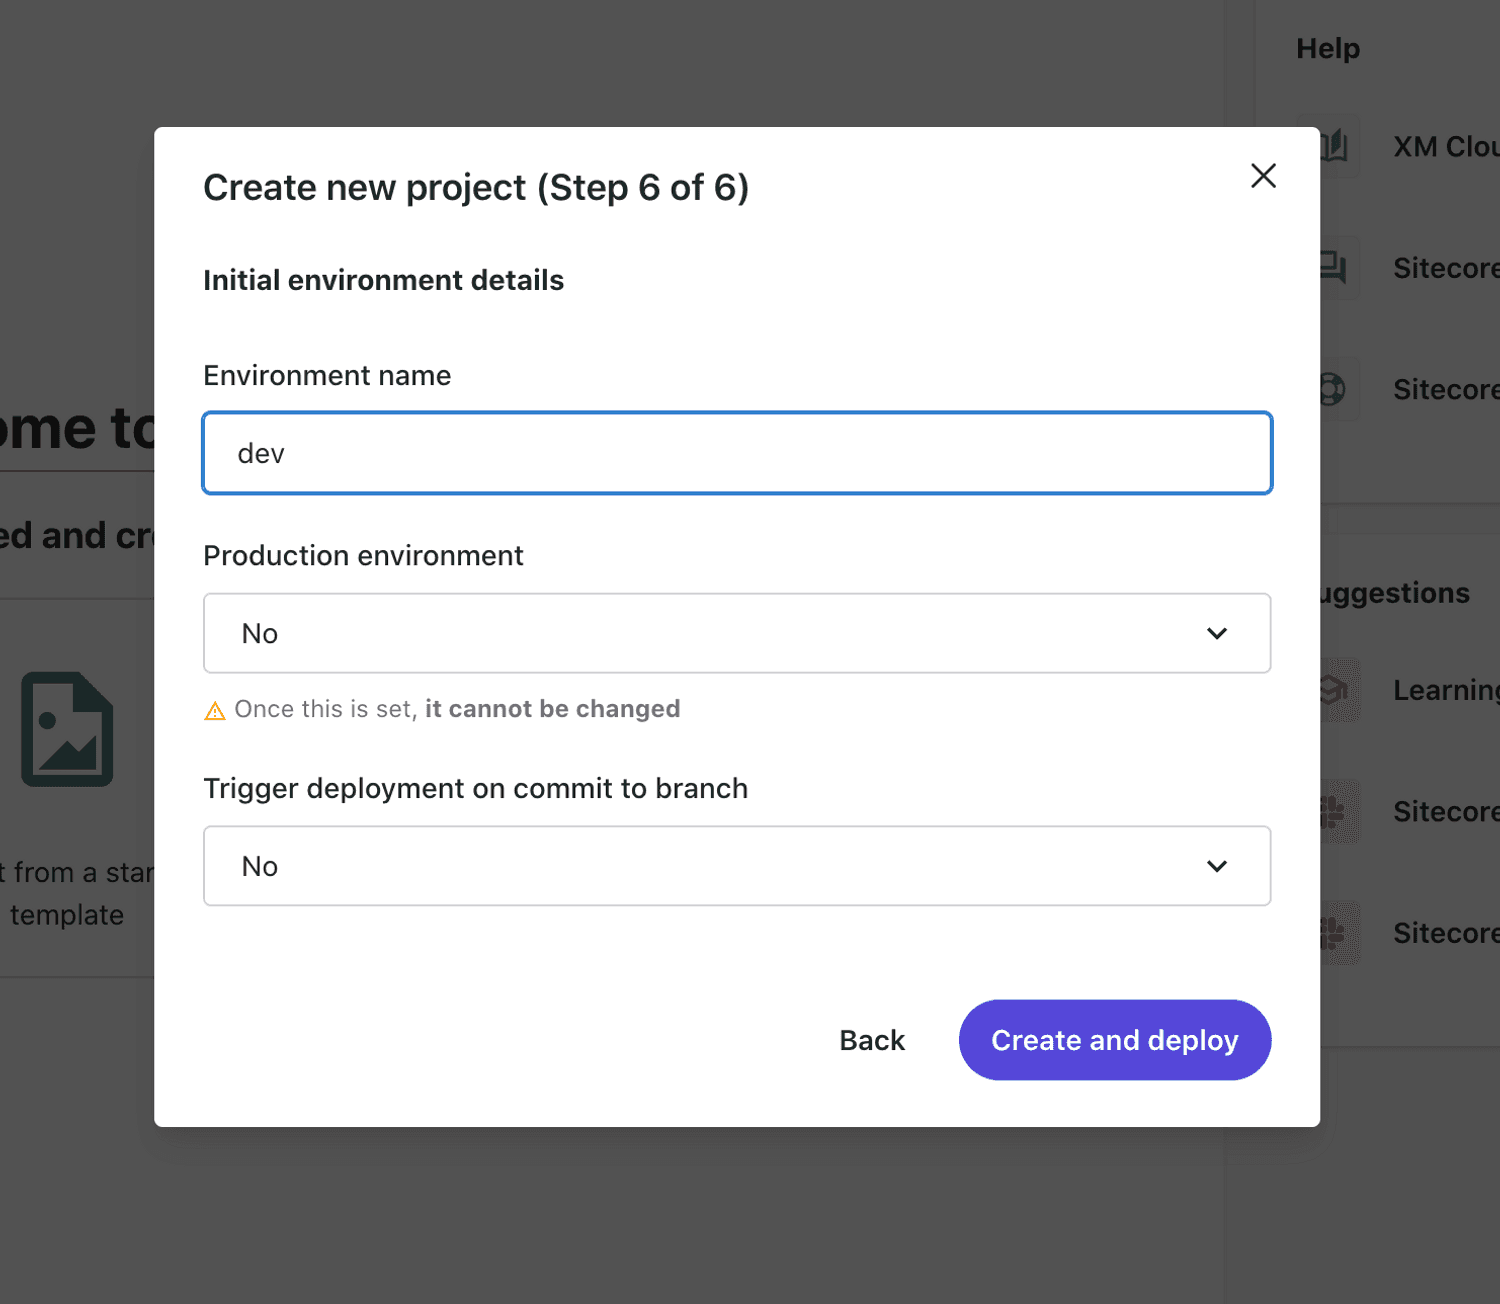
Set these values as appropriate. In my case I did not want to trigger a branch on commit as I’ll be doing a lot of playing around and don’t need everything deployed on each commit. Finally click Create and deploy.
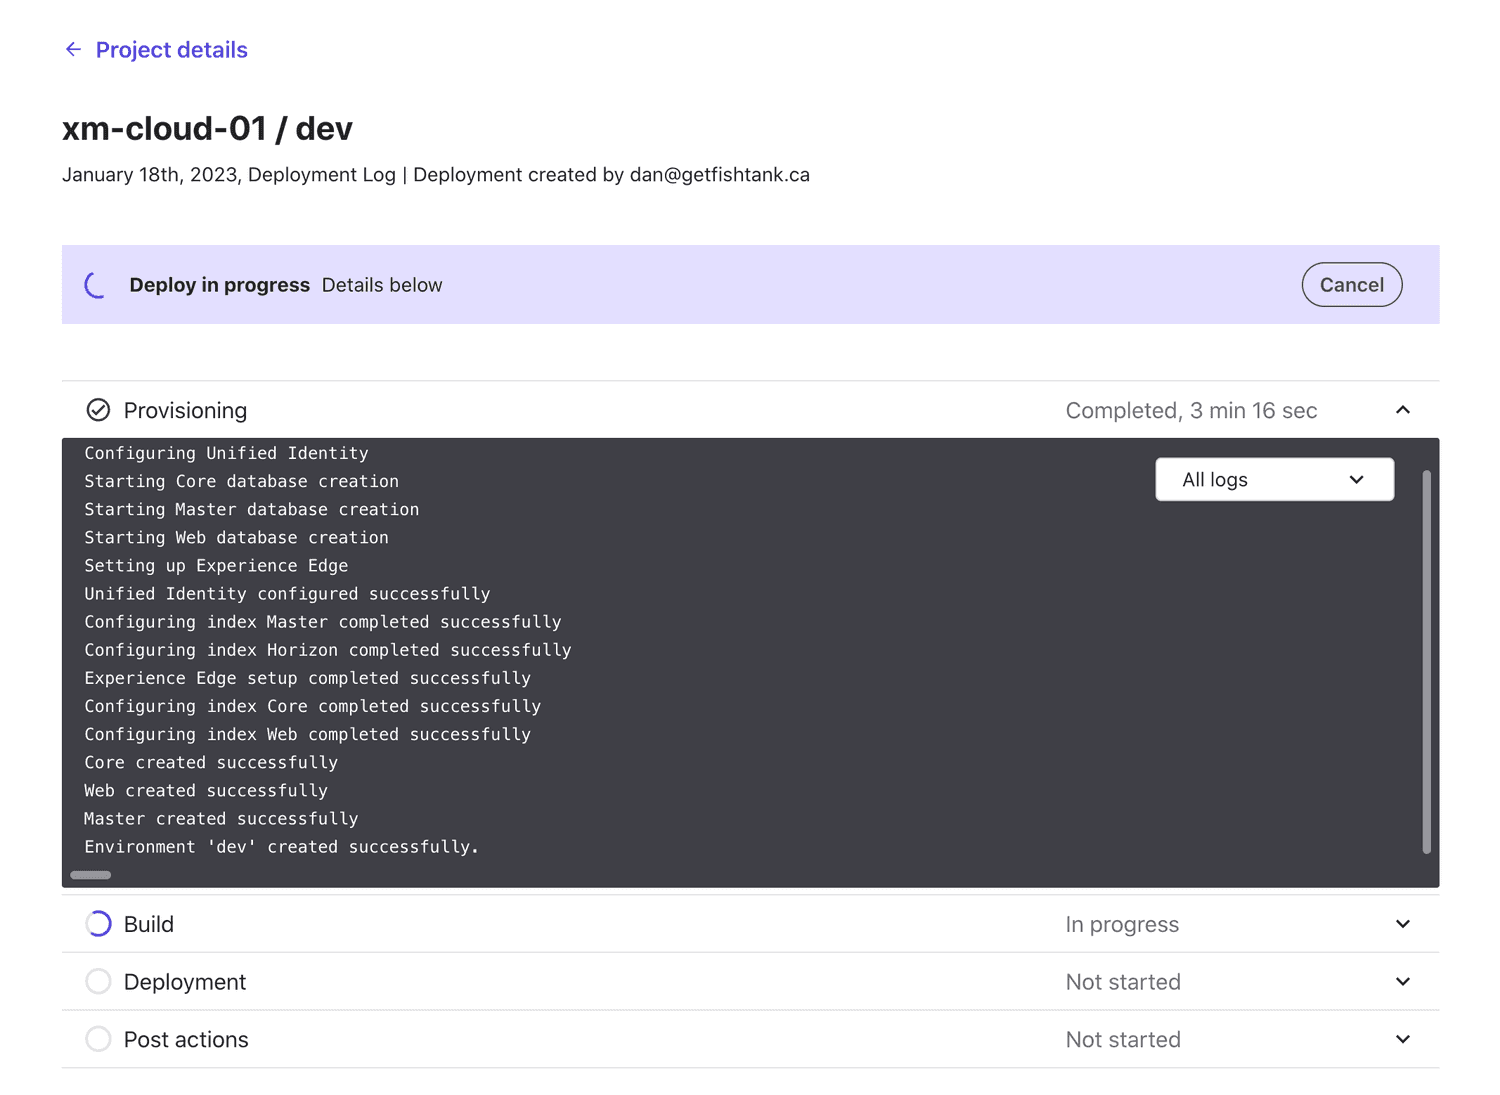
Now we’ll be deploying to XM Cloud for the first time. You can expand each step in the process to monitor and access the output.
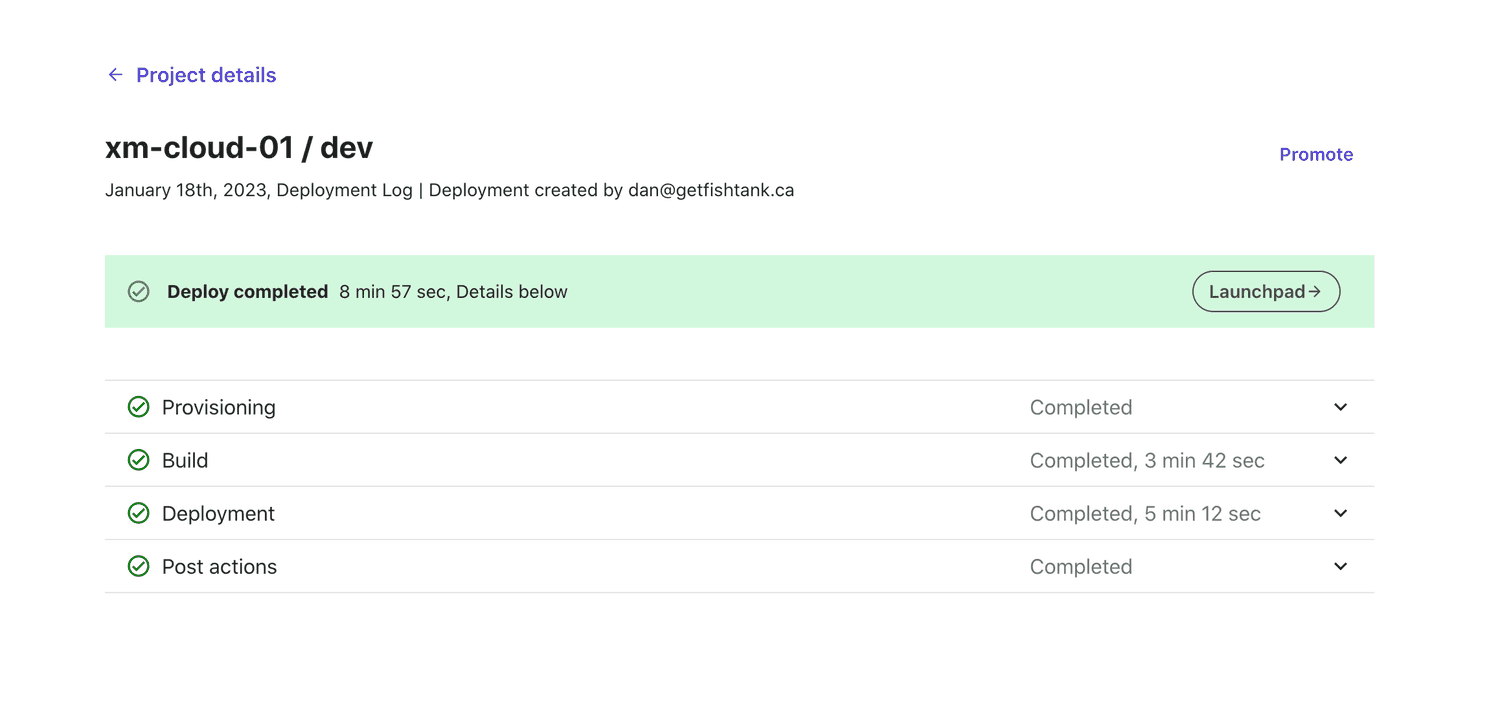
Amazing. Incredible. We have successfully deployed our new site. Next step, click into the
Launchpad → and see what’s going on.
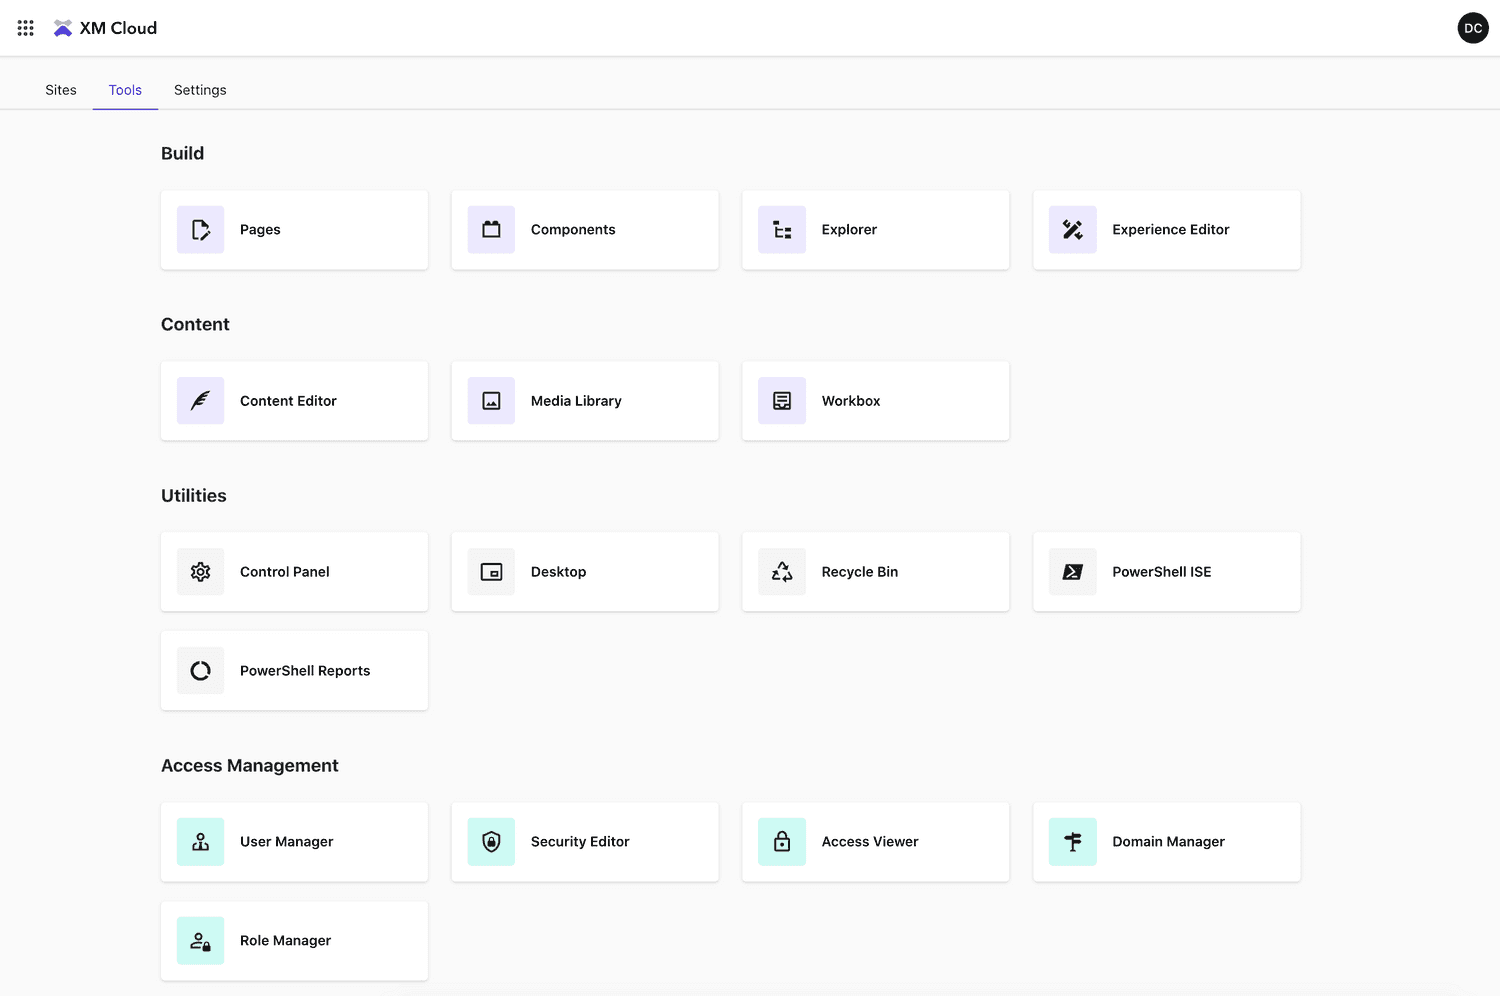
Shiny new dashboard. Some very familiar elements here for experience users but you’ll note some new contenders such
as Pages, Components & Explorer.
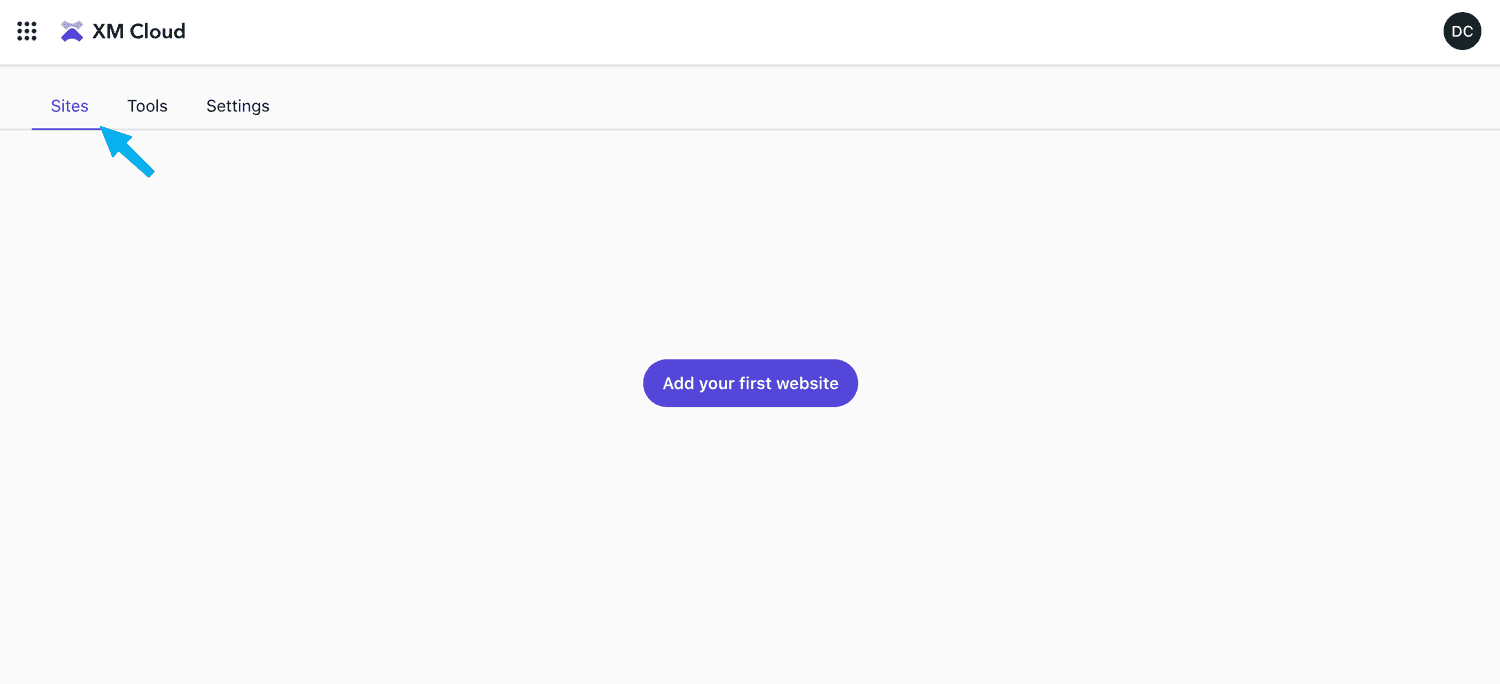
We have the tools. Let's create a site.
In the top ribbon of the dashboard, click Sites then click the
Add your first website button.
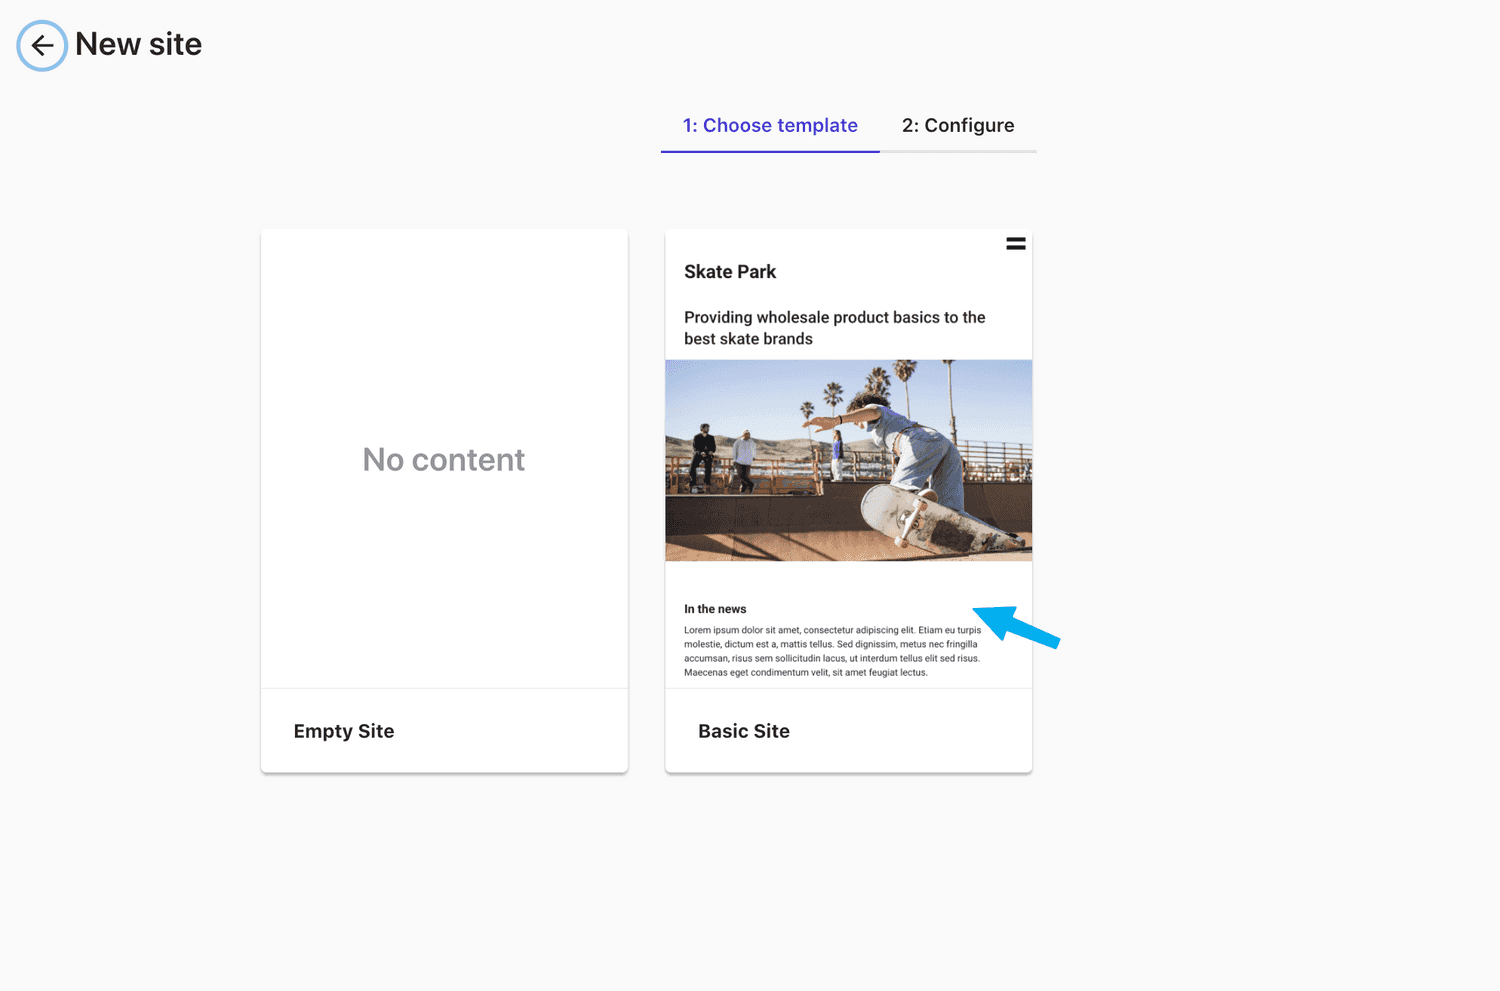
The Empty Site option is like an empty SXA based site. That is what you’d normally want in my opinion,
but I’m going to create the Skate Park **Basic Site** so we have a little more to dig into.
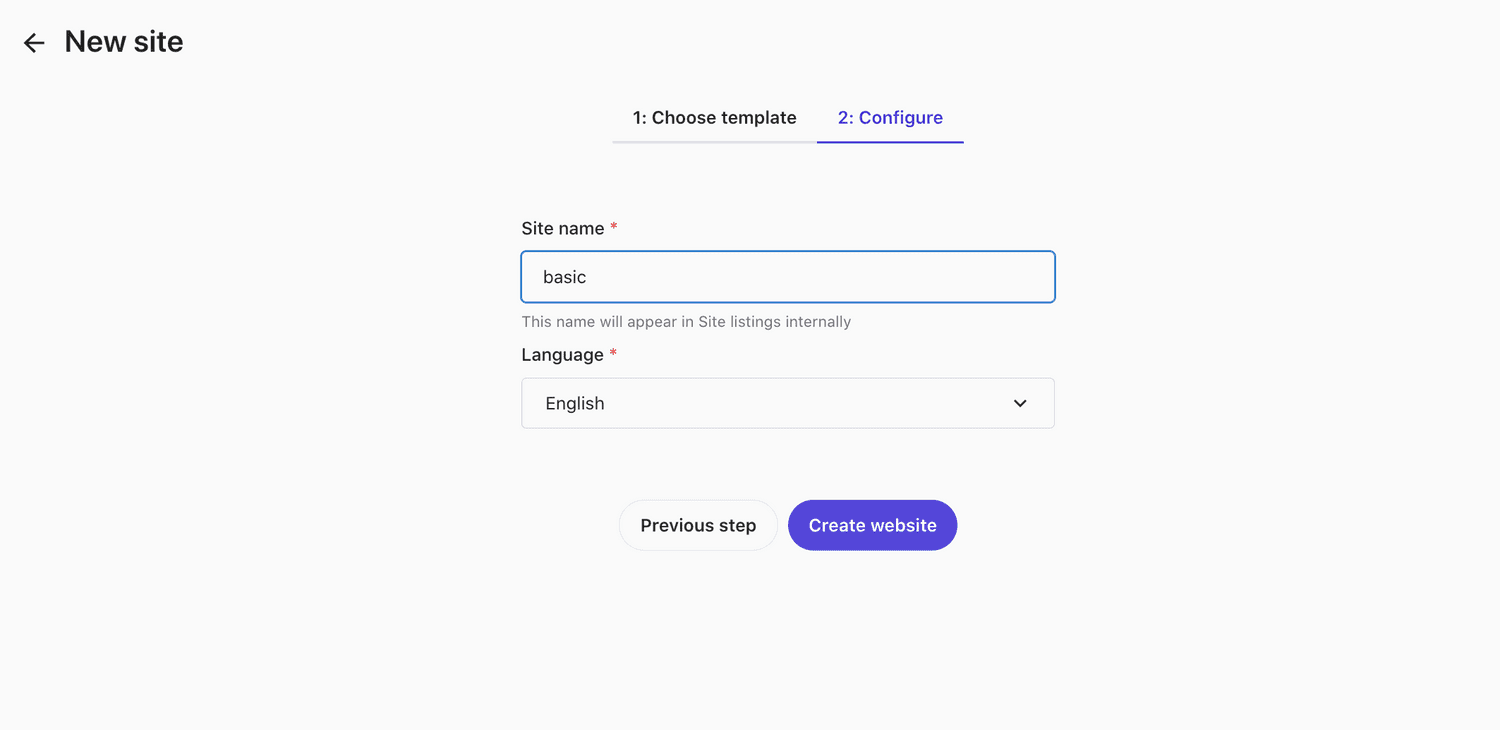
Name the website and click Create website.
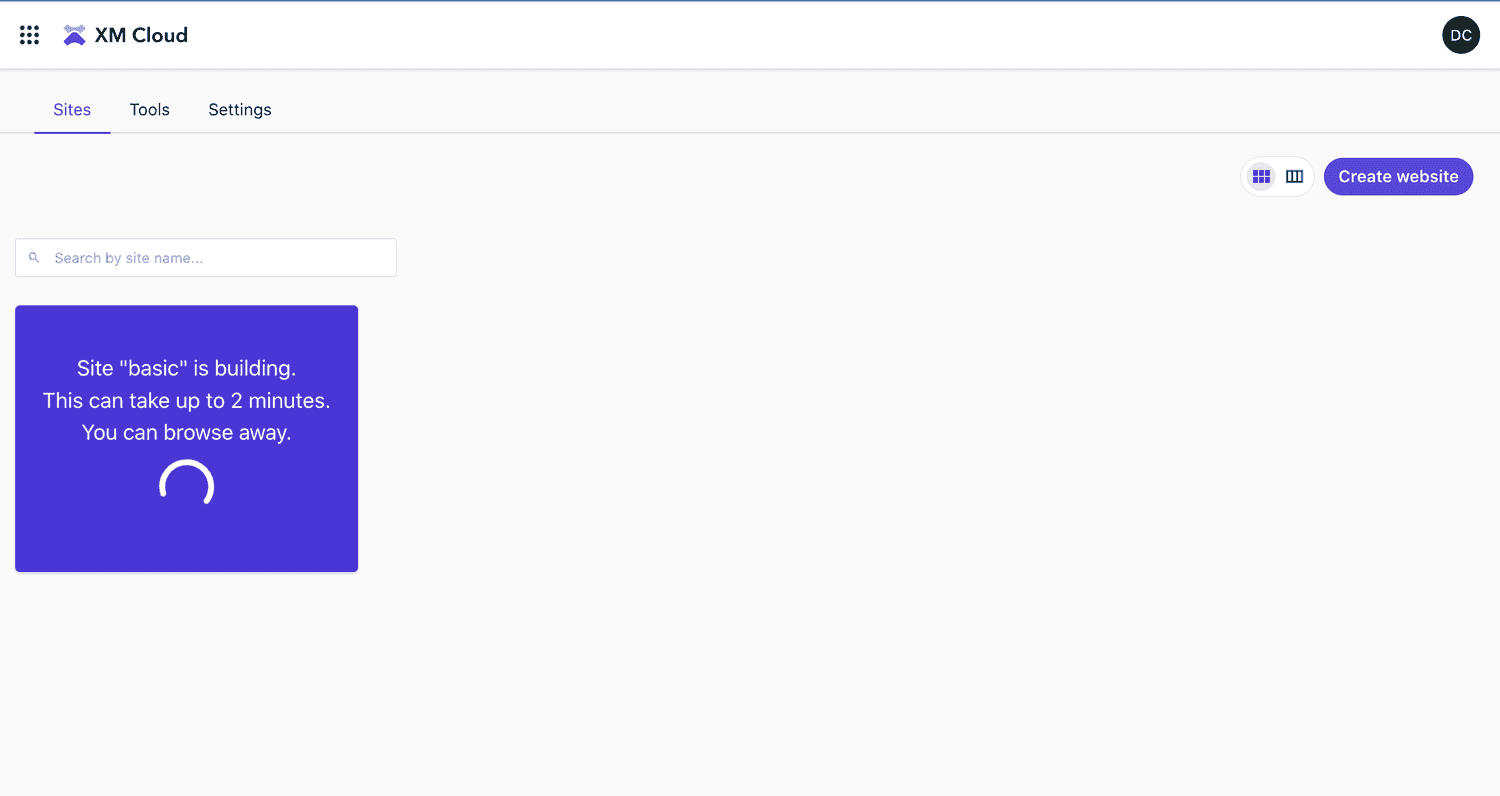
Note the nice new UX when creating a site in XM Cloud.
Walkthrough: Sitecore Pages in XM Cloud
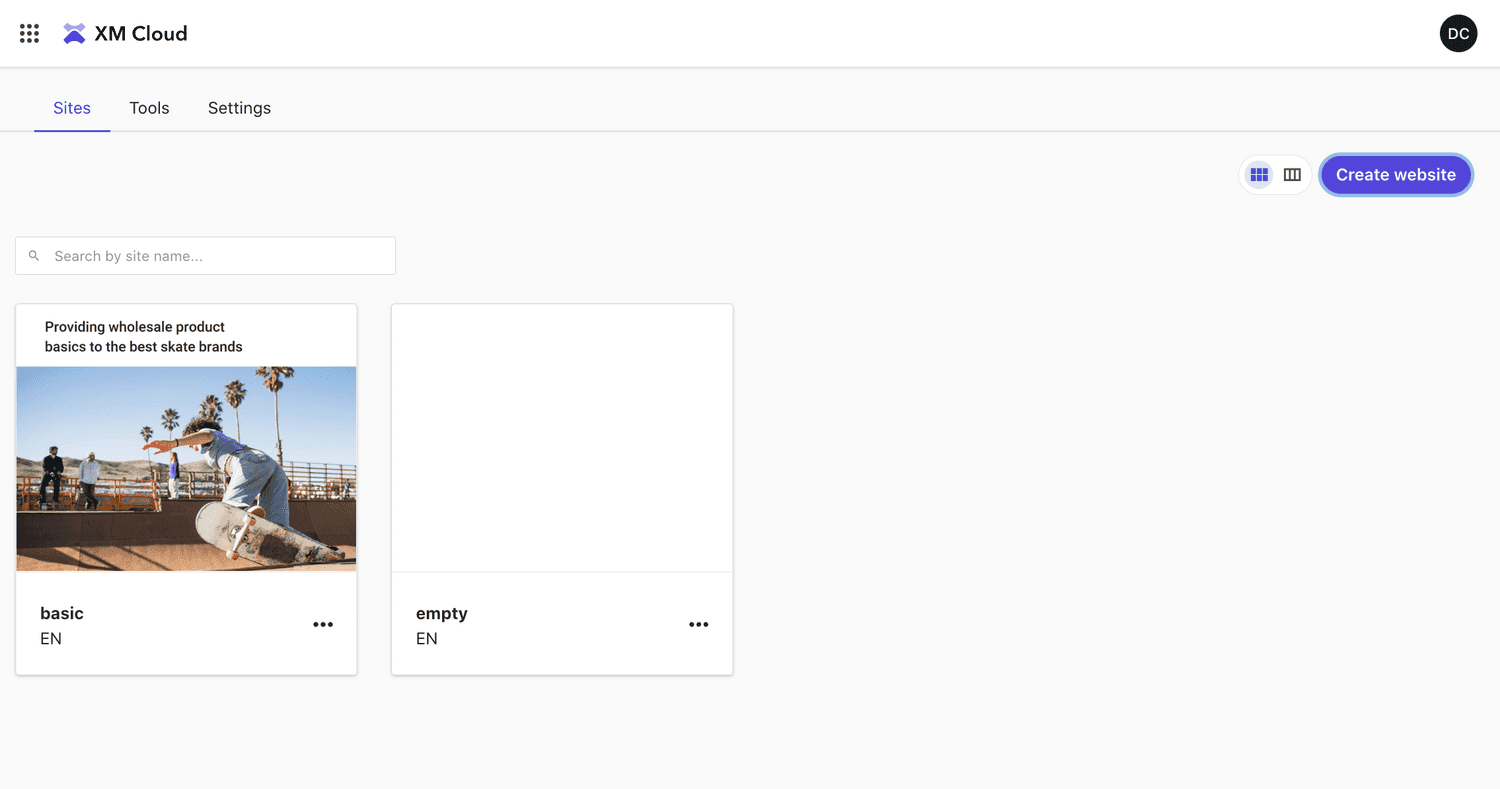
Our basic site is created and I also went back and added the empty site to help fill out
the dash. Next step,. we’re clicking the basic site to take a look.
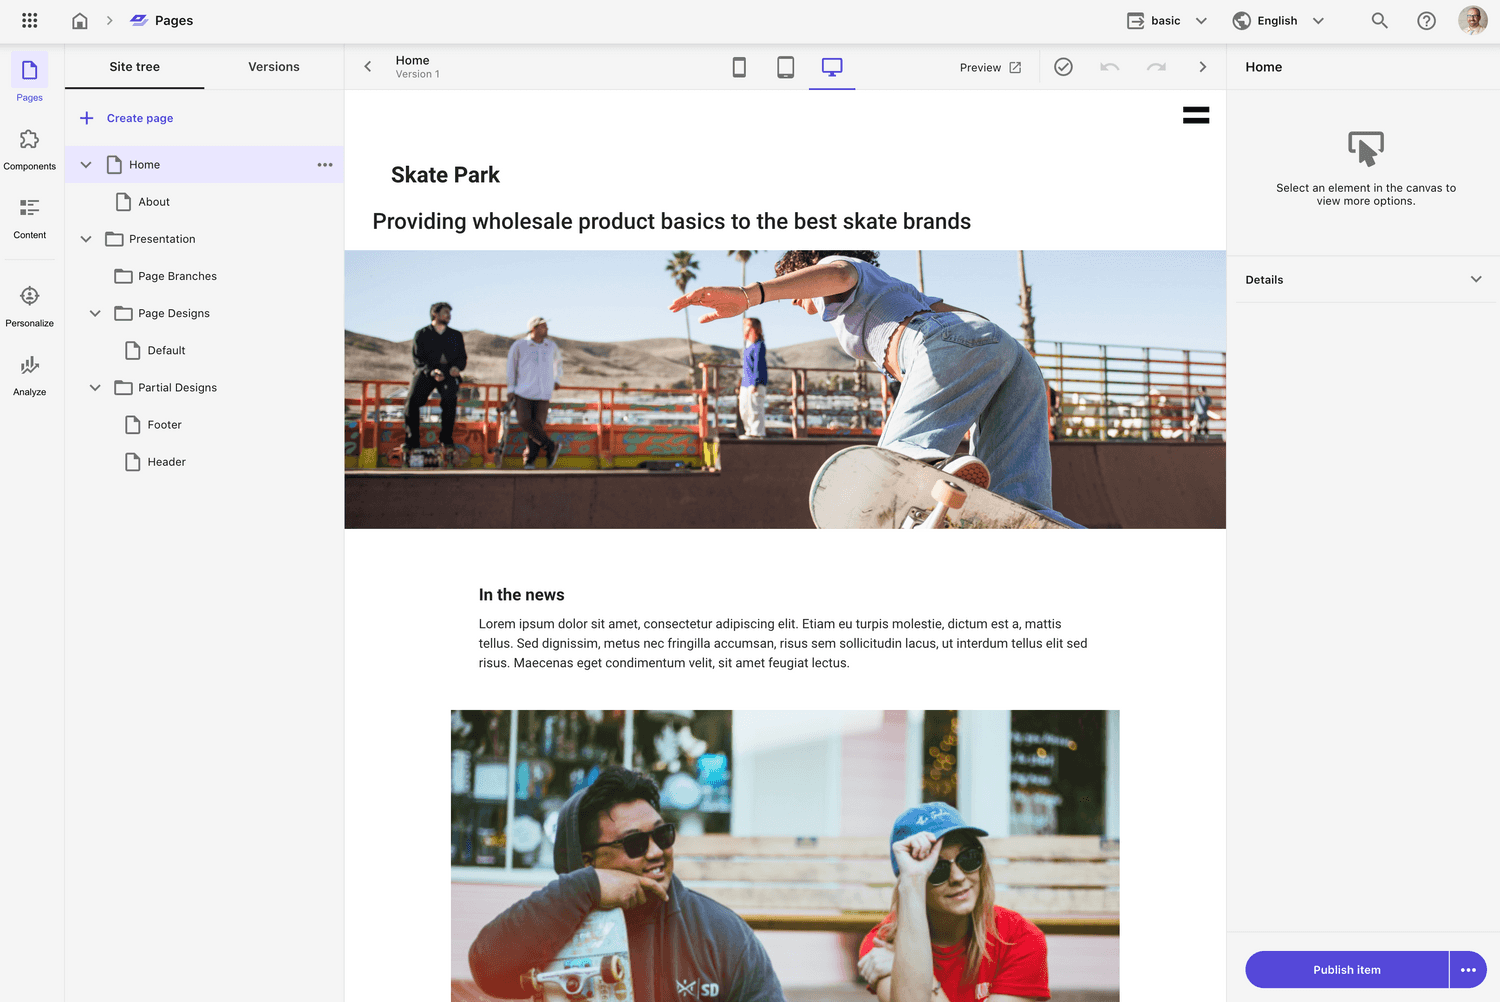
Browsing the basic site takes us into a new feature in XM Cloud called Sitecore Pages.
Note the unique elements in the new interface.
- Quick access panel to the new major features on the left
- Content tree is available to see the sites taxonomy
- A real-time editing experience next to the content tree
- A panel on the right to access element specific information
- Essentially combined the Content Editor, Experience Editor, Properties and elements of the traditional Sitecore dashboard into a single screen 😍
Now let’s take a look at the features in the “Quick access” panel.
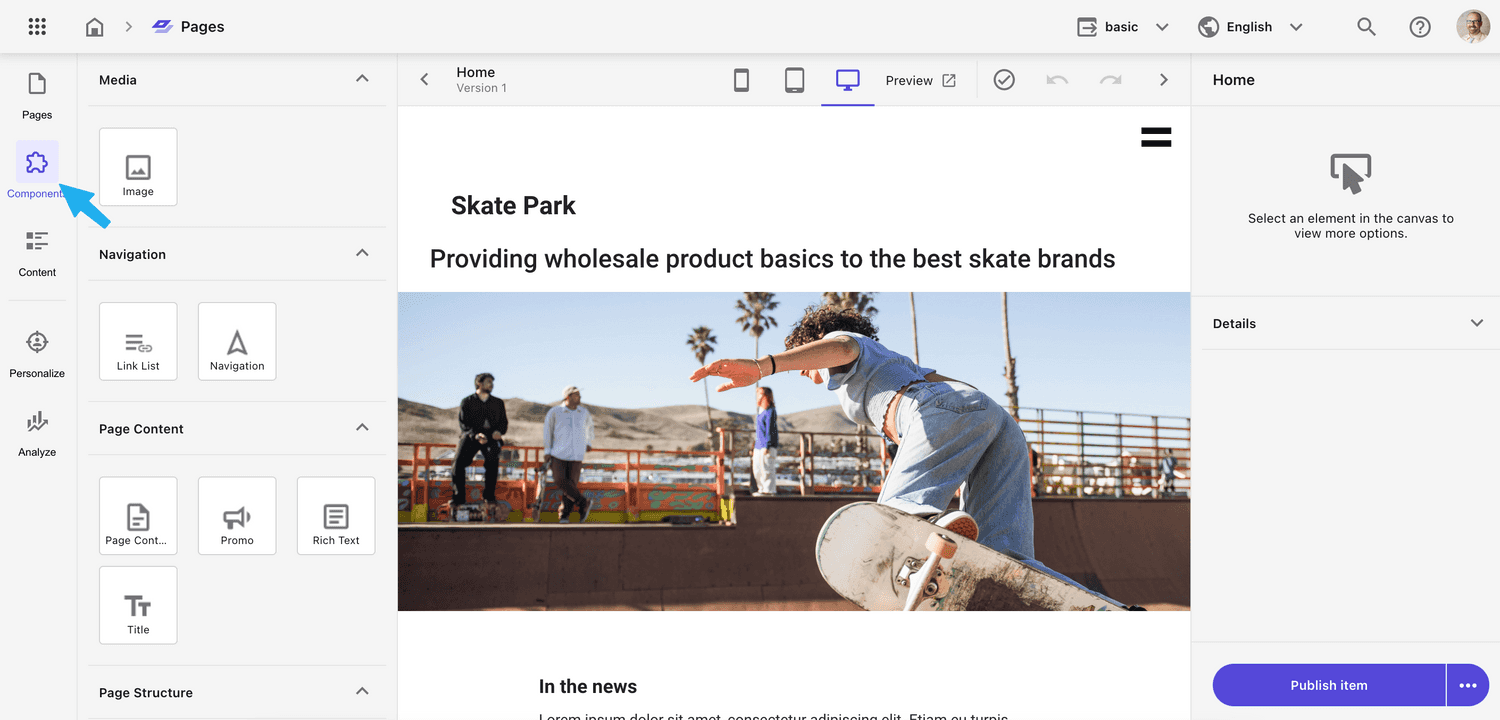
Opening Components reveals all the components that can be used in the website, added via drag and drop.
Very similar to the toolbox available in SXA.
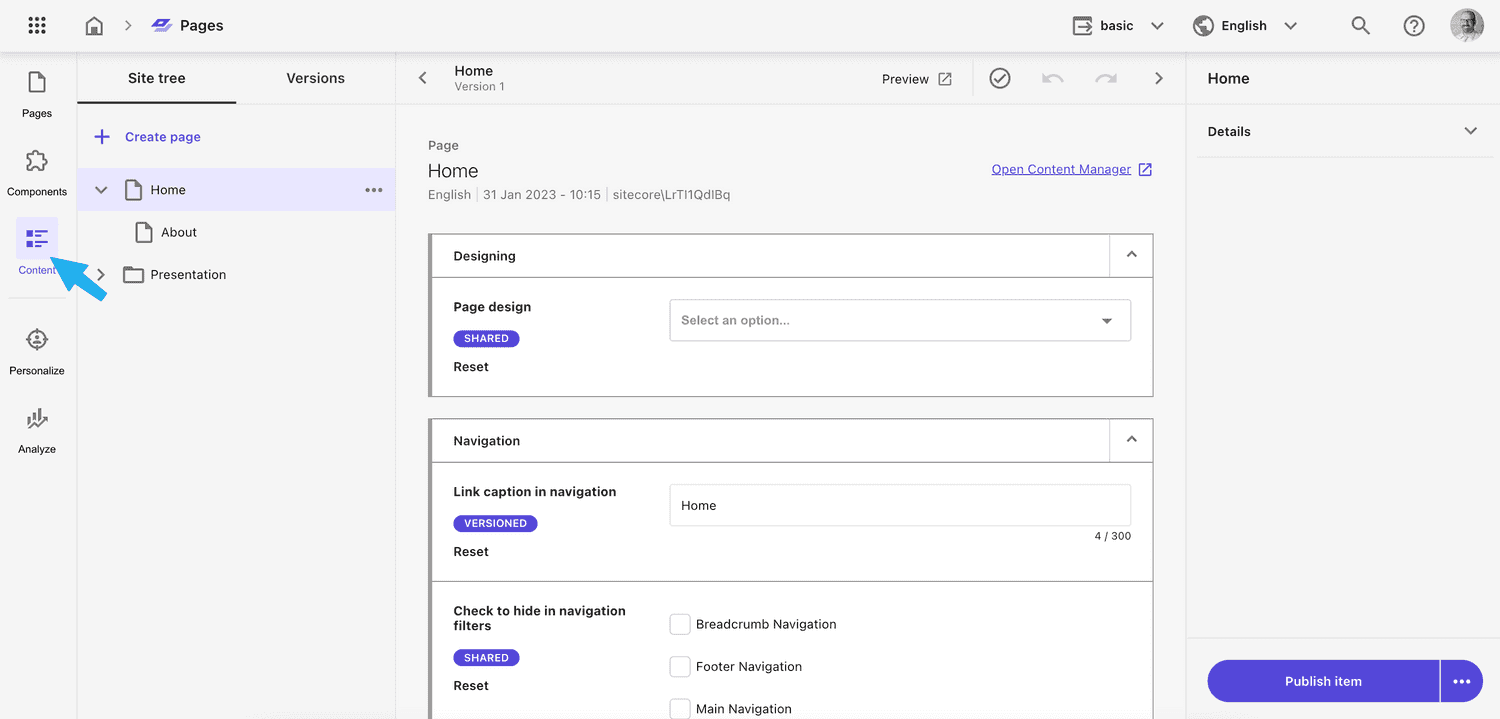
Selecting Content reveals a field-level view of the content item selected in the Site tree.
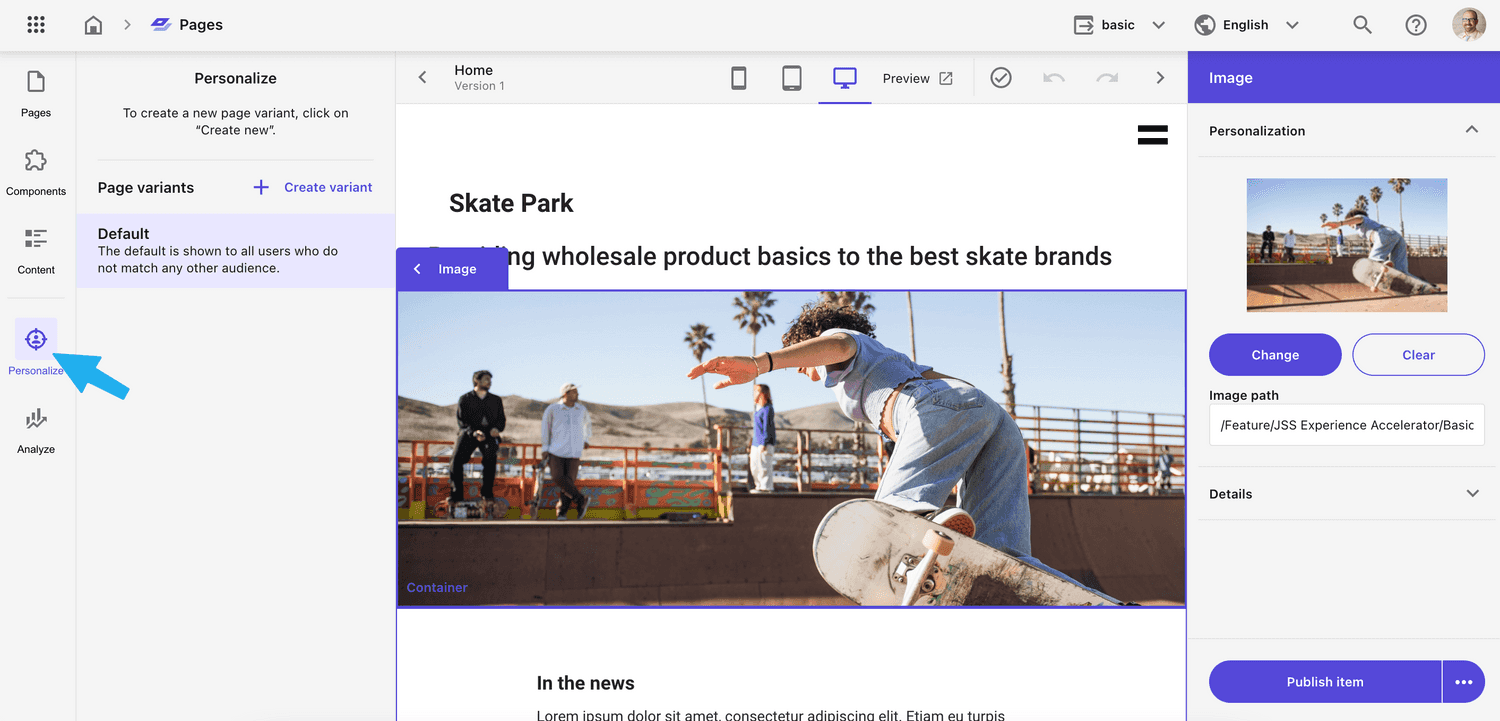
Using Personalize feature reveals the ability to do page and component level personalization. (Not
getting into this here. We’ll do a deep dive another day)
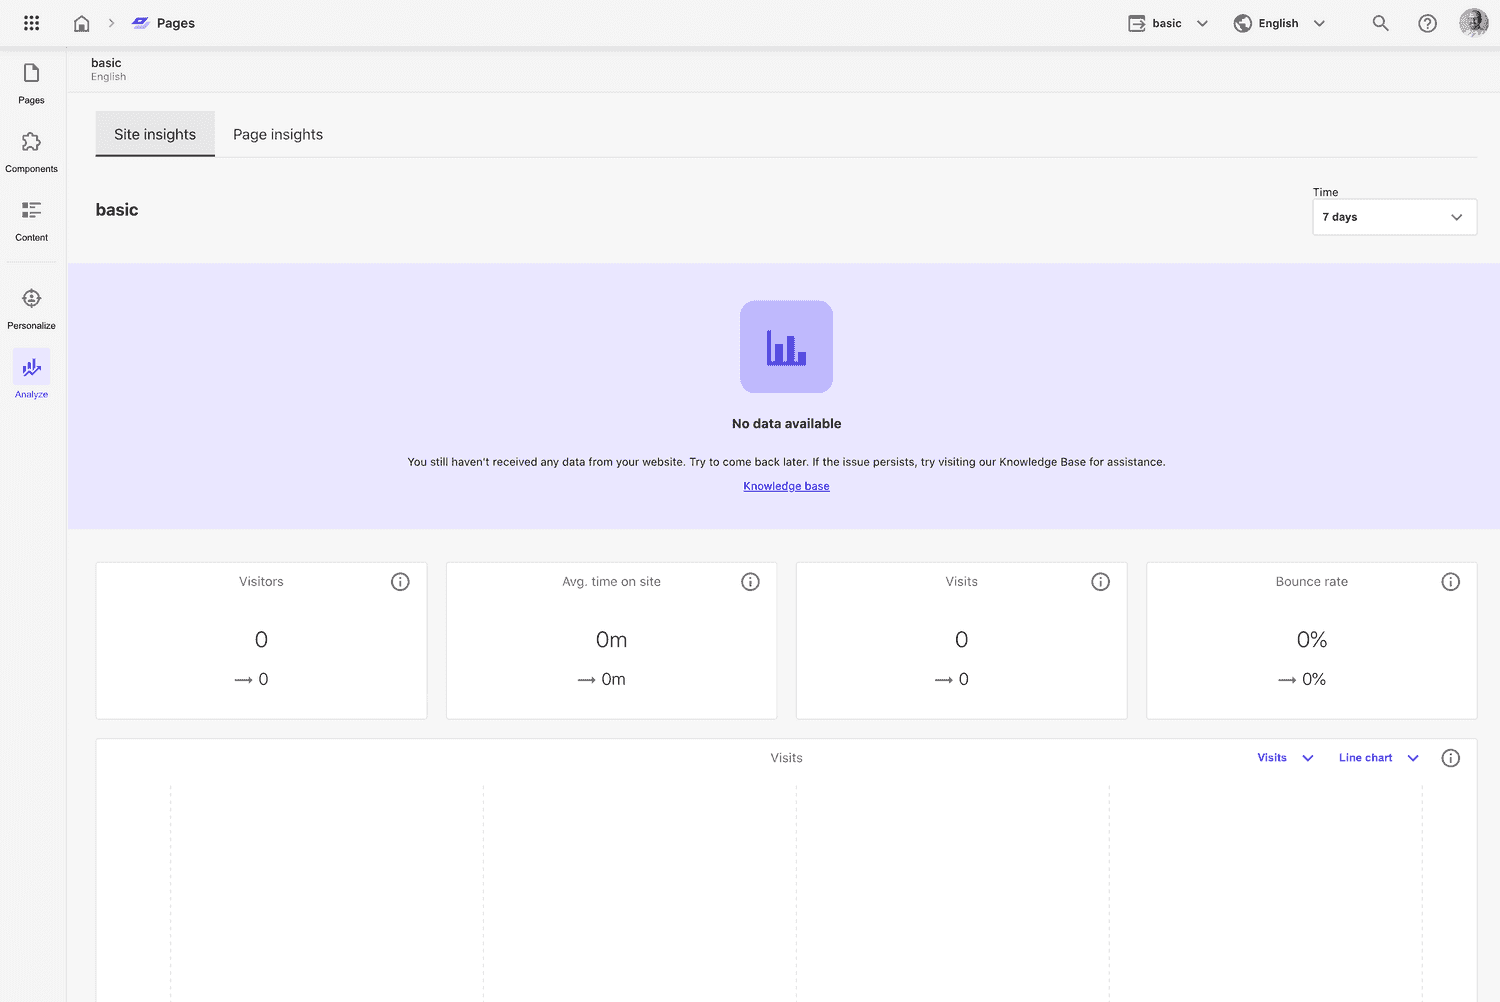
And Analyze will show us some site and page-level analytics. Unfortunately being a test site, there is
nothing to see here. You’ll be able to see things like visitor count, average time on page, top pages, top
countries, first pages, browsers and more.
When you choose the Page Insights tab, you can select a page from the content tree and view analytics related to that item.
That’s All For Now
I hope you enjoyed a little peak behind the curtain. I know that everyone doesn’t have access to XM Cloud so I’m happy to share a little bit more about it how it looks.
I know this was very high-level, but if you have any further questions about XM Cloud, how to evaluate it, or maybe a partner to help get you going please reach out to me directly and I’ll see what we can do.
Thanks for reading!


