Configuring Sitecore Customer Data Platform (CDP)
A key component of contemporary digital experience management is the Sitecore Customer Data Platform (CDP), formerly known as the Sitecore Experience Database (xDB). Particularly in a time when individualized customer experiences are crucial for business success, its significance and advantages in the fields of customer data management and personalization are considerable. But what are the advantages exactly? Let’s take a look at a few.
- Unified Customer View: By gathering and combining data from several touchpoints, Sitecore CDP builds a unified profile for every customer. Understanding consumer behaviour and preferences across several channels requires this cohesive view.
- Real-time Data Processing: The ability to process data in real-time allows businesses to react promptly to customer actions. This immediacy is crucial for delivering relevant experiences and engaging customers effectively.
- Flexibility and Scalability: Sitecore CDP can adapt to changing busirness requirements and manage massive data volumes. Because of its scalability, companies of all sizes can take advantage of its advantages without being limited by the volume or velocity of data.
- Sitecore CDP offers frameworks and tools to guarantee compliance with legislation like the CCPA and GDPR, assisting organizations in managing customer data responsibly in an era of strict data privacy requirements.
So for this particular setup, you will require access to the CDP organization of your client.
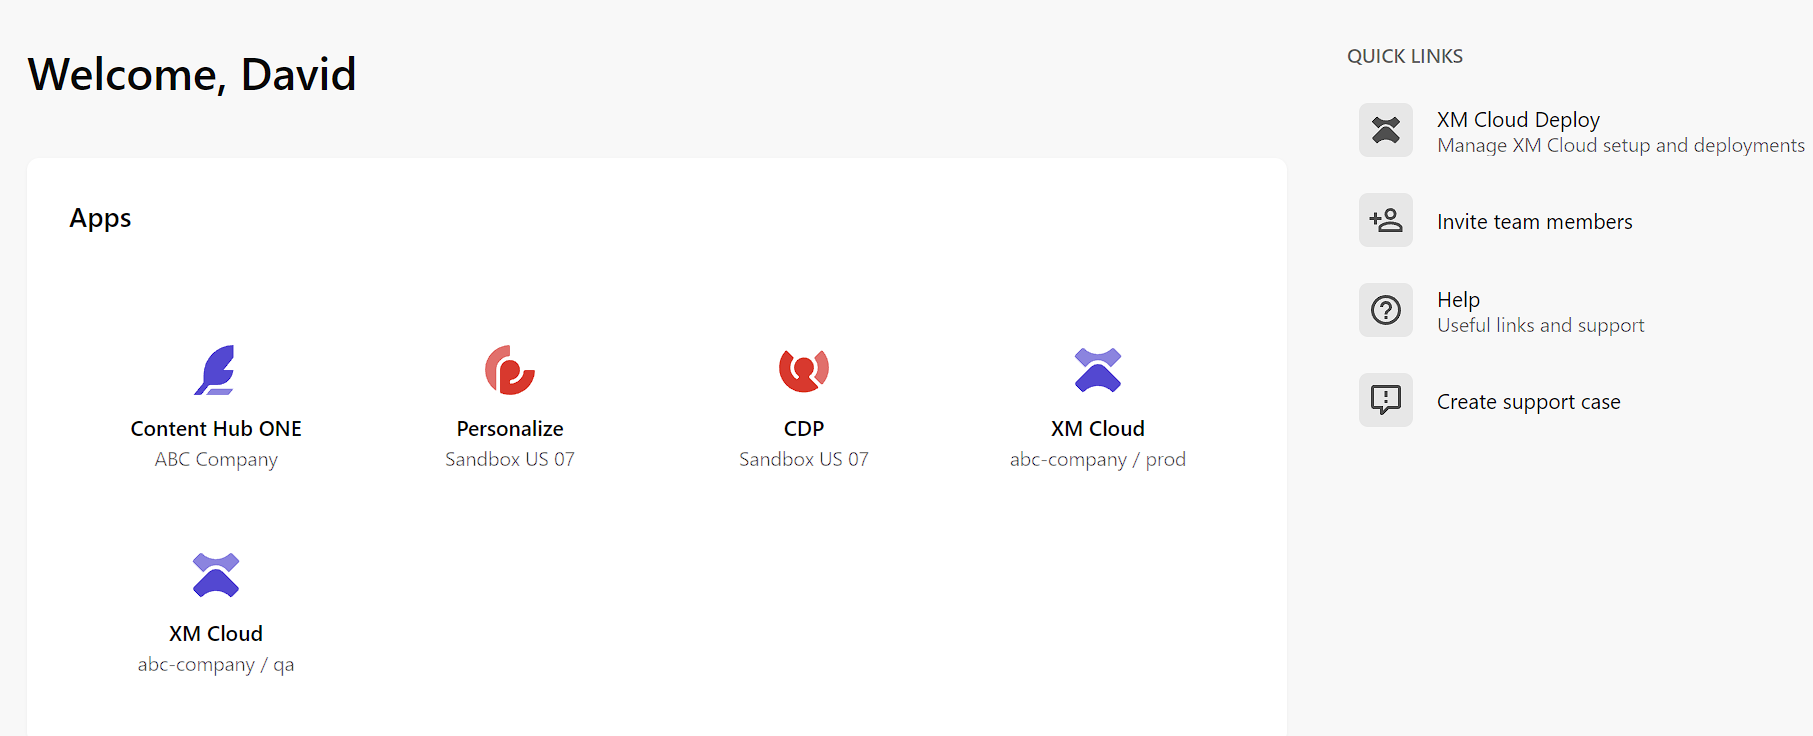
In , for your particular client, you’ll find CDP and Personalize right on the home page of the XM Cloud Portal.
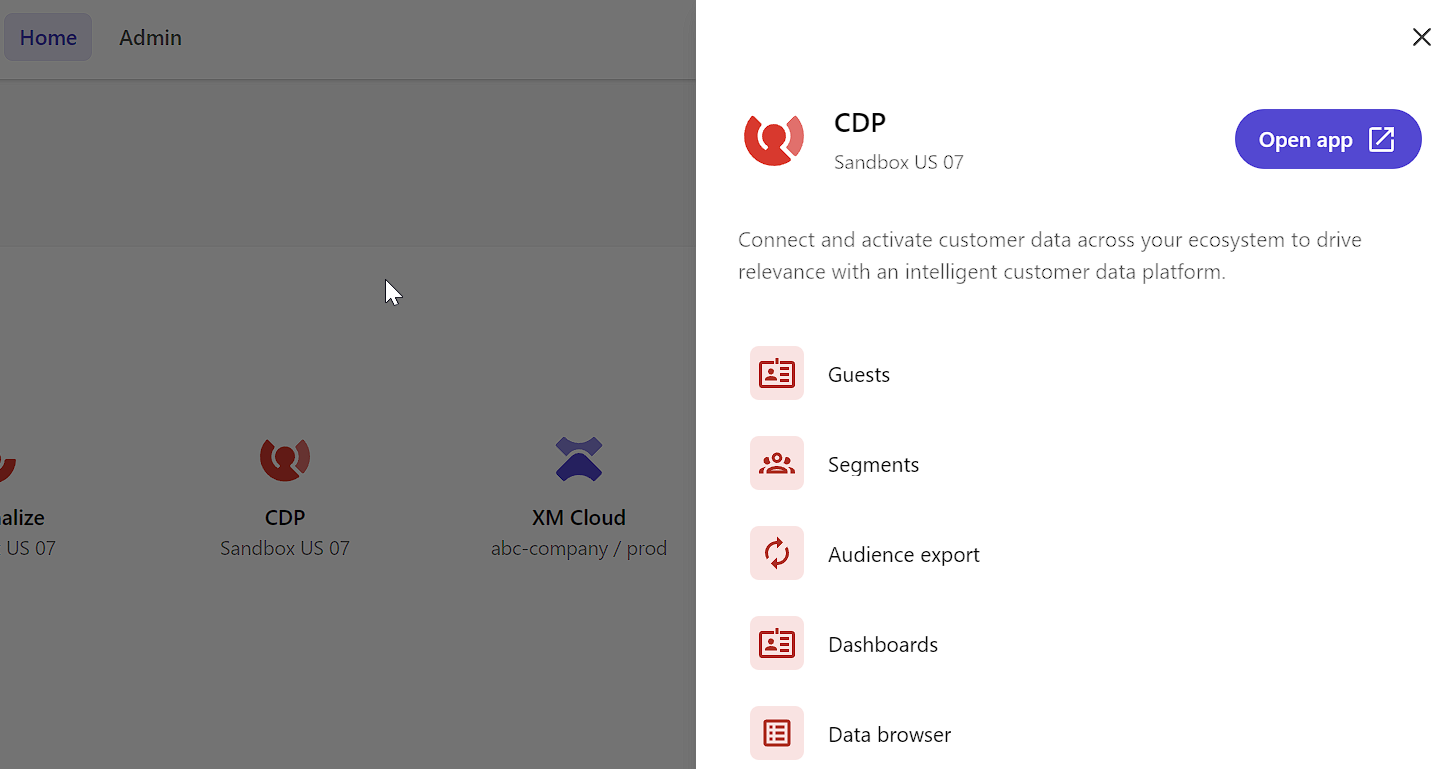
Click CDP and then you’ll get the flyout, click Open app. While you can use the other buttons to get to specific areas within CDP, for our purposes you’ll just want to launch the main area.
You will also want to go into Content Editor and on the Site Grouping setup the Point of Sale that will be used for CDP to collect and reference the information.
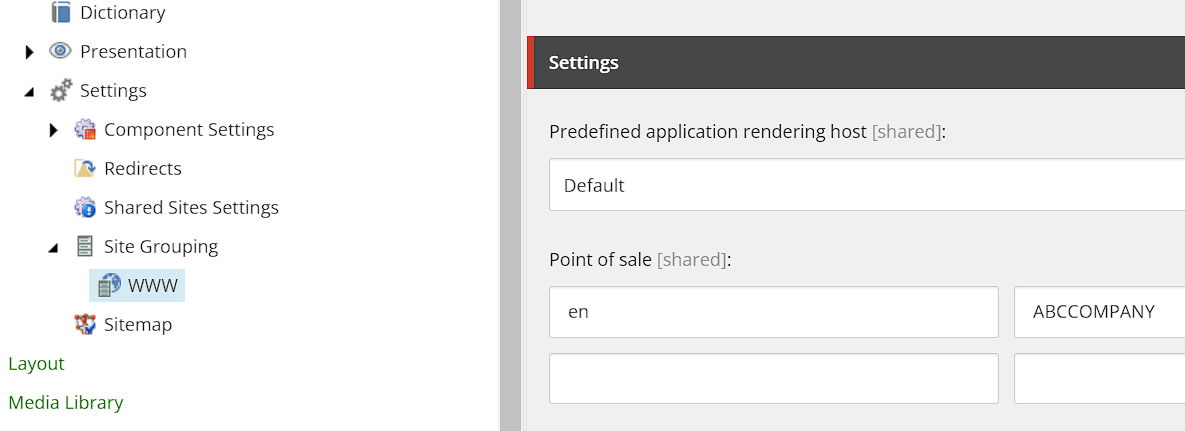
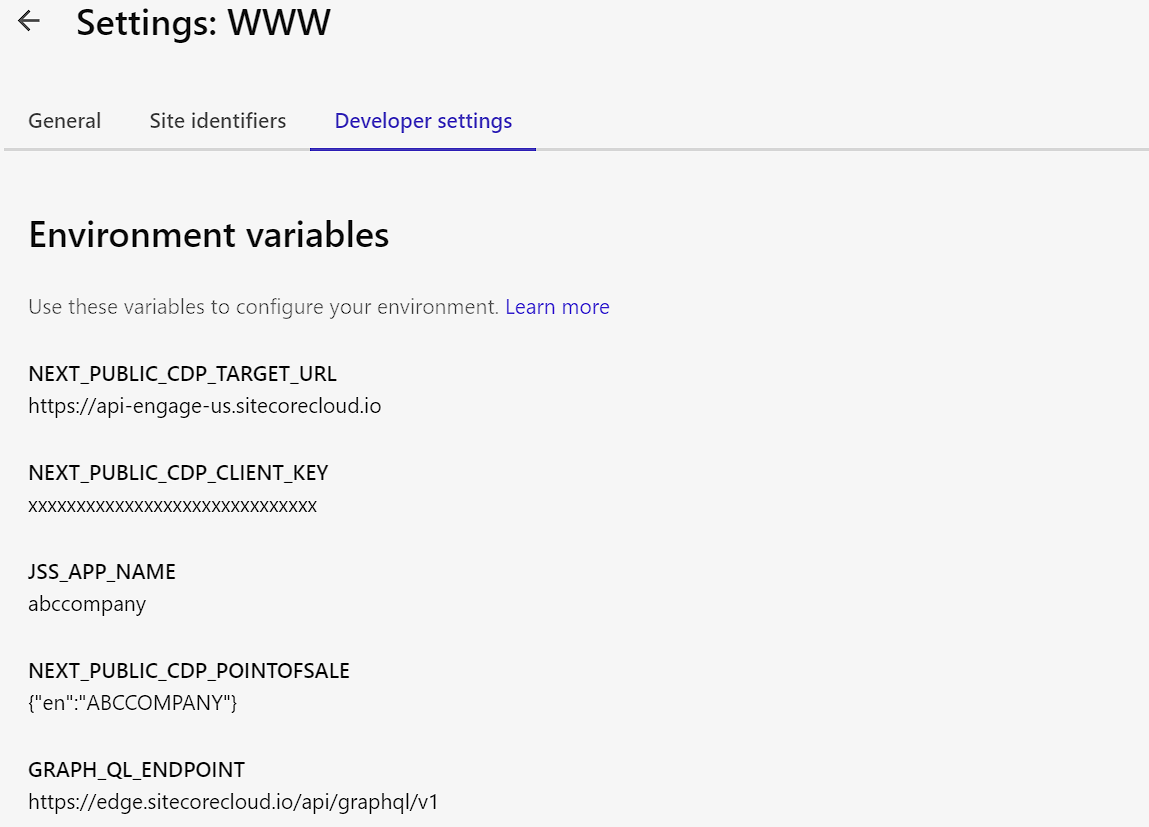
Once you’ve saved and published your Point of Sale you can now obtain the ENVIRONMENT VARIABLES needed to be able to synchronize analytics with CDP.
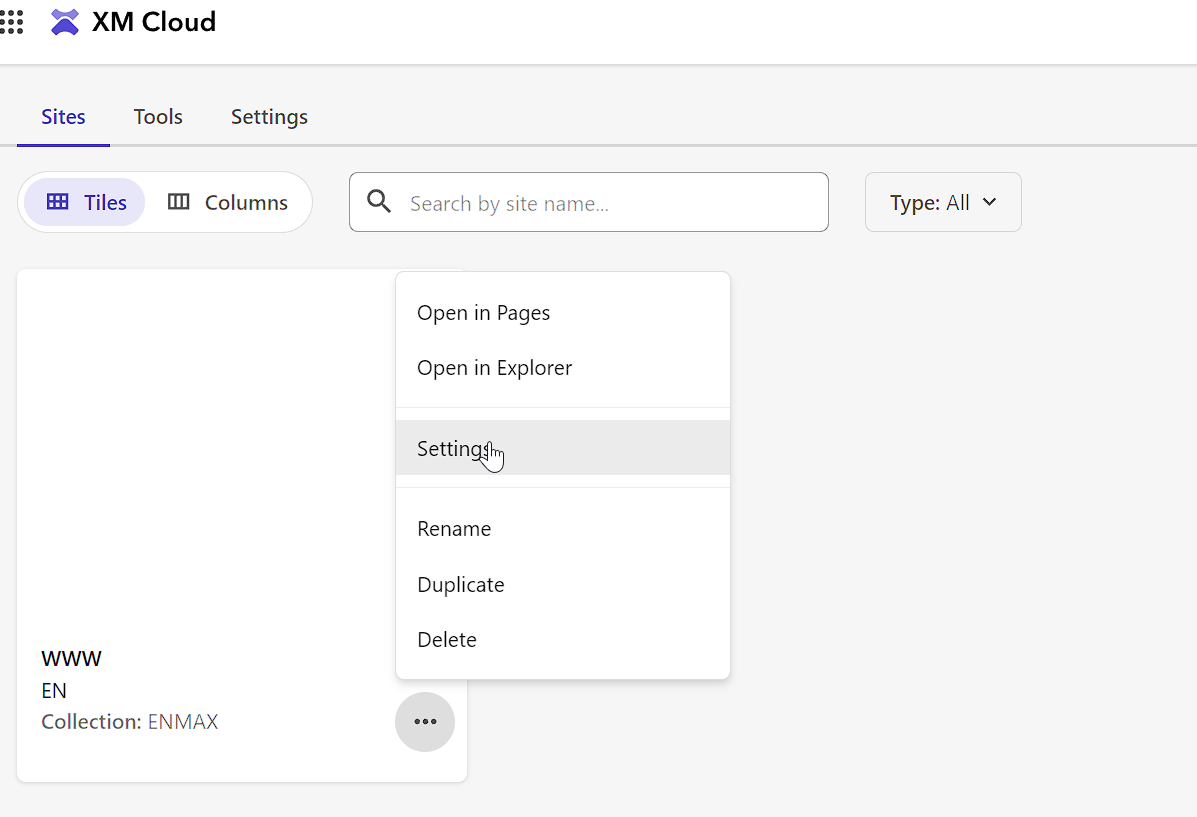
Clicking the nine squares in the top left of Content Editor, you will be take to the Site listing. Click on the ... for the site you are setting up, and then click Settings.
Once there you’ll see how you need to setup your front-end ENVIRONMENT VARIABLES.
Setting Up CDP In A Next.js Front-End
Thankfully Sitecore, since moving to Sitecore JSS 21, now has a CDP component already setup for you. You’ll be able to find it at this location (see here in GitHub). Now you can, if you need to, even use this component, modified of course, in a plain Next.js site if need be but this works out of the box to capture Page View events in CDP.
import {
  CdpHelper,
  LayoutServicePageState,
  SiteInfo,
  useSitecoreContext,
  PosResolver,
} from '@sitecore-jss/sitecore-jss-nextjs';
import { useEffect } from 'react';
import config from 'temp/config';
import { init } from '@sitecore/engage';
import { siteResolver } from 'lib/site-resolver';

/**
 * This is the CDP page view component.
 * It uses the Sitecore Engage SDK to enable page view events on the client-side.
 * See Sitecore Engage SDK documentation for details.
 * https://www.npmjs.com/package/@sitecore/engage
 */
const CdpPageView = (): JSX.Element => {
  const {
    sitecoreContext: { pageState, route, variantId, site },
  } = useSitecoreContext();

  /**
   * Creates a page view event using the Sitecore Engage SDK.
   */
  const createPageView = async (
    page: string,
    language: string,
    site: SiteInfo,
    pageVariantId: string
  ) => {
    const pointOfSale = PosResolver.resolve(site, language);
    const engage = await init({
      clientKey: process.env.NEXT_PUBLIC_CDP_CLIENT_KEY || '',
      targetURL: process.env.NEXT_PUBLIC_CDP_TARGET_URL || '',
      // Replace with the top level cookie domain of the website that is being integrated e.g ".example.com" and not "www.example.com"
      cookieDomain: window.location.hostname.replace(/^www\./, ''),
      // Cookie may be created in personalize middleware (server), but if not we should create it here
      forceServerCookieMode: false,
    });
    engage.pageView({
      channel: 'WEB',
      currency: 'USD',
      pointOfSale,
      page,
      pageVariantId,
      language,
    });
  };

  /**
   * Determines if the page view events should be turned off.
   * IMPORTANT: You should implement based on your cookie consent management solution of choice.
   * By default it is disabled in development mode
   */
  const disabled = () => {
    return process.env.NODE_ENV === 'development';
  };

  useEffect(() => {
    // Do not create events in editing or preview mode or if missing route data
    if (pageState !== LayoutServicePageState.Normal || !route?.itemId) {
      return;
    }
    // Do not create events if disabled (e.g. we don't have consent)
    if (disabled()) {
      return;
    }

    const siteInfo = siteResolver.getByName(site?.name || config.jssAppName);
    const language = route.itemLanguage || config.defaultLanguage;
    const scope = process.env.NEXT_PUBLIC_PERSONALIZE_SCOPE;

    const pageVariantId = CdpHelper.getPageVariantId(
      route.itemId,
      language,
      variantId as string,
      scope
    );
    createPageView(route.name, language, siteInfo, pageVariantId);
  }, [pageState, route, variantId, site]);

  return <></>;
};

export default CdpPageView;
You can however enhance the initialization such that you can set the cookie expiry, amongst others. The most important however, is if you want to enable personalization, you need to set webPersonalization to true.
cookieExpiryDays: 365,
forceServerCookieMode: false,
includeUTMParameters: true,
webPersonalization: true
Let’s break down all the parameters.
clientKey- The Client Key from your CDP instance.targetURL- Needs to be one of the following:"https://api-engage-eu.sitecorecloud.io""https://api-engage-ap.sitecorecloud.io""https://api-engage-us.sitecorecloud.io"
cookieDomain- Should be.abccompany.comor something similarcookieExpiryDays- Number of days before the cookie expires.cookiePath- What URL path should be in the URL to send a cookie.includeUTMParameters- Default istrue. UTM parameters are those such asutm_source,utm_medium,utm_campaign,utm_term,utm_content.forceServerCookieMode- Specify whether to set cookies from the client or from the server.webPersonalization- If the attribute is not set on the client side, or if you set the value tofalse, personalization will not be available.pointOfSale
Important Note
If you’re used to using Netlify or Vercel for your front-end you may realize that if you don’t have a domain hooked up that Personalize doesn’t work. The reason for that is that root level domain cookies on [vercel.app](http://vercel.app) are not allowed. For perhaps obvious reasons, as this could interfere with other sites.
As such, in order to properly enable Personalize, you will require a domain attached to your front end. For example: abccompany.com
Validation
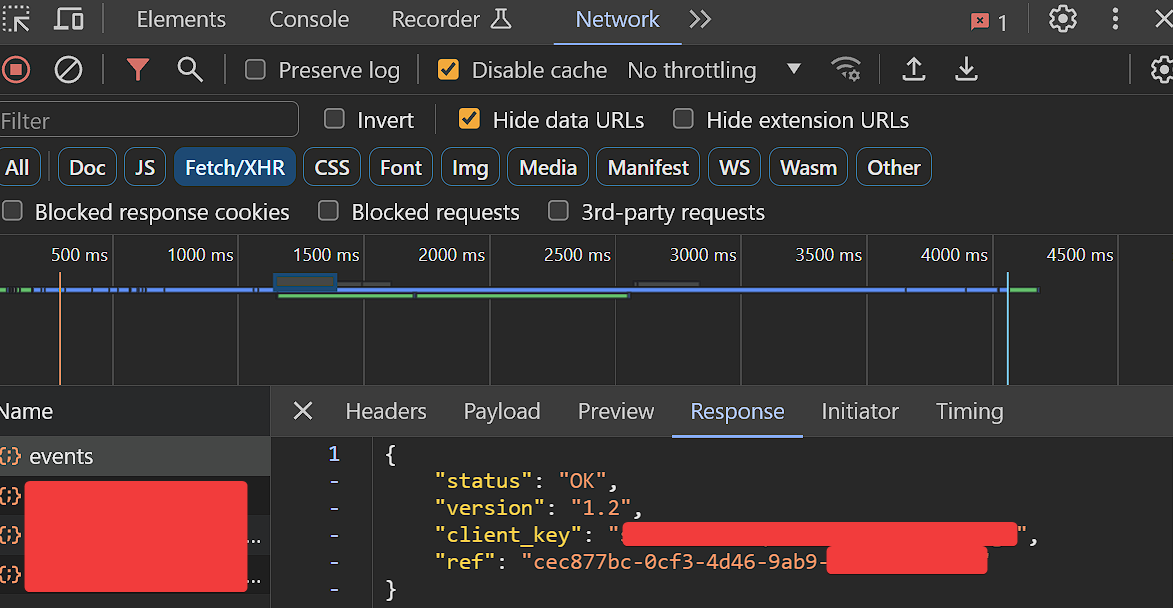
Once we get the front-end up and running, we can validate that CDP is working properly by going into the Network tab of your Developer Tools and ensure you can see the event call and the OK response as shown below.
