At first glance, it seems deceivingly easy to delete custom renditions in Content Hub: you simply select the unwanted rendition, click the trash can icon, confirm its deletion, et voilà! But, alas. By following these steps alone, you will still see your deleted renditions as download options across your instance.
In this article, I’ll walk you through the complete process to effectively remove a media rendition and ensure it’s no longer available as a download option. Additionally, I'll provide a few troubleshooting tips to handle common pitfalls.
Note: This blog assumes a basic understanding of extending the media processing flows to create new asset renditions and is only applicable for superusers.
Why Remove Renditions
If your instance has custom media renditions that aren't in regular use, it's a good idea to remove them (it's not recommended to delete out-of-the-box renditions). This helps prevent your instance from being bogged down with unnecessary renditions. Keep in mind that each asset upload in Content Hub triggers the creation of that asset in every available rendition, which means the more renditions you have, the more storage you use. The best practice is to maintain only the essential number of renditions that adequately serve the most common user download needs.
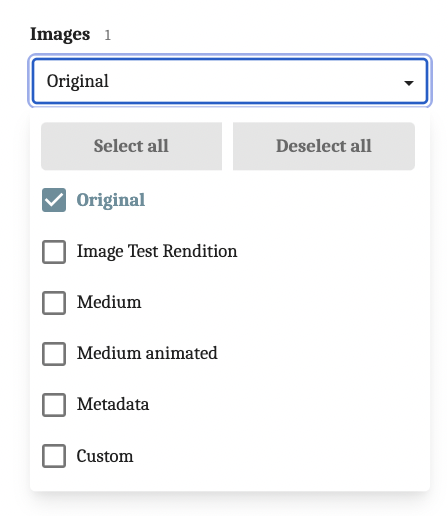
The other reason to remove redundant renditions is to keep the user download experience simple and straightforward. For example, these are the current rendition options available in my instance when I trigger a download order from the Assets page:
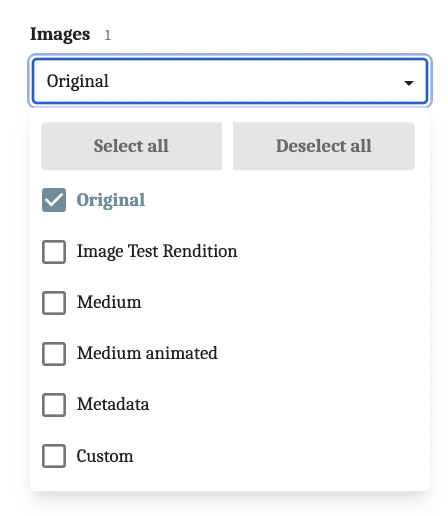
From a superuser’s perspective, having this many options is fine. But I want a more streamlined experience for other users, and to achieve this, I’ll need to tighten this list up. In the following walk-through, I’ll show you how to remove the custom rendition I created (aptly named “Image Test Rendition”) but also how to “hide” OOTB renditions like Medium or Metadata.
How to Remove Renditions
Starting with the easy part (kidding, I promise it’s all easy):
-
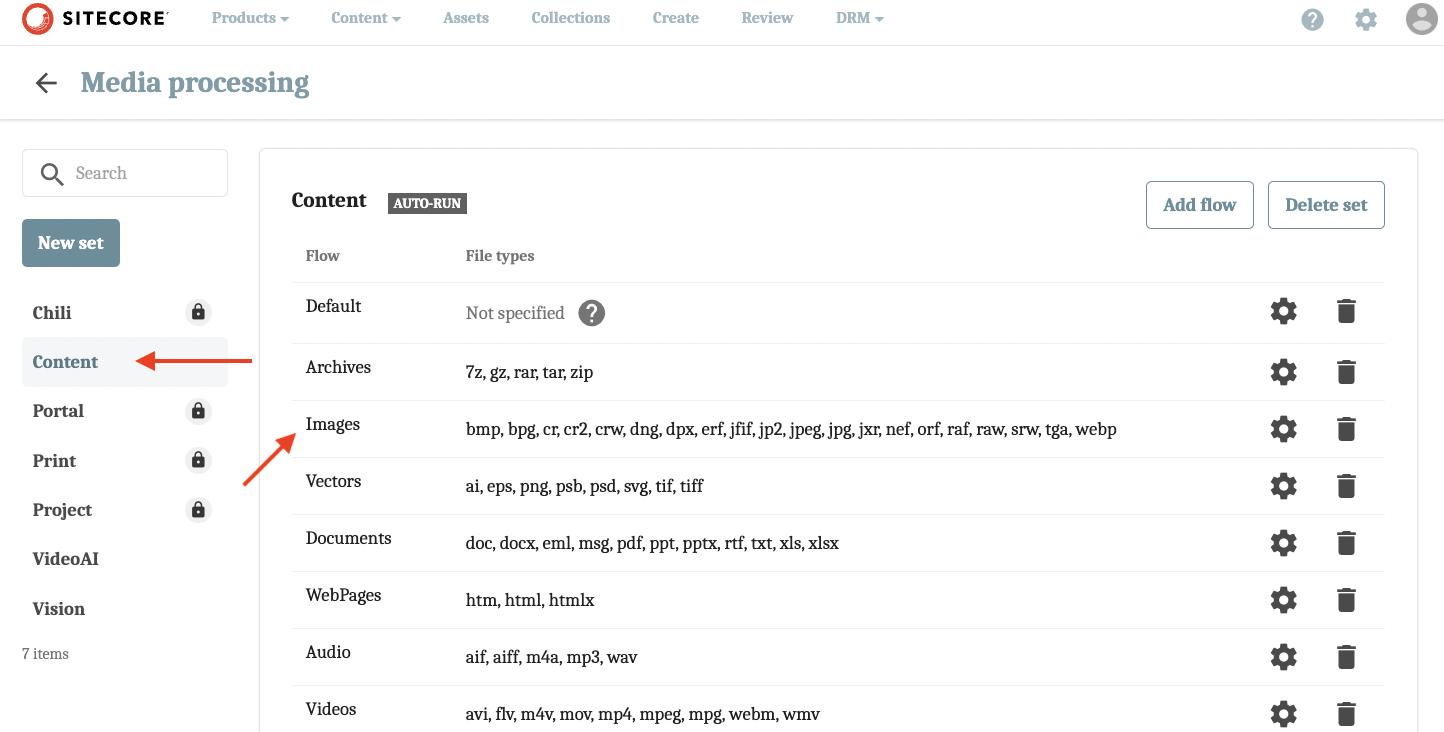
Navigate to the Media processing page via the Manage page. Then, click on the appropriate media processing set. For this example, I’m going to click on the Content set, then the Images flow.
-
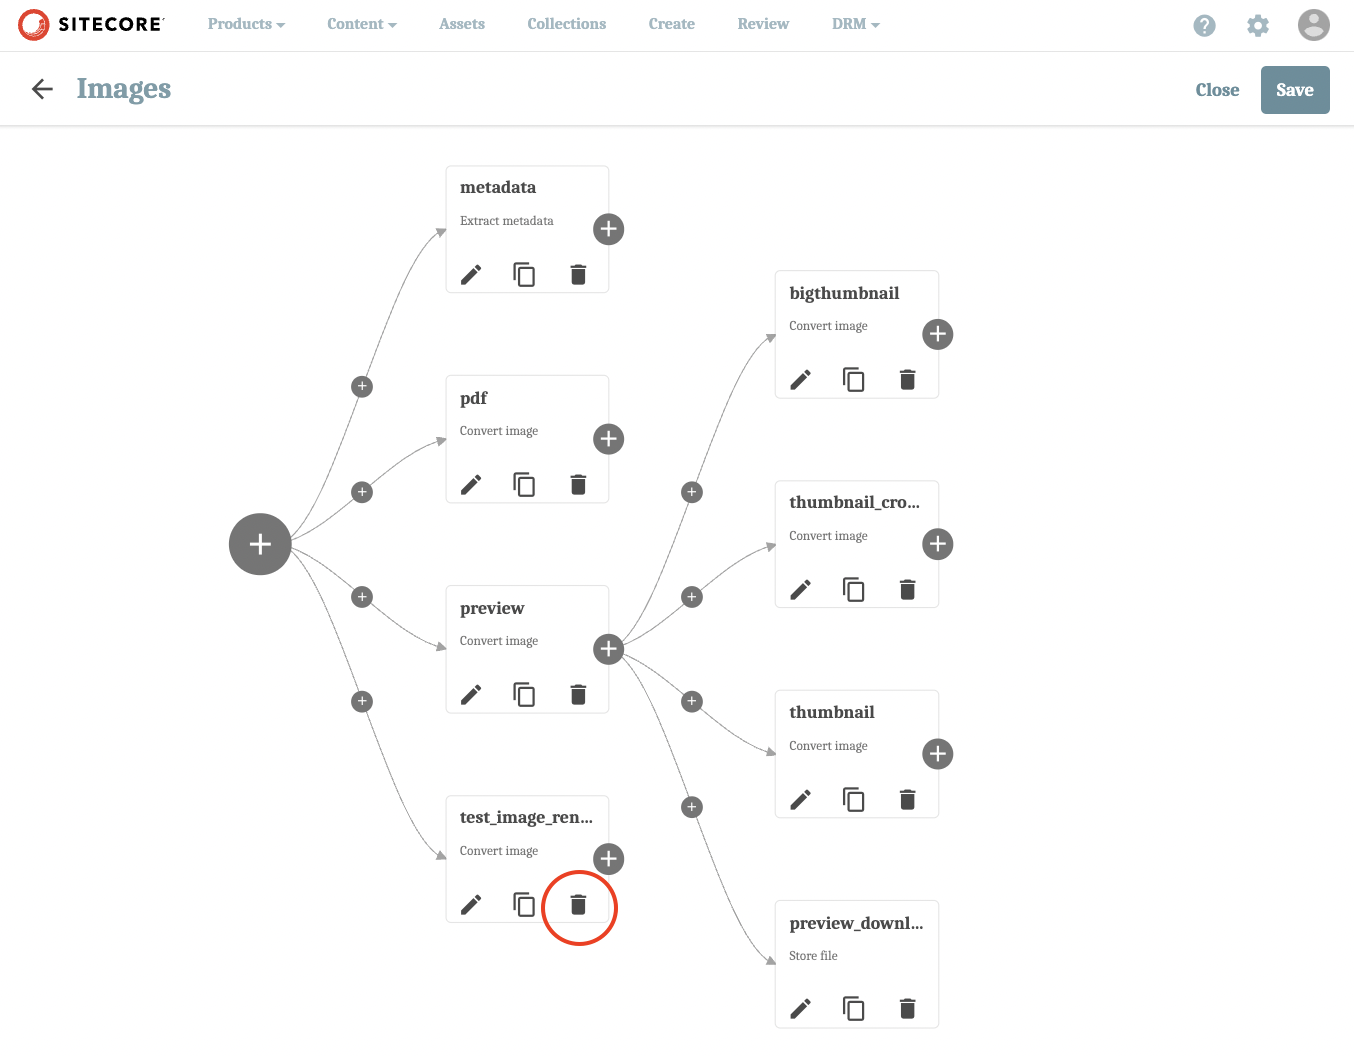
Click the trash icon of the rendition you want to delete. In my case, this is the “Image Test Rendition”.
-
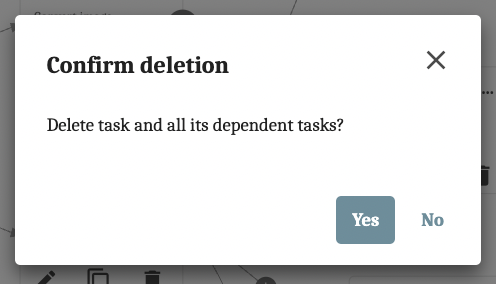
Confirm deletion by clicking Yes on the pop-up modal.
-
Click Save.
- Go back to the Media processing page (just hit the back button) and click Publish.
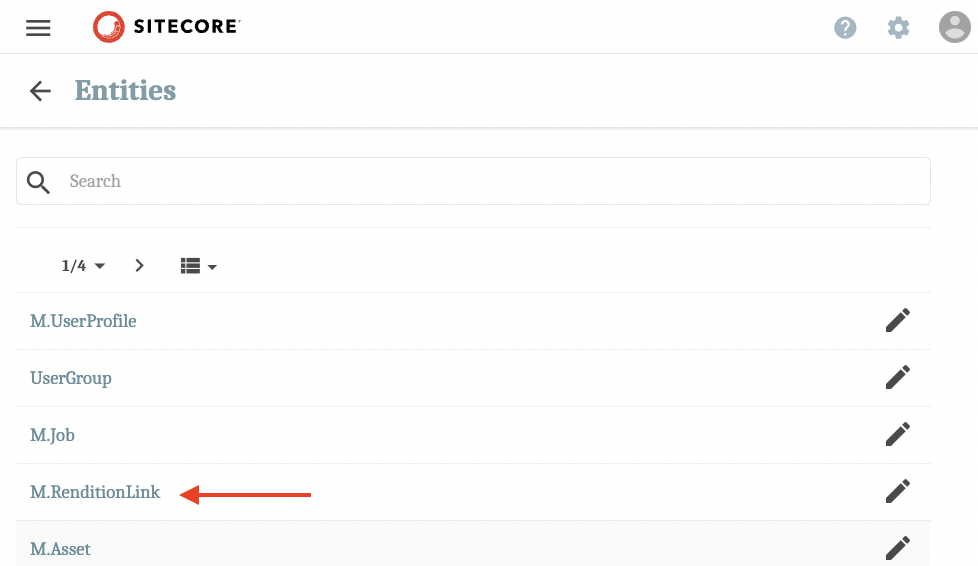
This next part is what stumped me. It’s a very simple process, but one that took me a few hours of smashing around to figure out (Shout out to this Q&A on the Sitecore Stack Exchange for the answer!) To completely remove a rendition, you need to delete it from M.RenditionLink.
-
From the Manage page, click on Entities, then select M.RenditionLink.
-
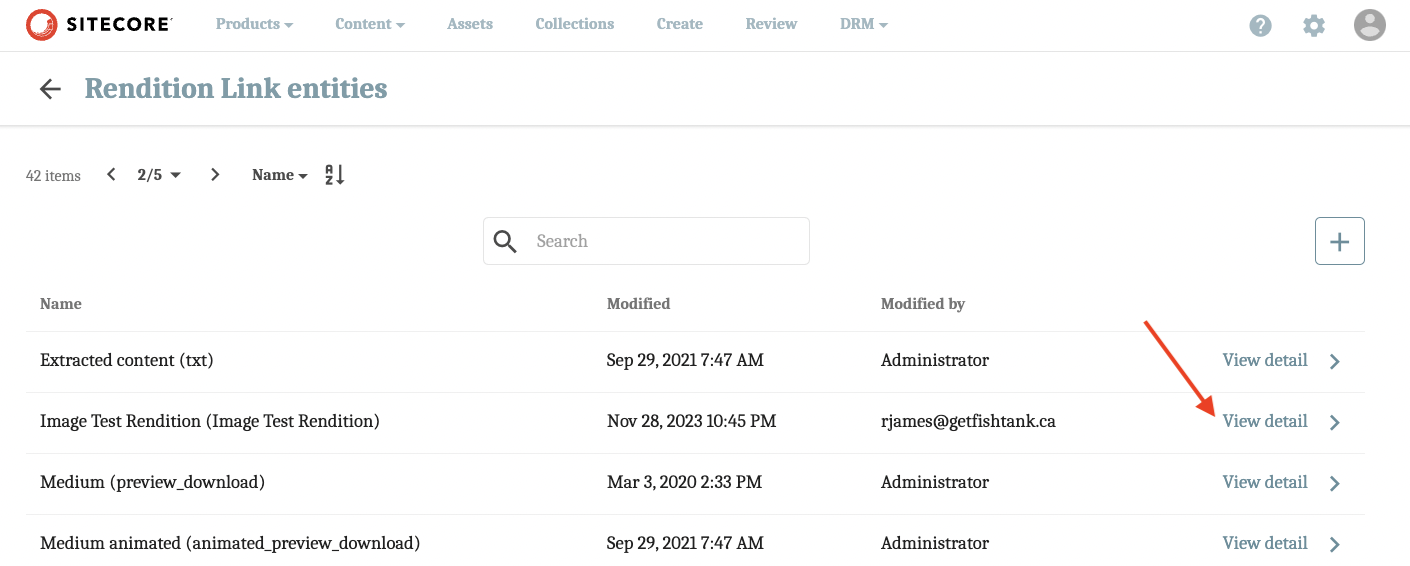
Locate the rendition you want to be removed, then click View detail.
-
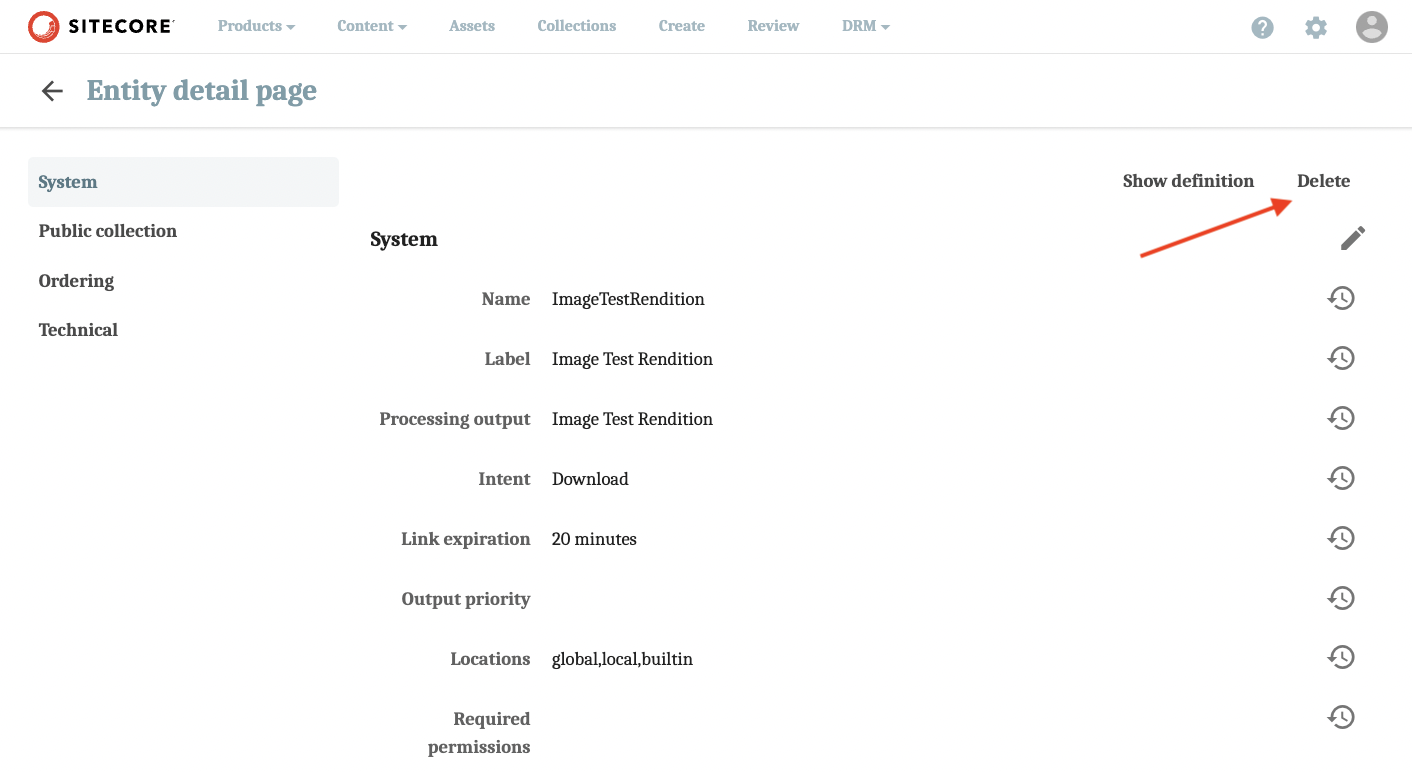
Click Delete and then confirm deletion via the confirmation modal.
That’s it! Your custom rendition should now have disappeared from the download options. But if it didn’t, try the following:
Clear the Cache
Go to the Cache manage page, then click on the Clear all button as well as the Clear button beside the Renditions line item.
Hard Refresh Your Browser
Hold down shift and press the refresh button on your browser. If you’re using Chrome, you can also empty the cache by right-clicking on the page and from the menu selecting Inspect. Then right-click on the refresh button of your browser and select Empty Cache and Hard Reload.
Refresh Renditions
From the Assets page, click on the Actions menu then Refresh renditions. This operation will refresh all your assets and may take some time depending on how many you have. Use with caution.
How to Hide OOTB Renditions From the Download Options
This use case is primarily for when you want to “turn off” OOTB renditions, like Preview or Thumbnail, so your users can’t download them. You don’t want to delete these renditions as they are a critical element for the visibility of your assets on other pages, like the Assets page. For example, the Thumbnail rendition allows you to preview your asset in search results, like on the Asset, Create, or Review pages. You would never want to delete the thumbnail rendition, but you may not want to make it available for download.
There are a few different ways to achieve this, like configuring relevant user permissions for M.Asset and M.File, or by setting specific renditions for download, but both merit their own blog post, so we’re only going to focus disabling renditions via the Media processing page.
Referencing my original list of download options, I want to remove all but Original and Custom. We just deleted Image Test Rendition, so now all that’s left is Medium, Medium animated (which I think might be a bug as this is for the GIF processing flow, but it's showing up in the Images processing flow. To be discussed.), and Metadata.
-
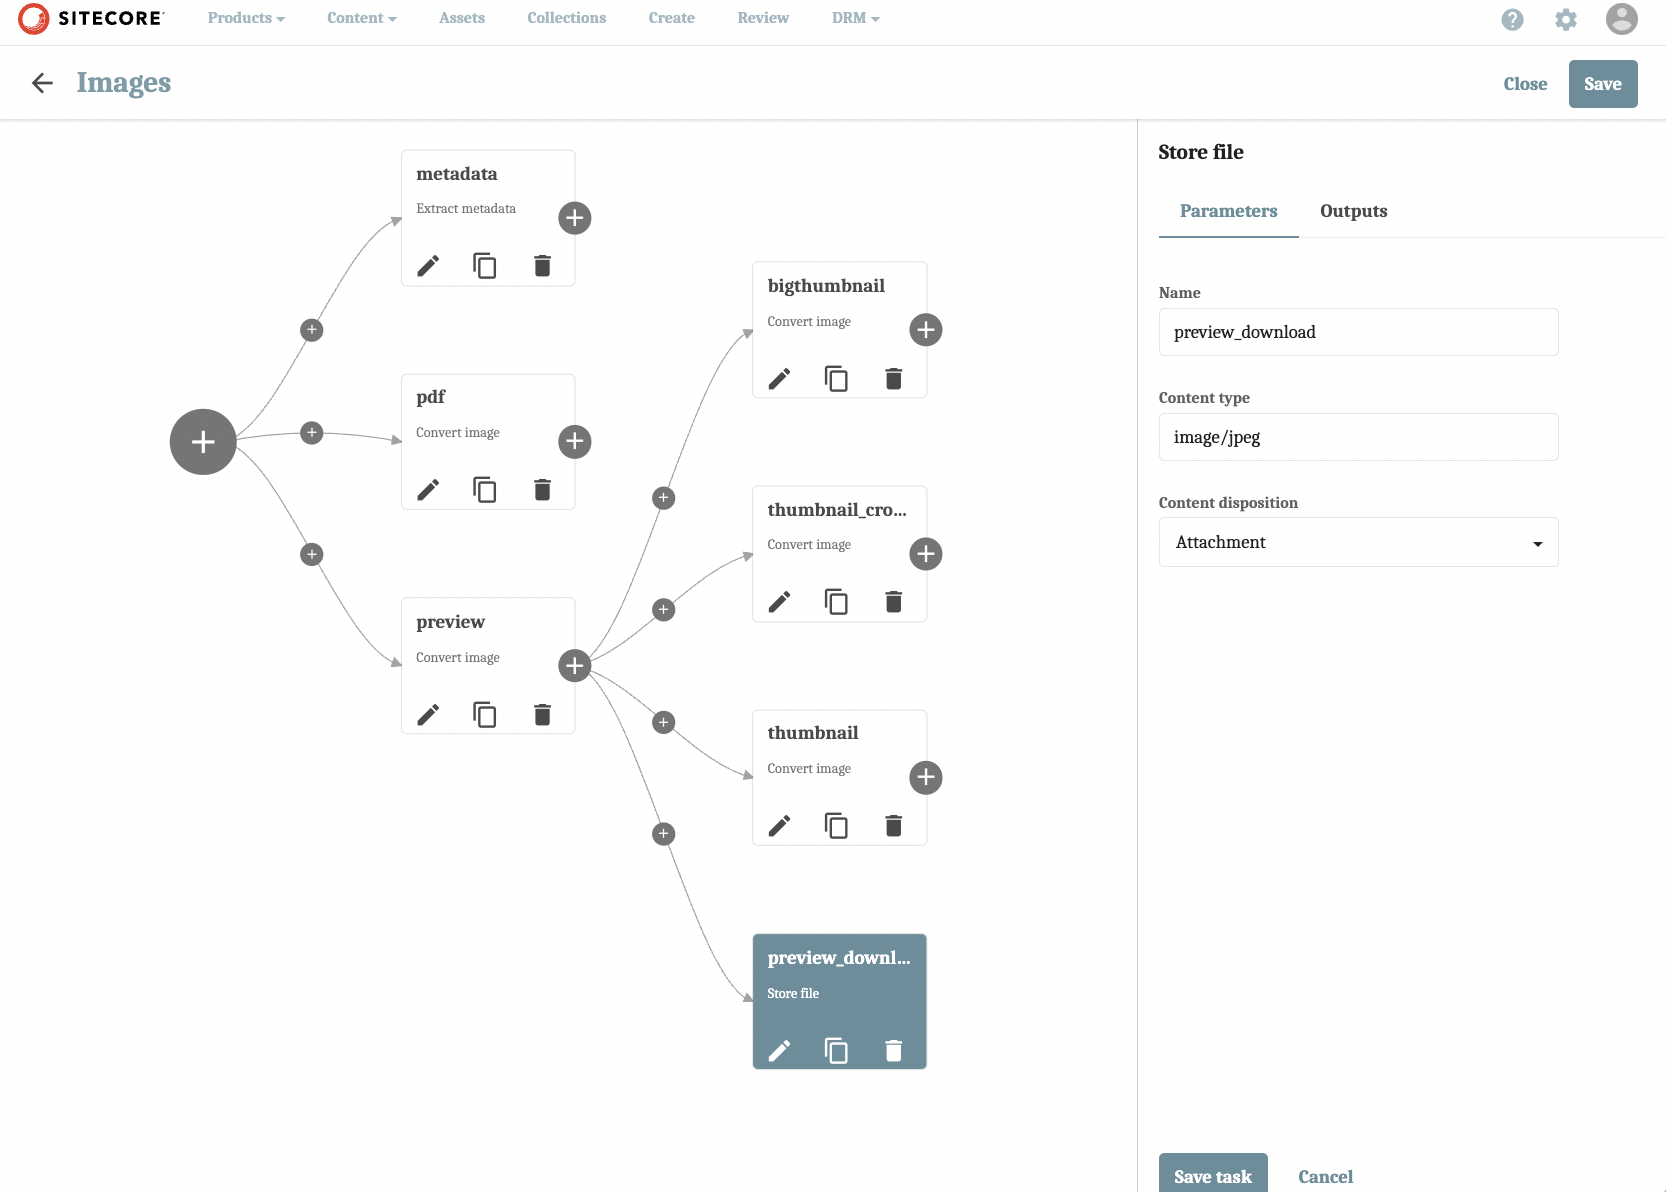
From the processing flow of your choice (in my case, the Images processing flow), click on the rendition you don’t want to be downloadable. I want to start with Medium, but you might notice there isn’t a task named Medium. Medium actually refers to Download Preview and allows users to download a preview rendition of the asset (the preview task is not the rendition used for the download preview). I’m going to click on preview_download.
-
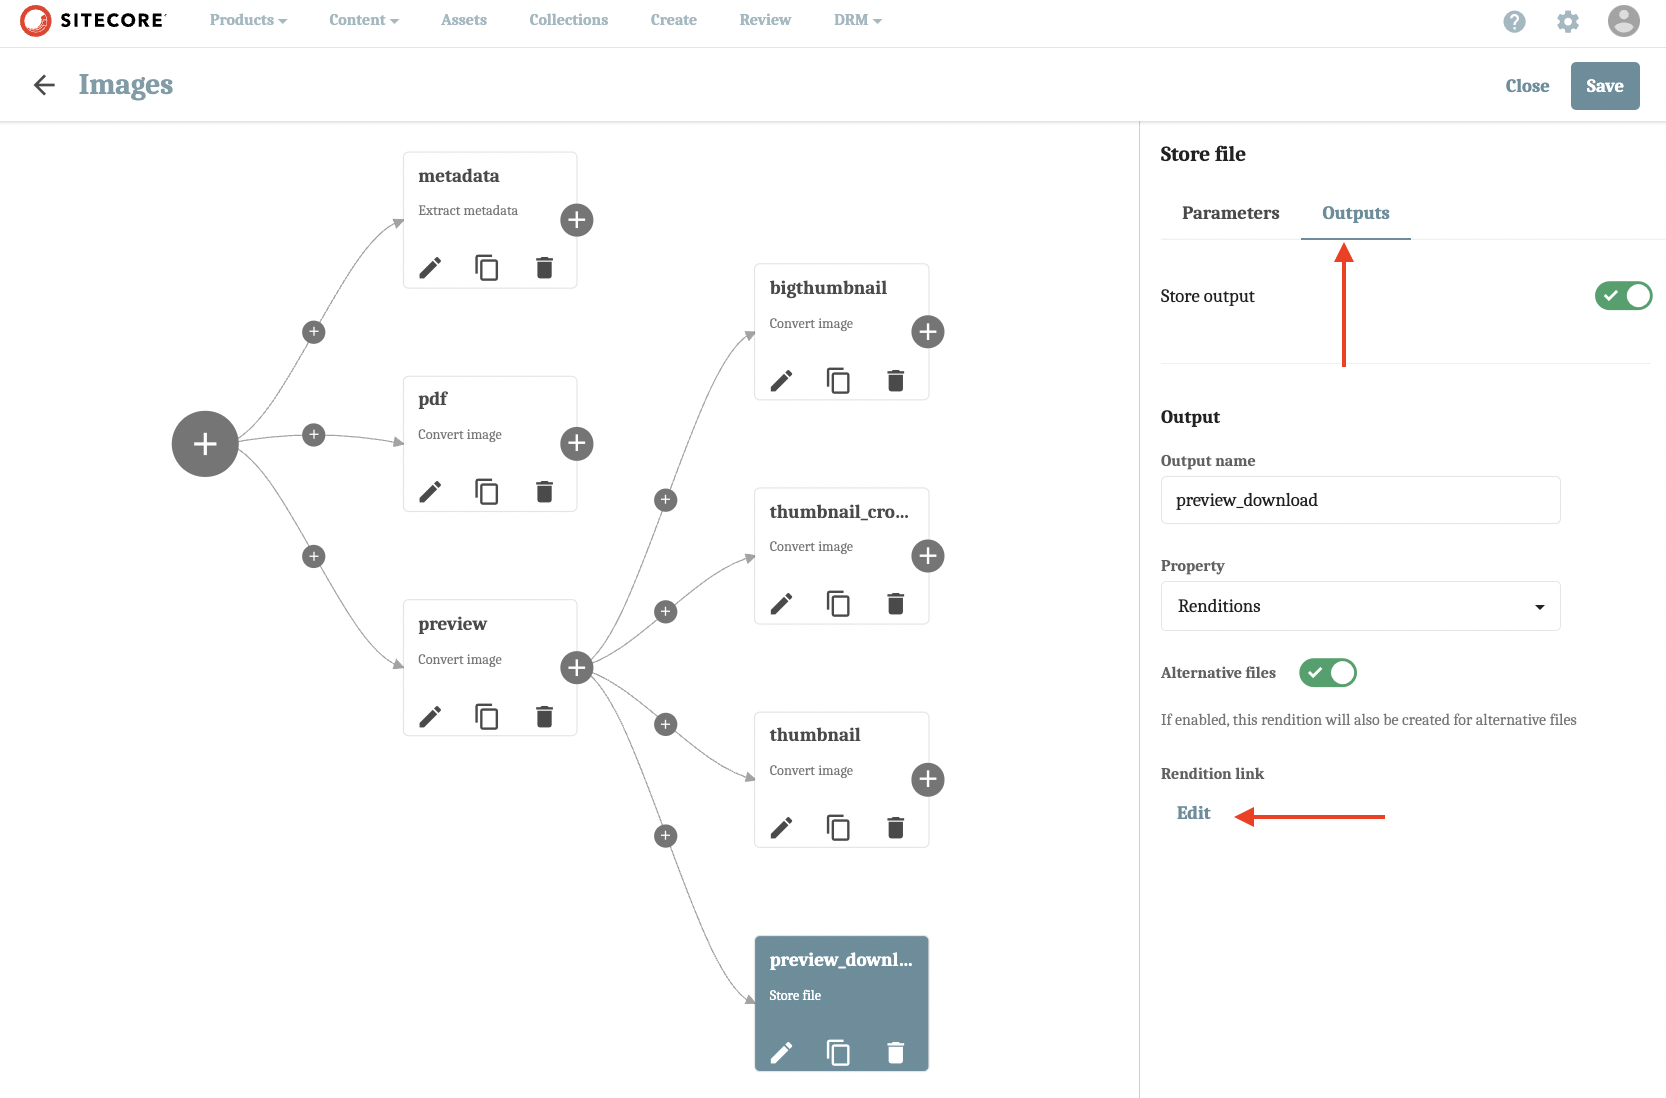
Click on the Outputs tab, then Edit under the Rendition link heading.
-
Scroll down, and then deselect Download from the drop-down menu under the Intended area of use header. Click Save.
- Save task then click Save at the top of the panel, then click the back button and press Publish for your changes to be reflected.
Your download options list should now look something like this:
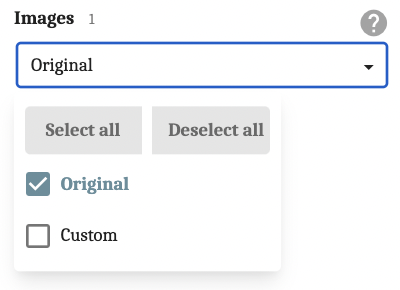
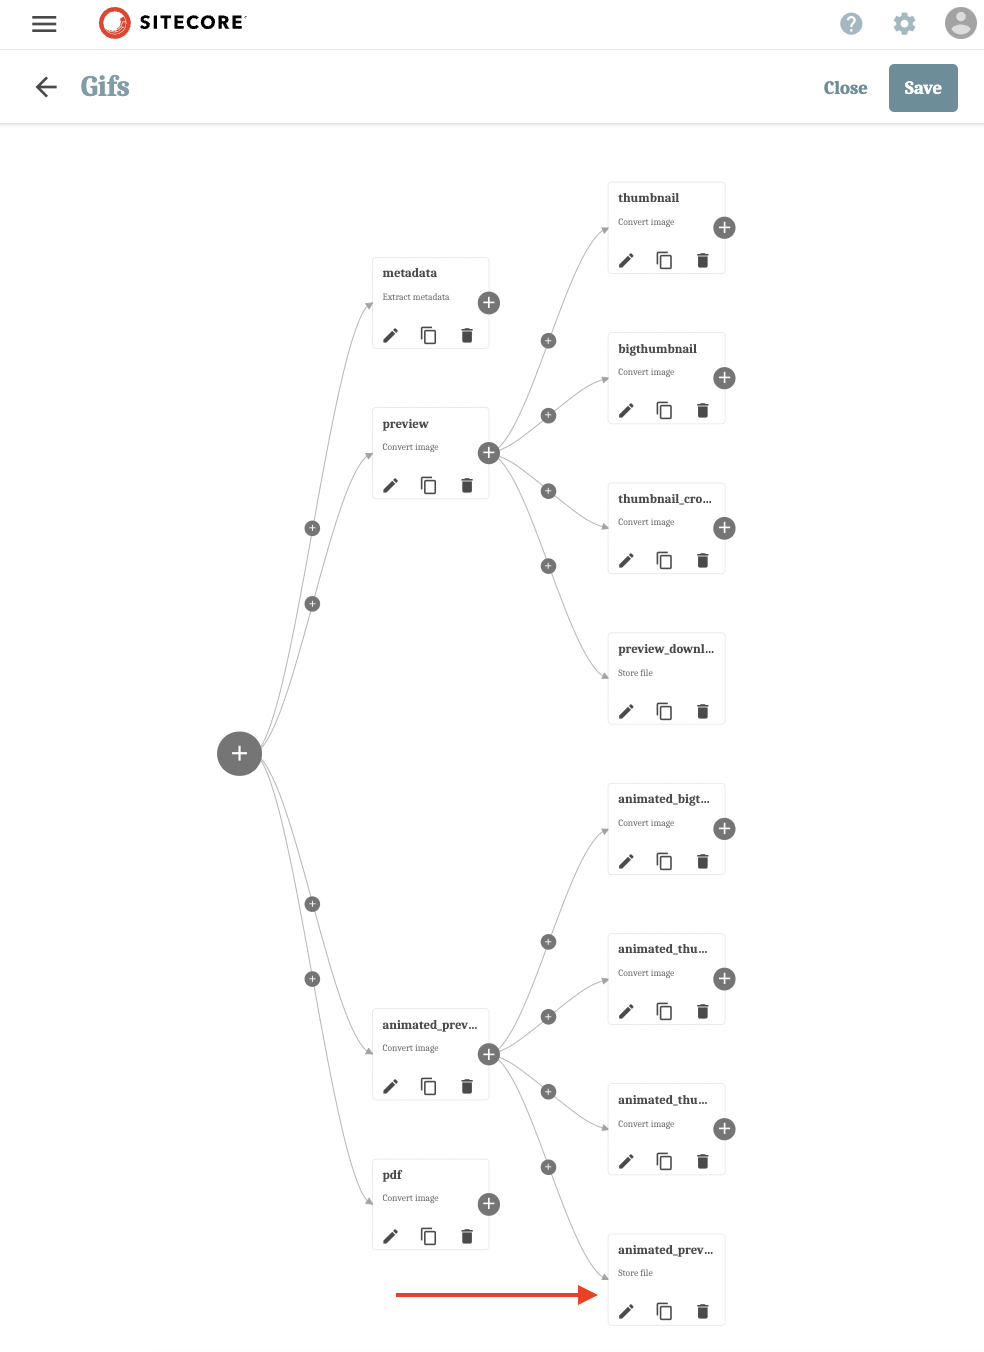
Follow this same process for the Metadata task in the Image processing flow. As for the Medium animated rendition, you’ll have go back to the Media processing page and select the processing flow for Gifs content. From there, select the animated_preview task and repeat the steps above. Maybe there’s a practical reason for showing this specific rendition for an image-type asset, but I don’t think this is expected behaviour.
Common Pitfalls
Here are a few things to be aware of working with Media processing in Content Hub:
Not Saving Your Changes Properly
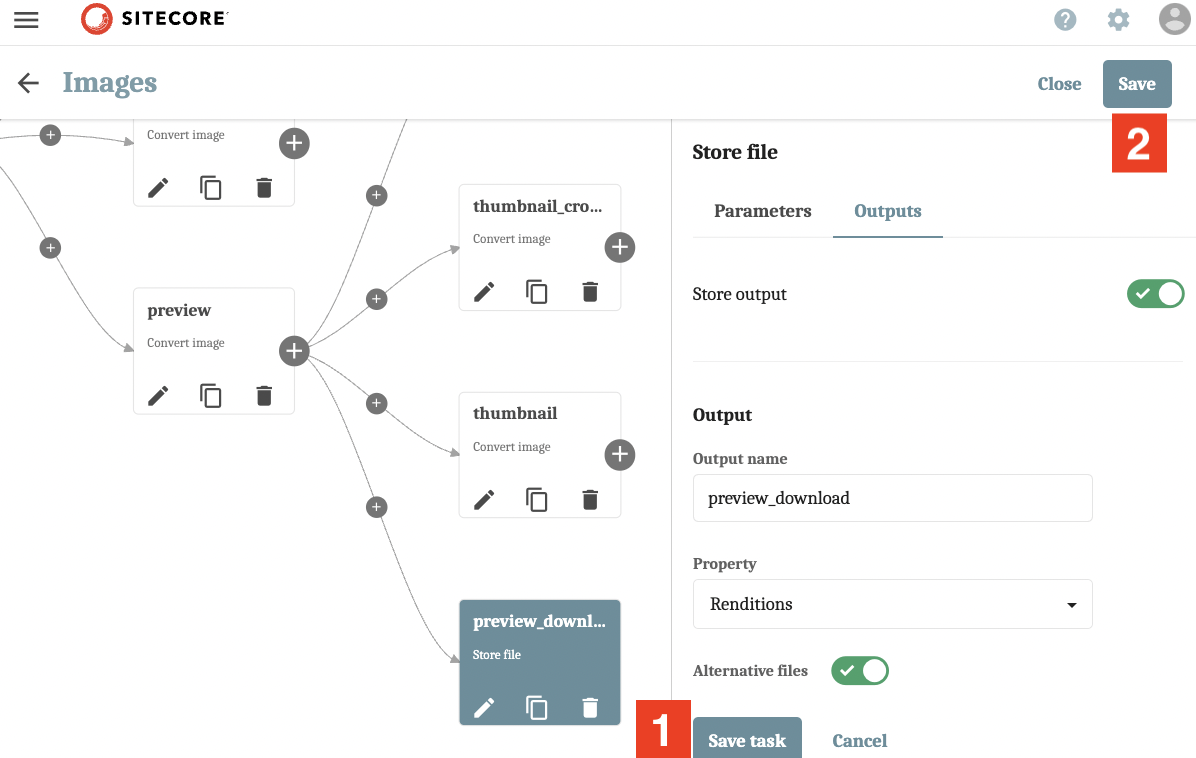
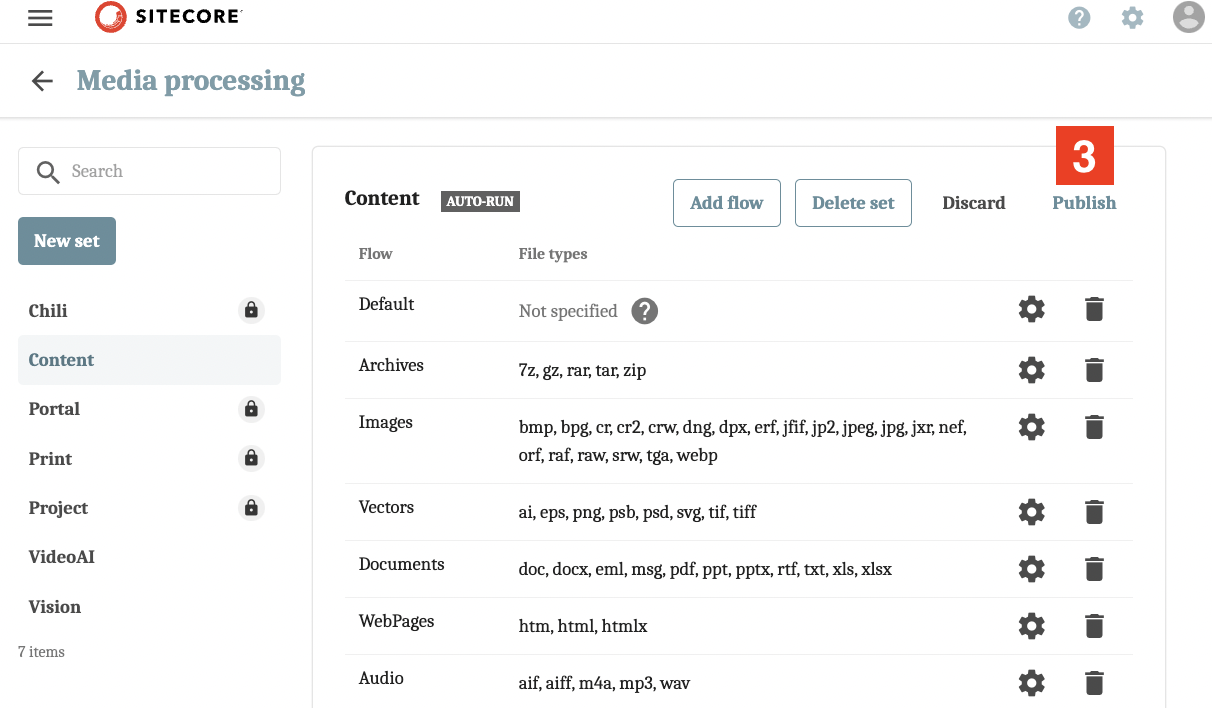
Saving your changes properly is (obviously) essential to applying your changes, and includes an extra step that’s often overlooked: publishing. To save changes to a task in a media processing flow, first click Save task, then the Save button at the top-right. Next, navigate back to the Media processing page and click Publish.
Accidentally Deleting a Rendition
Don’t panic! Hopefully, you have only deleted one instance of the rendition, either from the Media processing flow page or the M.RenditionLink entity page. If that’s the case, reference the instance you have to recreate it.
Creating Too Many Renditions
It’s recommended to keep the number of custom renditions very limited. Instead, try using the existing renditions, a custom download using the available preset dimensions (great for social use), or transformations.
That’s all! Hope this blog saves you some time and/or frustration. Have more questions or want to share your own insight on managing renditions in Sitecore Content Hub? Shoot me a message at [email protected].


