What is E-E-A-T, and Why is it important?
EEAT (formally “EAT”), stands for Experience, Expertise, Authoritativeness, and Trustworthiness, is a key element in Google's Search Quality Rater Guidelines. These guidelines help human evaluators assess the quality of googles search results. Since the internet has recently become flooded with spam and low-quality AI-generated content, it's become pretty important for Google to identify trustworthy sources that offer accurate, honest, safe, and reliable information. If you want to learn more about EEAT make sure you read my previous blog: “How E-E-A-T Will Improve Your Sitecore SEO Rankings.”
In this blog, I will be covering what are some strategic changes you can make to your pages and its content, providing some case studies on high quality EEAT websites, and showing you how you (or your developers) can easily implement some of the new code inside Sitecore/XM Cloud.
Table of Contents
- Content Strategies
- Case Studies & Examples
- How To Implement in Sitecore/XM Cloud
- Final Thoughts on Implementing EEAT in Sitecore
Content Strategies
The most important implementation tip I can give is to put more focus on your authors; primarily in two main places: On the content they have written, and on their author bio page. In this section, I'm going to talk about to do exactly that, in both locations.
How to Build a Strong Author Bio Page
One of the most important parts of having a strong bio page is constructing a strong and unique bio for each of your authors. Now, don't panic; you don't need to write a bio for every one of your authors yourself! Simply ask your authors to write a bio about themselves and provide them with some guidelines to follow. Here is an example showcasing both my Experience and Expertise that helps show my Authority on SEO. This could be my bio on my author page, or I could use it inside the content itself like I am now: **
I worked for multiple years at an online media agency ran by Cory Janssen, the founder of Investopedia, that operated a plethora of diverse online platforms. As a leading developer, I was required to find and implement technical SEO updates, as well as implement any content updates that required technical knowledge. Using this experience, I used my expertise to grow a trivia website to rank on the front page of Google for numerous search queries.
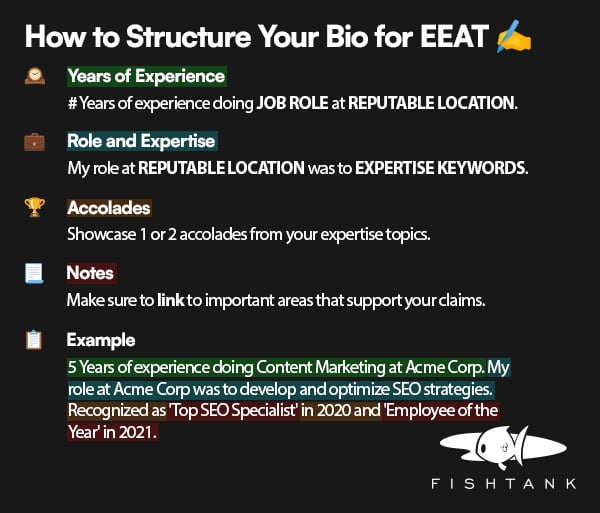
Looking over my bio, you can see important parts that help highlight what I'm going for. I'm not only talking about my experiences, but also discussing and linking to the important areas that support my claims. If you want to mimic my bio example from above, my general structure is:
# Years of experience doing BLANK at REPUTABLE LOCATION. My role at REPUTABLE LOCATION was to EXPERTISE KEYWORDS. Showcase 1 or 2 accolades from your expertise topics.
Schema / JsonLd
One thing that lots of people overlook is the impact of Schema on their websites. I've mentioned it a few times in this article already, but having a good schema structure allows Google to more easily understand what your site is about, but also give you the opportunity to link to other reputable sources that your authors have contributed to. There are a few ways to add Schema to your website, but for this example I'm going to be using JsonLd since it's the easiest to implement with Sitecore.
The two main types you will want on your Author Bio pages are ProfilePage and Person. These will help solidify your author's credibility. The more details you can put in your Schema, the better it will be, so try to include as much as you can from the Schema.org pages.
Some of the most important things to include are:
- Ensuring external links are listed in the schema
sameAslinks to other websites the author has contributed on- Social links to help show they are a real person
- Name & URL to their Bio page
- Their Bio
- Job Title
Here is some example JsonLd for the ProfilePage type.
  <script type="application/ld+json">
        {
           "@context":"https://schema.org",
           "@type":"ProfilePage",
           "mainEntity":{
              "@type":"Person",
              "name":"John Doe",
              "url":"https://example.com/our-writers/john-doe",
              "sameAs":[
                 "https://www.facebook.com/john-doe",
                 "https://www.twitter.com/john-doe",
                 "https://www.linkedin.com/in/john-doe"
              ],
              "jobTitle":"Farmer",
              "image":"https://example.com/image.jpg"
           },
           "agentInteractionStatistic":{
              "@type":"InteractionCounter",
              "interactionType":"https://schema.org/WriteAction",
              "userInteractionCount":27
           },
           "mainContentOfPage":"Lorem ipsum dolor sit amet...",
           "primaryImageOfPage":"https://example.com/image.jpg",
           "speakable":"Lorem ipsum dolor sit amet...",
           "reviewedBy":"Exmaple Orginization",
           "name":"John Doe"
        }
  </script>
Other Important Aspects
You should make sure to have an image of your author listed; this will help your readers understand that the author is a real person. You should also provide external links to the author's social media directly on the page (outside just the schema). This provides your readers with a way to directly contact your authors and shows Google that you are making contacting authors easy and accessible.
One of the most important things you can't forget to do (I mean, it's actually the entire point of the author page) is to list all the content that the author has written or reviewed on their profile. This is great for the author since they can now share this link to showcase their portfolio, it allows readers to find other content that they might like on your site, and most importantly, it allows Google to find a direct link between your author and all their content.
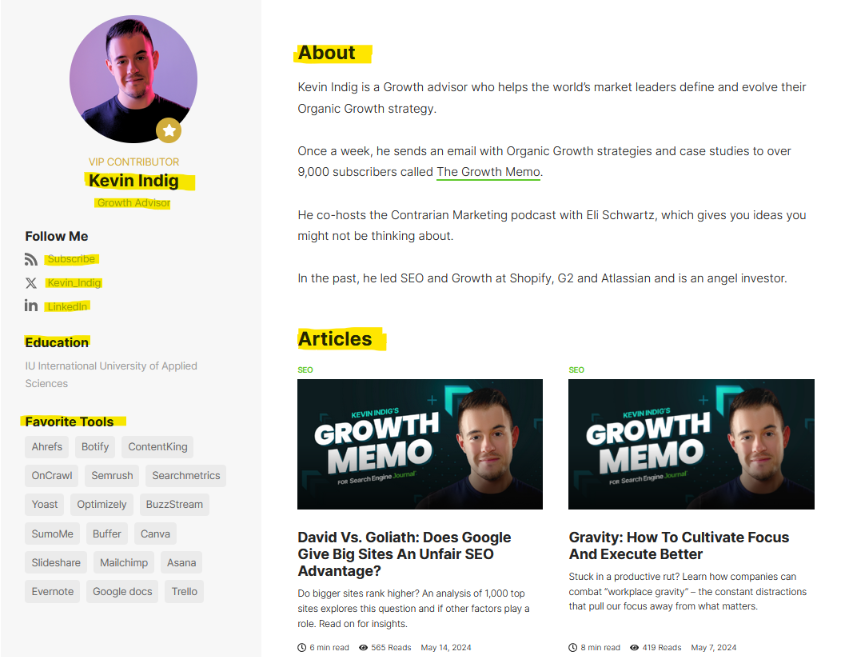
Here is a great example from Search Engine Journal, you can see that they have listed the Author's Bio, Articles, Name, Job Title, Social Media Links, Education, and Expertise/Tools in an easy to ready format.
How to Showcase Your Authors on Your Content Pages
Showcasing your authors on your content pages is much easier than building out an entirely new author bio page. That said, the first step is linking to that custom bio page. This will give Google a direct link to a hub of your authors' content, allowing them to immediately see their expertise. It's very common to link to this page twice: once at the top of your article in the 'Written by' section and again in a second, more in-depth 'About the Author' section below the article.
At the top of your article, you can just list the author's name (with it linking to the bio page) and the date posted/edited. This is just a quick and simple way for users to get to the bio page.
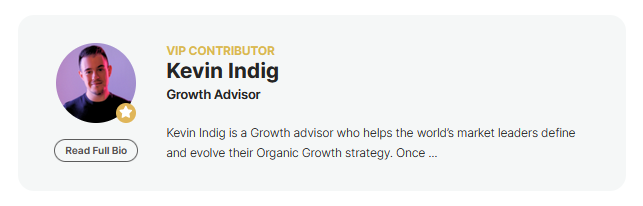
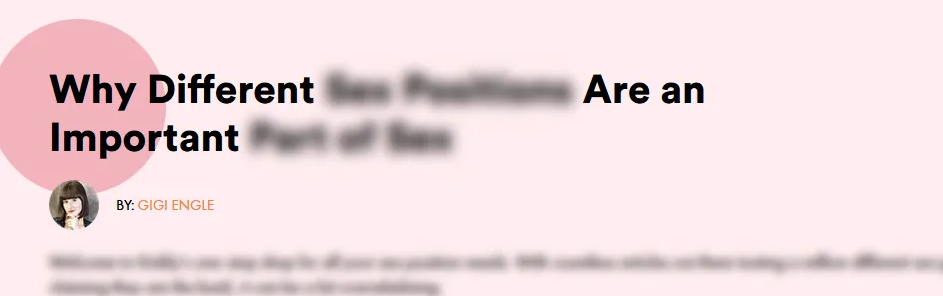
At the bottom of your article, in the 'About the Author' section, you can start to provide the user with a glance at the author's expertise. You can put a picture of the author, their name, job title, and bio. This area can be as long or short as you’d like, but it's common to display a short bio that is slightly different from the full bio on the author's page, or an excerpt of the author's longer bio. Then you can display a direct link that prominently states 'Read More about John Doe.' Here is another example from Search Engine Journal:
Schema / JsonLd
Just like on the Bio pages, it's important to put schema on all your pages, especially the content pages.
Luckily, if you've already created the ProfilePage schema for your Bio pages, we can reuse the
Person type from that! You just need to add some JsonLd to the page that contains the Person object. Here is an
example!
<script type="application/ld+json">
{
   "@context":"https://schema.org",
       ... //Other JsonLd Object can go here
      {
         "@type":"Person",
         "@id":"https://example.com/our-writers/john-doe#authorBio",
         "name":"John doe",
         "url":"https://example.com/our-writers/john-doe",
              "sameAs":[
                 "https://www.facebook.com/john-doe",
                 "https://www.twitter.com/john-doe",
                 "https://www.linkedin.com/in/john-doe"
              ],
              "jobTitle":"Farmer",
              "image":"https://example.com/image.jpg"
          "description":"Lorem ipsum dolor sit amet...",
      }
   ]
}
</script>
Case Studies & Examples
I've already shown a great example from Search Engine Journal, but that's just one example of implementing ways to increase your EEAT, and now I want to highlight a few more creative ways that could help spark some ideas for your XM Cloud site!
Verified by a Reputable External Source
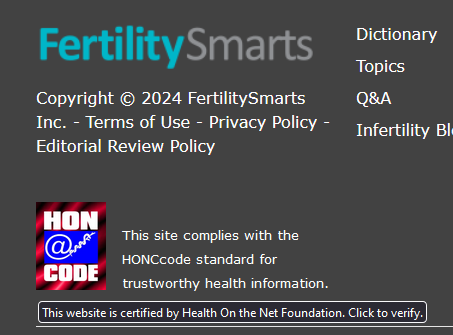
One way to increase your trustworthiness is to get verified by a trusted third party. For example, I'm using a fertility website called Fertility Smarts, which focuses on educating parents about conceiving.
Since Fertility Smarts is a Your Money, Your Life (YMYL) topic, both Google and readers need to be reassured that the content they are reading is trustworthy. One of the methods they used was getting verified by the Health On the Net Foundation, which allowed them to put a “Health On the Net Code” image and link directly in their footer. This link allows readers to see that the website is trusted, and since the image links directly to a Health On the Net verification page specifically for Fertility Smarts, Google can immediately verify the validity of this claim!
Reviewed by a Trusted Source
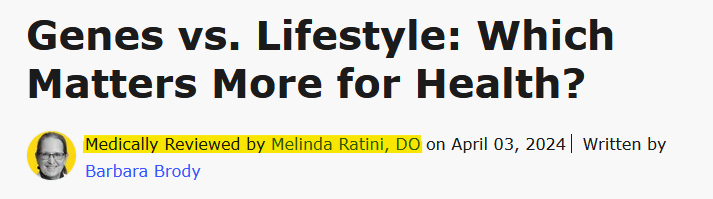
It's important to show that each individual piece of content has been reviewed by a professional in that field. For my example, I'm going to use WebMD because it's a YMYL topic, but this is still valuable for non-YMYL topics as well. (A tech website could get a C# article reviewed by a Senior C# Developer.)
You might not notice it at first, but WebMD is putting more emphasis on the reviewer than the writer. They are promptly stating that this article has been “Medically Reviewed” by a doctor. They are stating that first, before the author's name. Even the headshot, which is usually of the author, is of the reviewing doctor.
Adding Person Schema Outside of Bio and Content Pages
You should be thinking about adding Person Schema to any page that is touched by a reputable source. Here is a direct example that I helped implement, where I saw firsthand the improvements in ranking this provided. On a health-oriented site I've developed on, we had a description on one of our listing pages that explained more about the topic. Despite already being a very large site in the niche, we were ranking at the bottom of the second page of Google.
We decided to get a reputable and trusted person in the niche to rewrite the blurb and directly list them on the page, linking to their bio page and adding Person Schema to the page. Over the course of 1–2 months, we moved from the bottom of the second page to the middle of the first page for this highly competitive keyword.
The important takeaway here is to not only ensure you're correctly linking to bio pages and using the Person Schema on every page possible, but to also look around your site for areas that could be rewritten by a reputable source to help increase the rank of your page.
How to Implement E-E-A-T in Sitecore/XM Cloud
When working with Sitecore, there are many different approaches, balancing configurations and unique code configurations, so I won’t be getting too technical into the implementation. It's likely that a full implementation guide won’t easily fit into a given organization's Sitecore instances and/or setup. Instead, I will be providing some guiding principles that should help you (or your development team) with implementation!
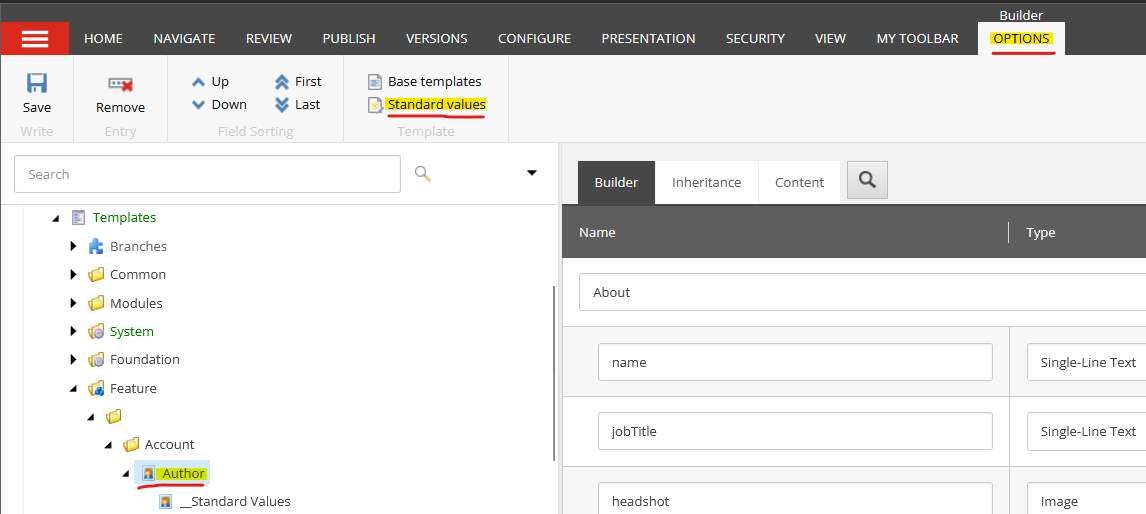
Important Fields to Add to Your Author Template
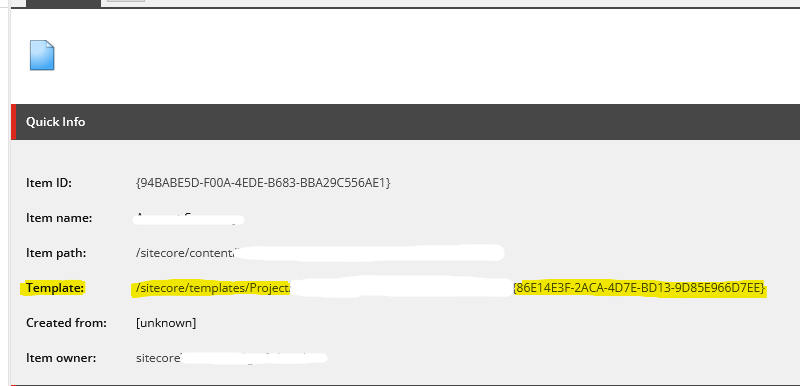
Step one is going to be finding navigating to your Author items template. This is super easy to do - if you select one of your Author items you can see the templates location under the “quick info” section at the top!
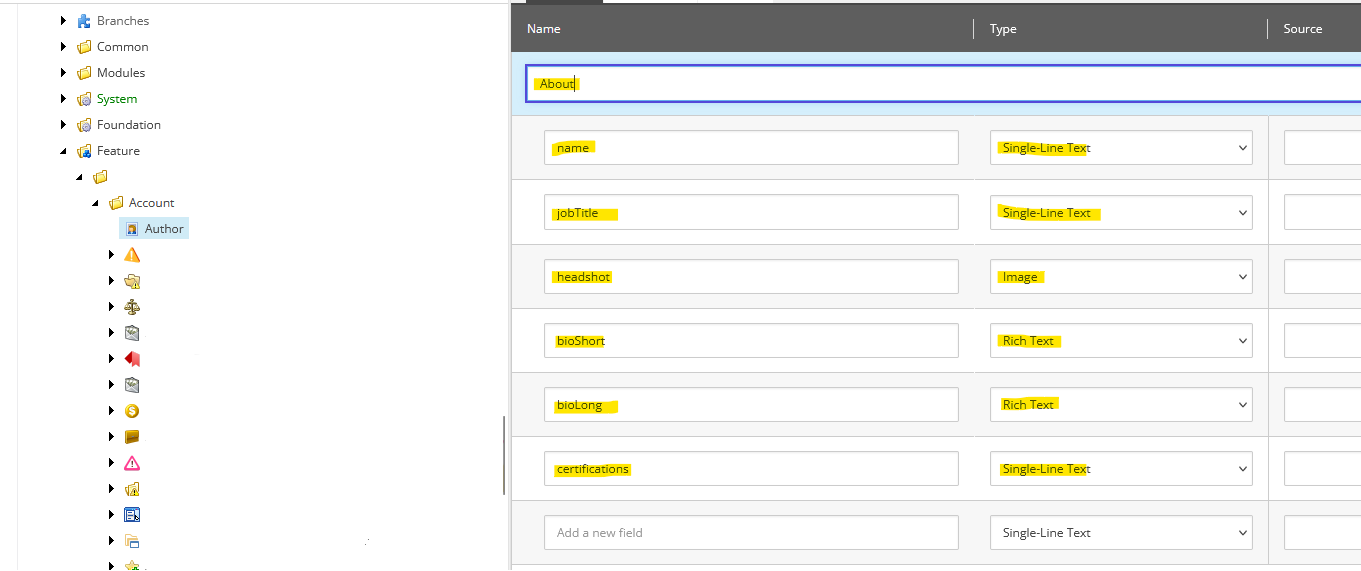
Once we are on your Author template, we want to add as much extra information to the author item as possible! The more creative and niche you can be, the more it will help define your author to Google.
The main items you want to ensure you have are:
- Name
- Job Title
- Image (Headshot)
- Bio
- Short (optional)
- Long
- Certifications
- Social Links
Certifications and social links are just as important as all the other items; they show Google that your author is a
real person and knows what they’re talking about. There are two main ways you can create your certifications. The
most common method is to use a simple single-line text field and input exactly what you want displayed
on the front end or create a comma-delimited list that can be split into “tags” on the front end.
An alternative and more beneficial implementation method is to create a treelist of selectable
certifications that you can use to add directly to your authors. This will:
- Ensure the formatting is the same across all your authors
- Allow for author filtering on your Front end by Certification
- Allow you to link/tag your articles with the same certifications
- This would help with organizing content in the Sitecore
- It will allow you to quickly find potential authors that match a new topic/content outline
I recommend creating a unique section for social links, as this could grow to be quite large as you find new reputable sources to link to. Being creative with your links is also beneficial, as long as you are linking to other reputable sites. Some of the best places to link to would be:
- Personal Portfolio page
- GitHub (for developers)
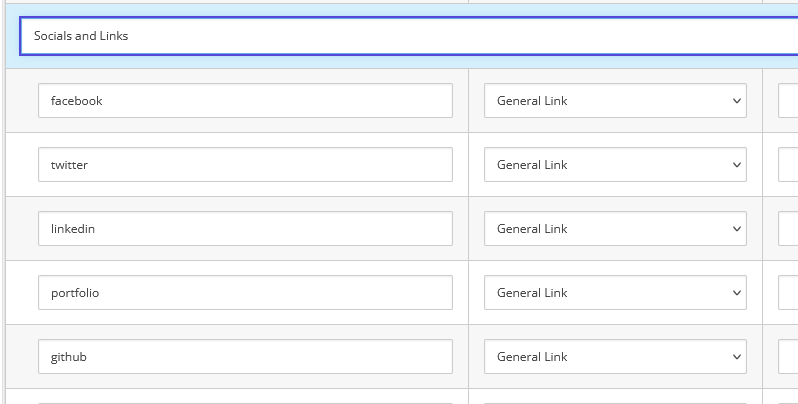
Architecting Your JsonLD Implementation Inside Sitecore
Choosing how you want to implement JSON-LD comes down to where you want to place it on your website. Optimally, you want to have JSON-LD on every page of your site (if possible); however, I understand every business's use case is different. So, I’m going to cover two ways you could implement JSON-LD: one for a potential site-wide approach, and one just for your authors.
Authors Only Approach
This is the easiest approach, since we only need to add a new field to our author template. Create a new Multi-Line Text field on your template, and make sure you add Standard values.

Inside our Standard values for our jsonLd item, we can add an outline for our selected Schema Object.
Feel free to add as many relevant Schema objects here as you would like, but for
the example I'm only going to use the Person object.
The simplest solution would be to enter all your desired properties and hardcode them per author. Then you can get your developer to plot the object onto the page. However, i find this adds unnecessary work that can easily be avoided.
Instead we can create a json object that has placeholder values, that your developer can use to dynamically replace the values on the front end. This way the author code with always be ready to go out of the box for each new author you create.
Example of a custom object:
{
   "@context":"https://schema.org",
       ... //Other JsonLd Object can go here
      {
         "@type":"Person",
         "@id":**idUrl**,
         "name": **fullName**,
         "url": **canonicalUrl**,
              "sameAs": **socialLinks**,
              "jobTitle": **jobTitle**,
              "image": **headshot**,
          "description":**bioLong**,
      }
}
Example front end code replacing those values with Sitecore values:
function replaceValues(sitecoreJsonLd: string, data: yourCustomJsonType): string {
  let jsonLd = structuredClone(sitecoreJsonLd);

  // Replace each placeholder with the corresponding Sitecore value
  jsonLd = jsonLd.replace(
    '**idUrl**',
    data.canonicalUrl + '#' + data.fullName.replace(/\s+/g, '')
  );
  jsonLd = jsonLd.replace('**fullName**', data.fullName);
  jsonLd = jsonLd.replace('**canonicalUrl**', data.canonicalUrl);
  jsonLd = jsonLd.replace('**jobTitle**', data.jobTitle);
  jsonLd = jsonLd.replace('**headshot**', data.headshot);
  jsonLd = jsonLd.replace('**bioLong**', data.bioLong);

  // Cerate an array of social links
  const socialLinksArray: string[] = [
    data.twitter,
    data.linkedin,
    data.facebook,
    data.portfolio,
    data.github
  ];
  const socialLinksJson = JSON.stringify(socialLinksArray);
  jsonLd = jsonLd.replace('**socialLinks**', socialLinksJson);

  return jsonLd;
}
Site-Wide Approach
The approach for a site-wide implementation is very similar to the “Authors Only Approach”, but instead of adding a new multi-line text field to the page, we will create a dedicated JsonLd data item and link it to a drop-down list that we can add to any page we want.
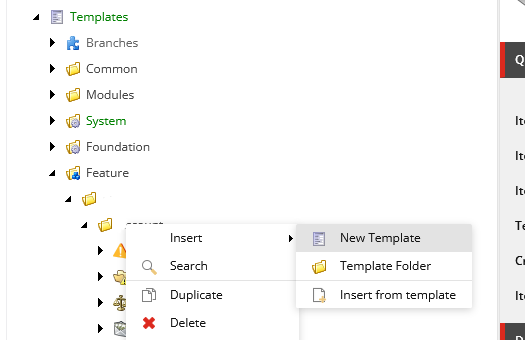
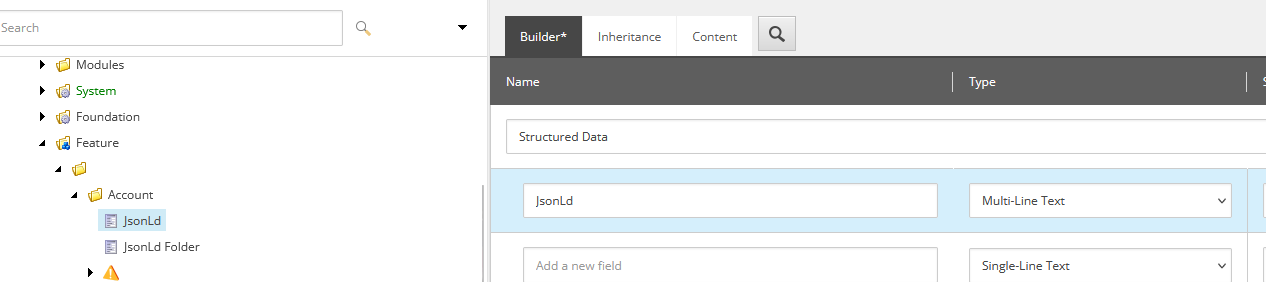
The first step is to create a new template and template folder items that we can use to store the JsonLd types. I'm
just going to keep the naming simple and call the new template JsonLd.
Make sure you add the JsonLd template type as an insert option on the Standard Values for your JsonLd Folder.
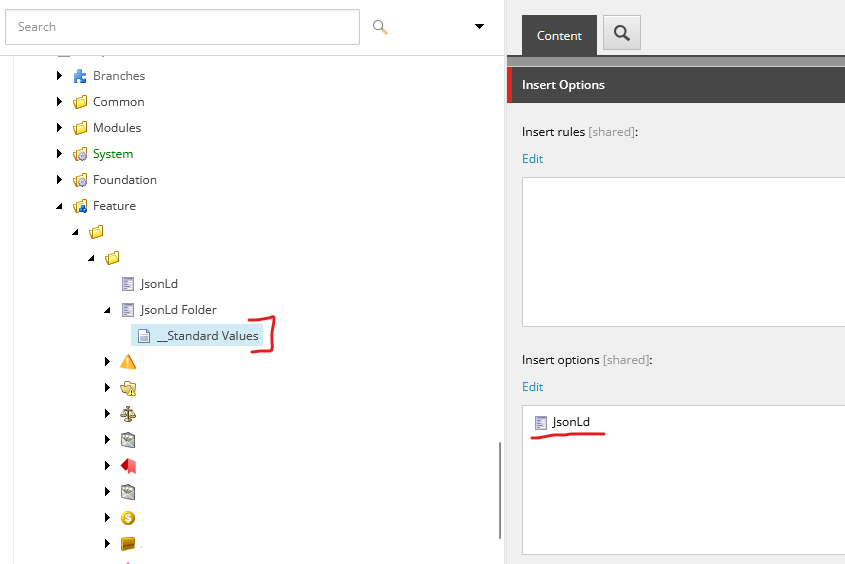
Inside our JsonLd Template, we can add a new Multi-line Text Field that we can use to store out JsonLD. The main concept is the same as the “Authors Only Approach”, but the end result will give us a much more versatile implementation.
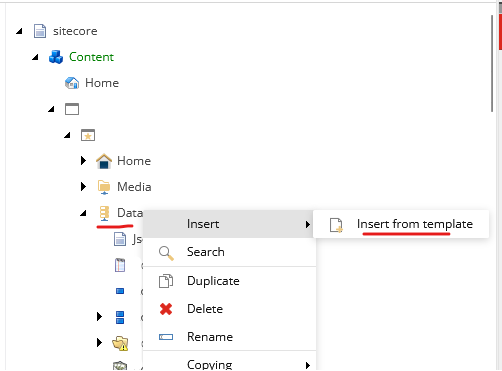
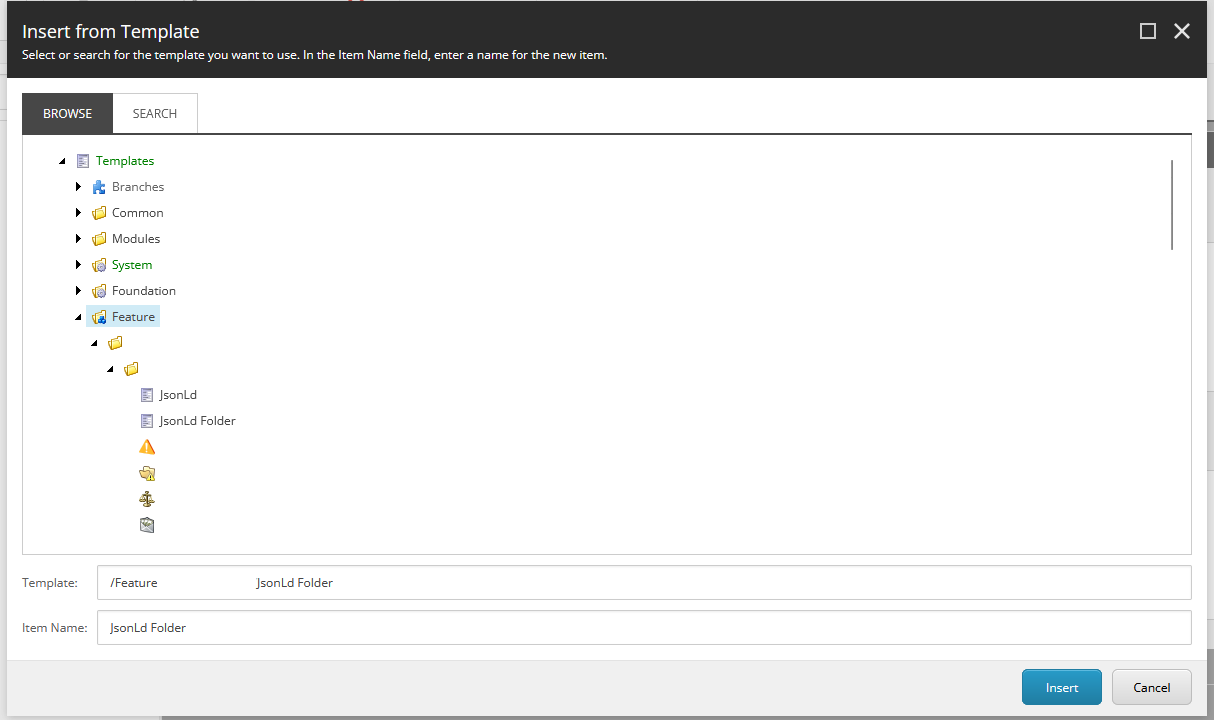
Next you want to insert the new folder template into your Data folder.
Once we have created our new folder, we can start to insert individual JsonLd Object items. You can create as many objects from schema.org that you would like, but to keep it simple I'm only going to create a Person object.
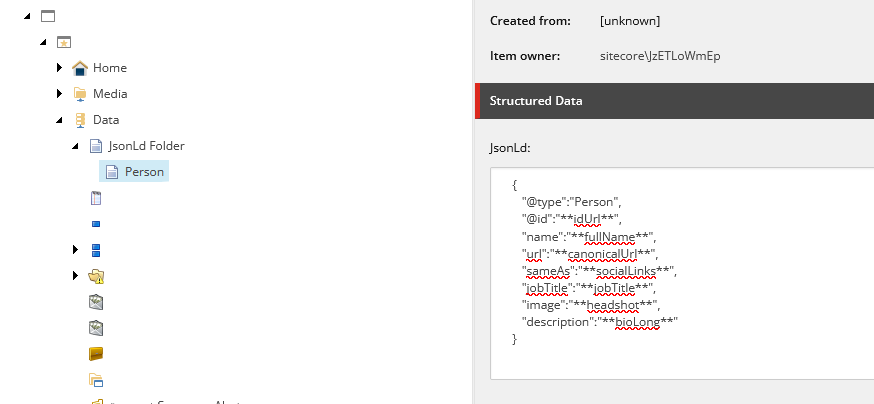
I'm using the same replaceable structure as above, so we can write code in our JSS front end to replace these value’s with the correct Sitecore values from the Author’s profile.
{
    "@type":"Person",
    "@id":"**idUrl**",
    "name":"**fullName**",
    "url":"**canonicalUrl**",
    "sameAs":"**socialLinks**",
    "jobTitle":"**jobTitle**",
    "image":"**headshot**",
    "description":"**bioLong**"
}
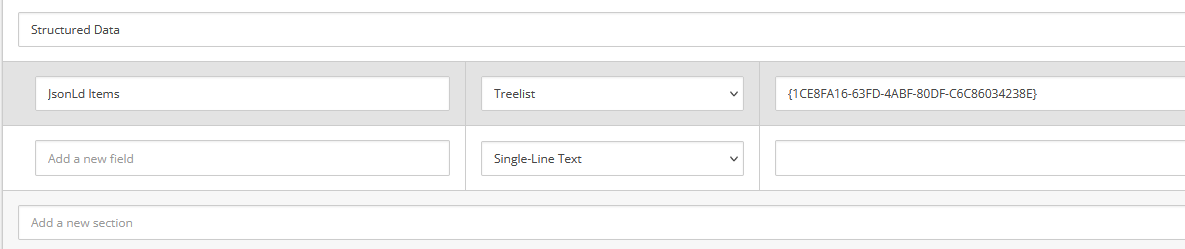
Finally you can navigate to any of your page’s templates and add a new Tree List item that contains the Id of the Data source folder. This will allow you to connect your new JsonLd items to each page. This way you can easily add multiple different JsonLd objects to any page you wish.
Final Thoughts on Implementing EEAT in Sitecore
EEAT is an extremely important part of modern-day SEO and helps show Google that your site is respectable. It is not something you should gloss over. Hopefully, your team can easily implement an EEAT strategy into your company's unique Sitecore instance using one of the two methods I've provided.

Meet Tyler Holmes
Full Stack Developer
🇬🇧🧑💻🏸
Tyler is an experienced Full Stack Developer who has worked on a plethora of unique projects. He possesses a deep understanding of Technical SEO, C#, and React/Next.js.