How to Create Rendering Variants in Sitecore XM Cloud with Next.js
Learn how to create variants for your Sitecore renderings and apply them in Next.js
Start typing to search...
Recently we had encountered challenges on handling difference designs for the same set of templates. We could have ended up bloating the list of JSON Renderings we had with every minute design differences the client wanted us to do.
Luckily, we found the Sitecore XM Cloud’s ability to add rendering variants for our JSON Renderings. You can expose different content content for each variant, only displaying the necessary information needed for the component while maintaining the same source of data.
Rendering variants can be used to solve multiple problems and optimize solutions within your project. Here are a couple of scenarios it could be useful to use rendering variants:
For every Sitecore Rendering you make, you have the option of customizing different rendering variants with it. This does not need any different process of creating component renderings, instead you can create rendering variants from your existing components.
Let’s start off by creating the template and JSON rendering for the component, and let’s call it Card. I’ll skip specifying where these are meant to be created and go directly to where to add the rendering variant. This should be located inside the Content Section of your Content Editor and inside your Headless Site look for the presentation. You should be able to find an item called Headless Variants.
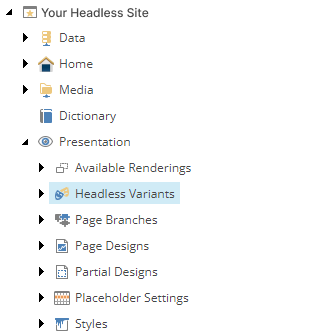
Next, you can insert a Variants item inside. Name your item the same name you had for your rendering. In our case, we named our JSON Rendering as Card, then we name the variant as the same.
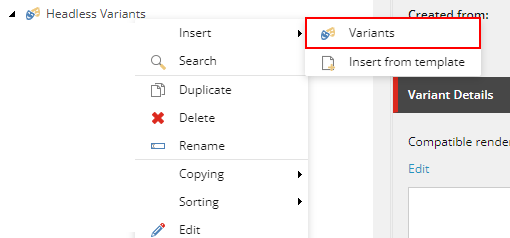
It should look like the screenshot below. Next, we can create the different variants we want inside of it. The first variant you should add is the Default variant, it’s the expected variant you should have. Without it the moment you change variants, you cannot revert it back to the initial one.

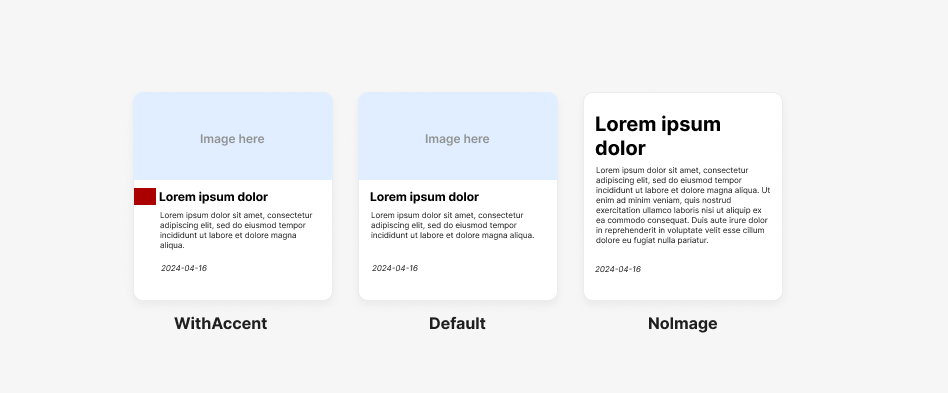
Here we created 3 new variants, each one serves a different purpose.

Below you can see a proposed idea for each variant. WithAccent may be an idea from the stakeholders to help make the Card pop out. NoImage are for situations you are using the same datasource but need to not display the image.
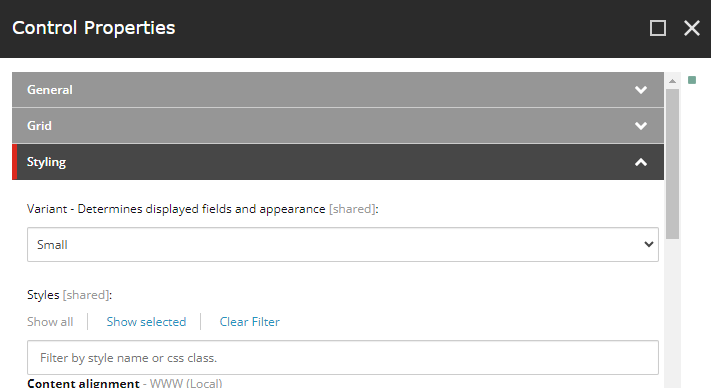
When you add the Sitecore rendering on the Presentation of a Page, under the Styling Section you will find a Variant field which is a dropdown that will hold all the different variants you have defined.
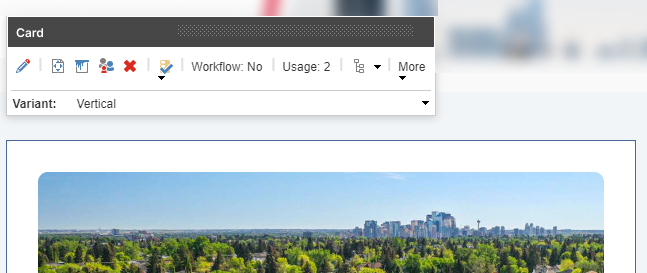
Similarly, on the Experience Editor, when you select the component, you will see a dropdown on the popup which you can then select the new variants.
We simply do not need to do anything with your existing file structure. You’ll only be looking at the Card.tsx file. Let’s look at a classic way of how your file may look like.
import {
  Field,
  ImageField,
  RichTextField,
  withDatasourceCheck,
} from '@sitecore-jss/sitecore-jss-nextjs';
import React from 'react';
import { ComponentProps } from 'lib/component-props';

type Fields = {
  image?: ImageField;
  heading?: Field<string>;
  body?: RichTextField;
  publishDate?: Field<string>;
};

type CardProps = ComponentProps & {
  fields: Fields;
};

const Card = () => {
  return <div>Your card content here</div>;
};

export default withDatasourceCheck()<CardProps>(Card);
We have your component and added in a withDatasourceCheck along with making the component it’s default export. Let’s convert this to one that allows rendering variants. Here we convert the existing component as your Default and instead we handle each variant as it’s own export. Make sure the name is exactly the same with what’s on the Content Editor.
import {
  Field,
  ImageField,
  RichTextField,
  withDatasourceCheck,
} from '@sitecore-jss/sitecore-jss-nextjs';
import React from 'react';
import { ComponentProps } from 'lib/component-props';

type Fields = {
  image?: ImageField;
  heading?: Field<string>;
  body?: RichTextField;
  publishDate?: Field<string>;
};

type CardProps = ComponentProps & {
  fields: Fields;
};

export const Default = (props: CardProps) => {
  return <div>Your card content here</div>;
};

export const WithAccent = (props: CardProps) => {
  return <div>Your card content here</div>;
};

export const NoImage = (props: CardProps) => {
  return <div>Your card content here</div>;
};
Rendering variants can be used to solve different problems but doesn’t limit it as the only solution you can use. Play around and get familiarized with using rendering variants and you’ll be able to strategically use it in your project.
Check out the Sitecore Documentation on Rendering Variants.