It is highly probable you will encounter the need to use PowerShell while administering or developing in the Sitecore environment. As more and more clients are migrating to the XM Cloud, the need to be as efficient as possible in that migration; PowerShell helps enable automation, saving you extensive and laborious manual effort. Now not every client will have dozens, if not hundreds, of pages and dozens of renderings on those pages and potentially thousands of data sources and media, but those that do should take advantage of what PowerShell can do.
We’ve been using it for everything from:
- Switching renderings from Controller Rendering and View Rendering to JSON Rendering
- Updating Placeholder values for renderings from, say, “main” to “headless-main.”
- Updating field names
- Moving content from /sitecore/content into a tenant/site structure.
If you try to use PowerShell via the PowerShell ISE, you would likely see that it’s either blocked entirely or in the cloud; it’s prompting you for a password for a weird username - don’t be alarmed by that, by the way.

So let’s turn that frown upside down and enable PowerShell. Both the local XM developer environment and the XM Cloud environment come with it disabled by default (i.e. blocked). You can easily enable it, but where and how are not immediately obvious.
Enabling PowerShell in Local Developer Environment
PowerShell is installed if you’re using the XM Starter Kit or a template from an XM Cloud setup. If you’re rolling your own, it might not be.
Assuming you’re going with the former, as it’s the most logical starting point. You will need to update two files in your environment.
- .env
- docker-compose.override.yml
For .env
For the root .env file, you need to add a line to the file with the following variable and value.
SITECORE_SPE_ELEVATION=Allow
For docker-compose.override.yml
Open up the docker-compose.override.yml file and then locate the cm container and under the environment section, add the following line to pass in the SITECORE_SPE_ELEVATION environment variable.
SITECORE_SPE_ELEVATION: ${SITECORE_SPE_ELEVATION}
It will look like this when done:
cm:
    image: ${REGISTRY}${COMPOSE_PROJECT_NAME}-xmcloud-cm:${VERSION:-latest}
    build:
      context: ./docker/build/cm
      args:
        PARENT_IMAGE: ${SITECORE_DOCKER_REGISTRY}sitecore-xmcloud-cm:${SITECORE_VERSION}
        TOOLS_IMAGE: ${TOOLS_IMAGE}
    volumes:
      - ${LOCAL_DEPLOY_PATH}\platform:C:\deploy
      - ${LOCAL_DATA_PATH}\cm:C:\inetpub\wwwroot\App_Data\logs
      - ${HOST_LICENSE_FOLDER}:c:\license
    environment:
      SITECORE_SPE_ELEVATION: ${SITECORE_SPE_ELEVATION}
...
You will now need to do a ./down and a ./up to have this show up and enable.
Enabling PowerShell in XM Cloud
Log in to https://portal.sitecorecloud.io and locate the Manage my projects link.

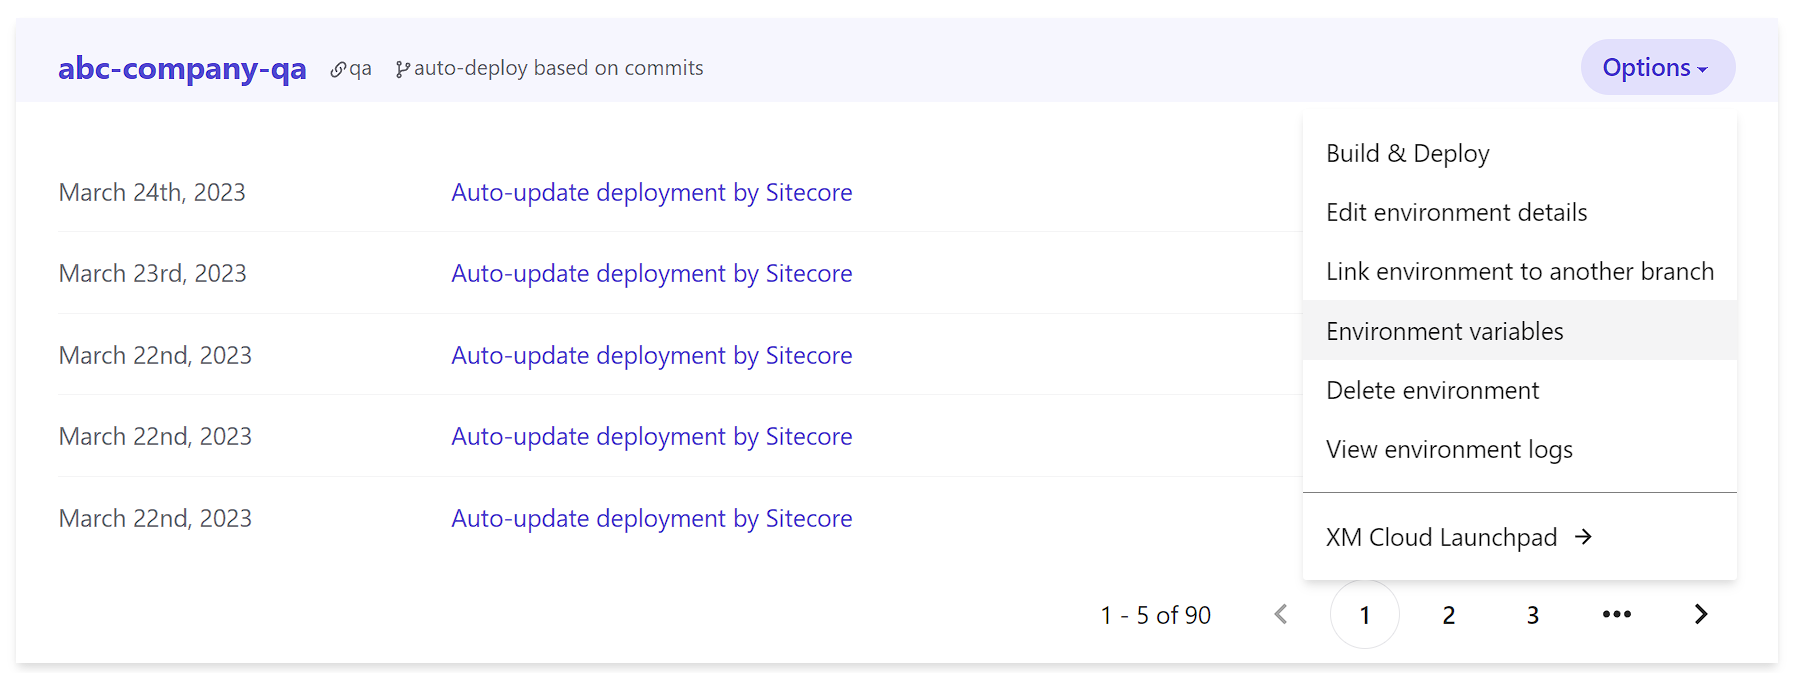
Select the appropriate project. When prompted with a list of environments, select the Options menu and select Environment variables.

In the fly-out, select SITECORE_SPE_ELEVATION and set it to Allow. Initially the value will show as Block.
I will state, this is only set to Allow in our QA environment. For any other environment you would be better to set it to Confirm that way the users are still prompted. You can read up about each setting here: Environment variables: SITECORE_SPE_ELEVATION.

You will then need to perform a new Build & Deploy from the environment listing page in order for the environment variable to set it. Once done, you will be able to use the PowerShell ISE without a warning. I also recommend closing down your browser and re-opening PowerShell ISE, as in one or two cases I have seen the ISE locked when it actually wasn’t.


