Enable Two-Factor Authentication in Netlify
Boost your Netlify security: A step-by-step guide to enabling two-factor authentication
Securing your online accounts is more important than ever in the current digital era. Because cyber threats are always changing, using passwords alone is no longer adequate. By demanding two forms of verification, usually via your mobile device, in addition to your password, two-factor authentication (2FA) offers an additional layer of security. This extra precaution greatly lowers the possibility of unwanted access, safeguarding your private information and providing piece of mind. Enabling 2FA is an essential step in protecting your online presence because it strengthens your defenses against potential cyberattacks.
In Netlify you can do these very easily. Let’s walk through the steps to do so.
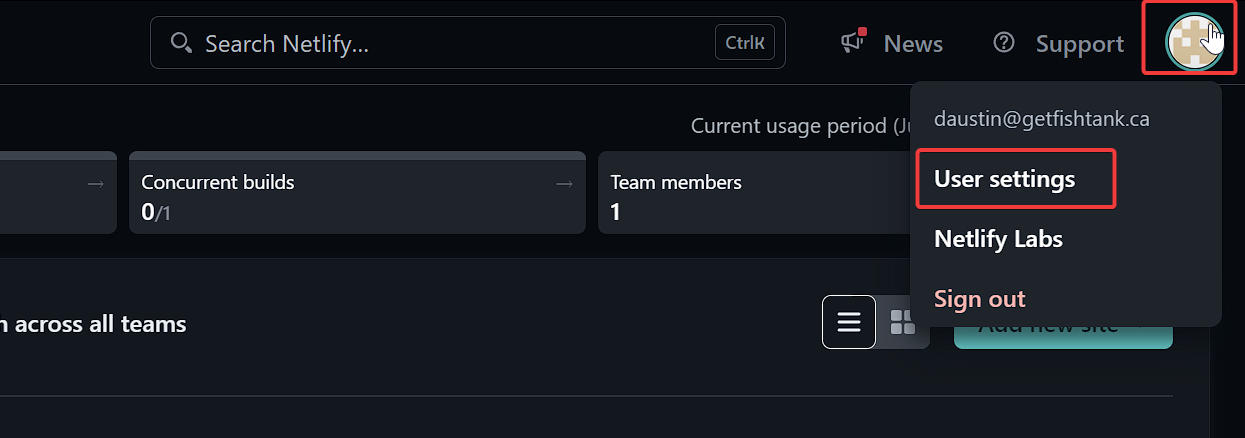
First. Login and then on the right-hand side locate your profile icon. Click it to reveal a drop-down and select User settings.

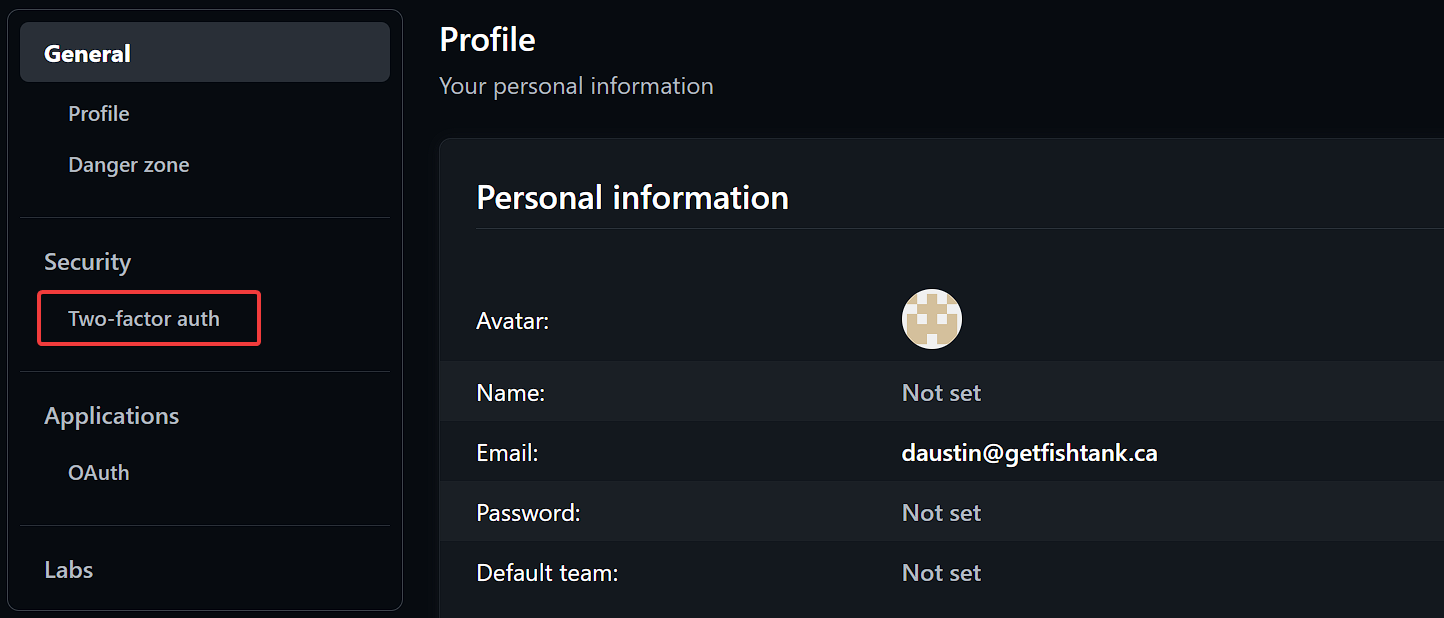
On the left side, select Two-factor auth from the list of options in the navigation menu.

You’ll be presented with an option. You’ll want to have a preconfigured two-factor authentication program like Google Authenticator ready to go.

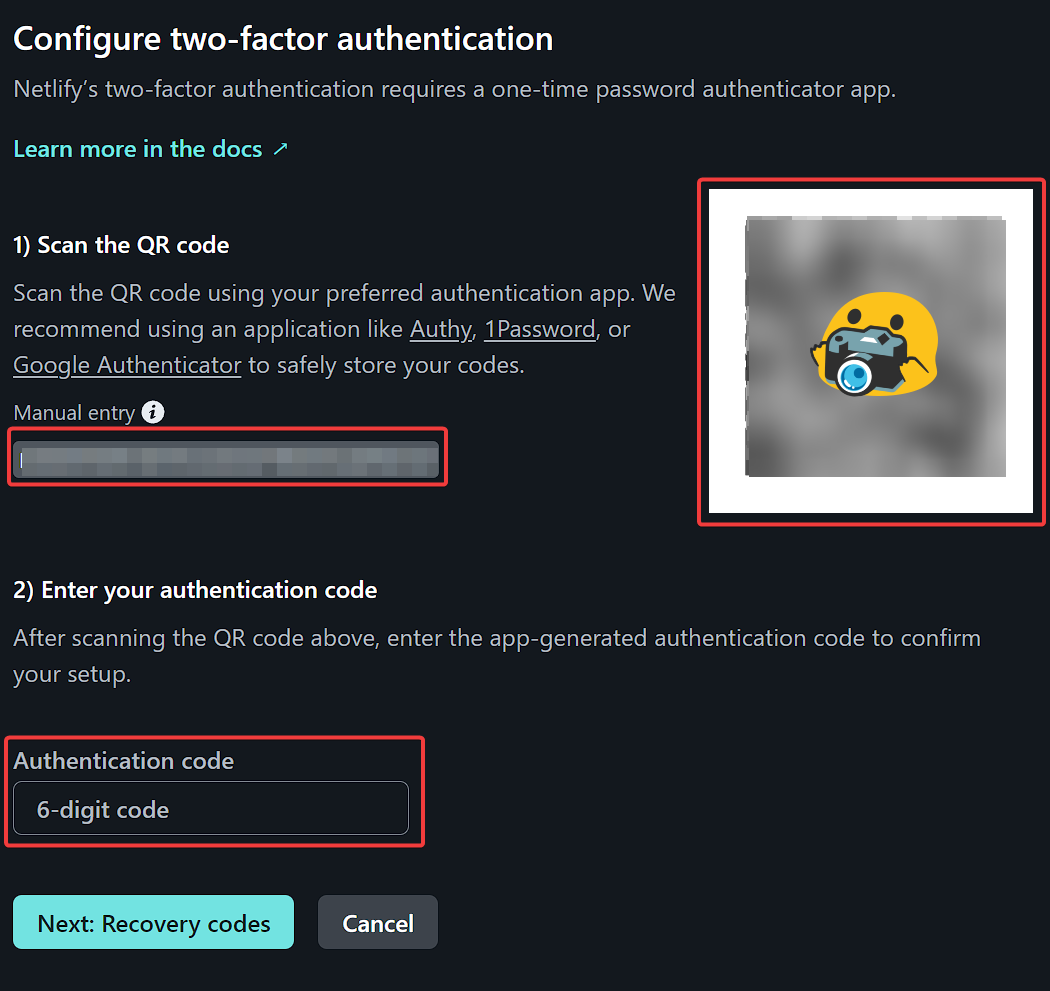
After clicking Enable two-factor authentication you’ll be presented with a set of instructions similar to the following.

Using your phone, open your authenticator app, for example, Google Authenticator and click the “+” or other method to add the item, select the Scan QR Code option or manually enter the lengthy code provided.
Once done, you’ll want to enter the provided Authentication code. After doing so, click Next: Recovery codes and you’ll see your recovery codes. After capturing those somewhere, click Finished and you’re all set.
Start typing to search...