Create A New Role In Sitecore
And Assign It To A New User

Ashwinder Kaur
Quality Assurance Lead
Quality Assurance Lead
And Assign It To A New User

Quality Assurance Lead
Quality Assurance Lead
To Add A Content Author:
From Launchpad, go to Role Manager.
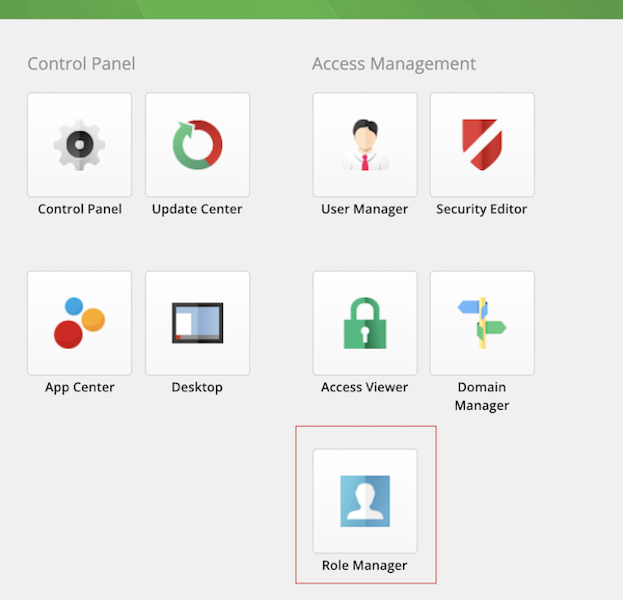
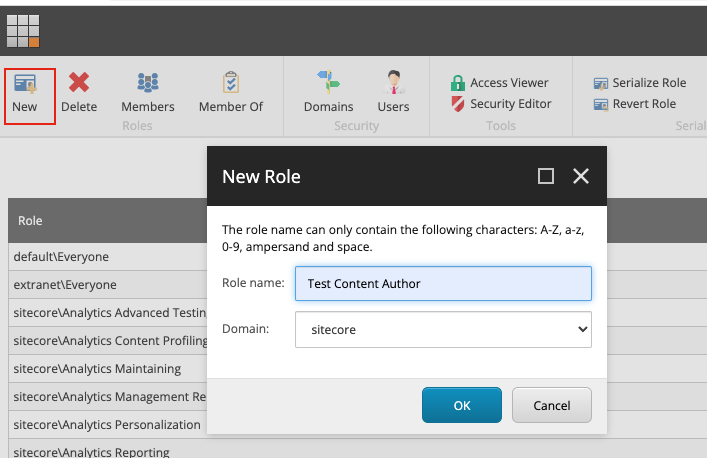
Create a new role by clicking on New.
Choose a Role name e.g. Test Content Author.
Select Domain as sitecore, hit Ok.
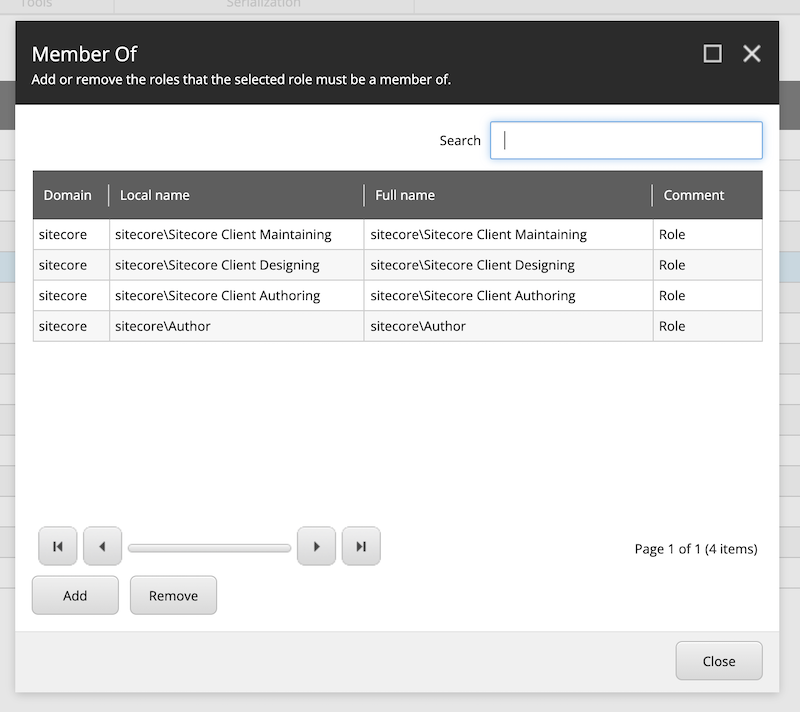
Select the newly created role and click on "Member Of" option from menu bar.

Click on Add CTA button to add following roles for Content Author:
To Add A Content Publisher:
From Launchpad, go to Role Manager.
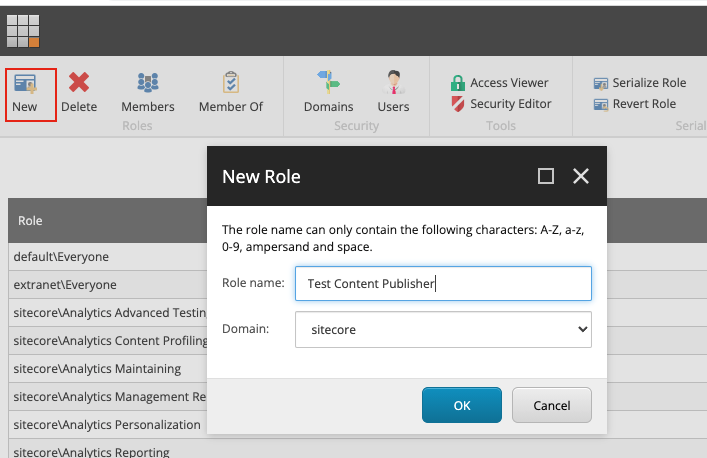
Create a new role by clicking on New.
Choose a Role name e.g. Test Content Publisher.
Select Domain as sitecore, hit Ok.
Select the newly created role and click on "Member Of" option from menu bar.

Click on Add CTA button to add following roles for Content Publisher:
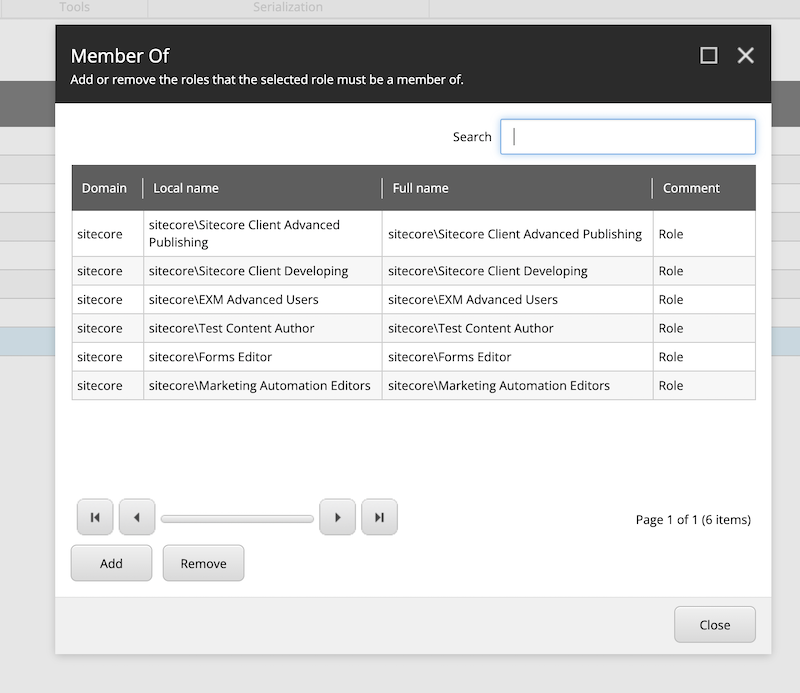
Content Authoring Role:
Select the role and click on Security Editor option from menu bar.

Expand the Content section in sitecore tree and check all permissions (except Administer) for Home and Assets items.

In Media Library, go to folder with client name and check all permissions (except Administer).

For content authors to access Component Properties, go to /sitecore/templates/System/Layout/Rendering Parameters/Standard Rendering Parameters/__Standard Values and check Read and Write permissions.

Content Publisher Role:
No need to make any changes in this role as all changes from Content Author will be inherited to this role (as Content Publisher role is inheriting Content Author role).
From Launchpad, go to User Manager.
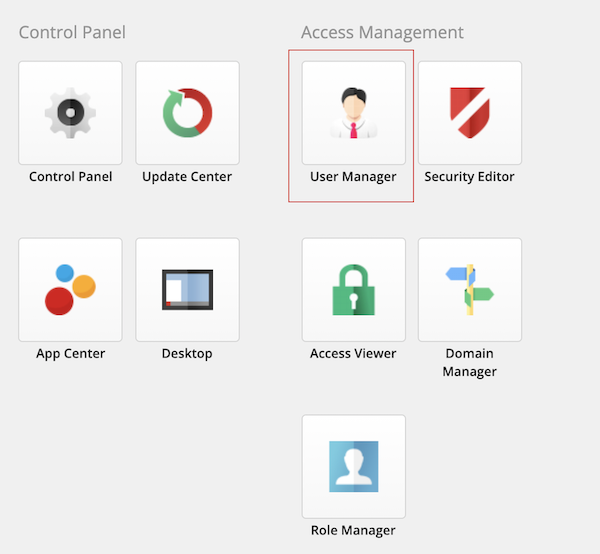
Click on New to create a new user.

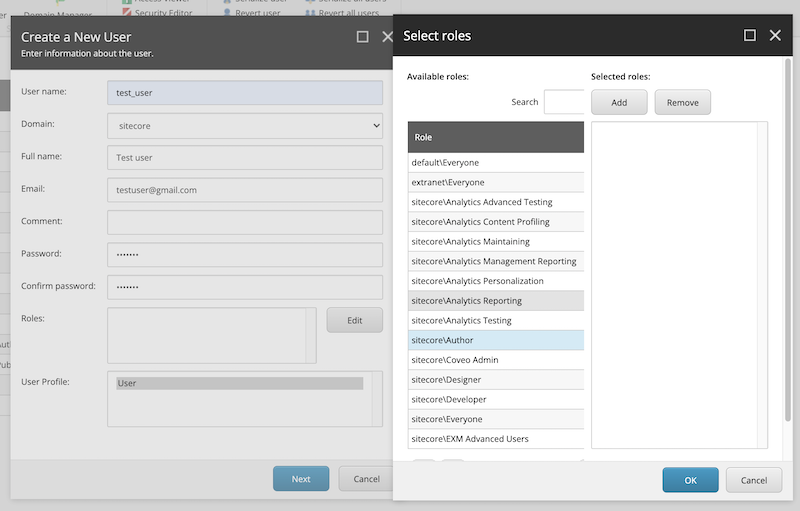
Enter User name (e.g. test_user), Full name, Email, Password, Confirm Password.
Select the Roles by clicking Edit.
Select newly created roles and hit OK.
Click Next on "Create a New User" window and new user will be created.
_____________________________________________________________________________________________________________________
Thanks for reading the post!
Start typing to search...