Create A Staging Area For Publishing In Sitecore
Using Branching Workflows
In a typical Sitecore implementation you will see the sample workflow provided by Sitecore being used. That is, if any workflow is used at all. For most organizations, the default works perfectly fine. It has a draft state, an approval state, and a published state.
But what if it's not enough? What if, your organization requires additional steps, or something more sophisticated? Say, setting up a "staging" area for items to be published all at the same time, separate from day-to-day upkeep. Perfect example might be year end financials, or a special announcement.
One way people manage this is by having a separate structure that houses all of that information. When it's ready to go, they publish it. A better way, to ensure information is not published accidentally, is by securing it within a workflow.
Now optimally for this to work, your organization would already be utilizing a workflow today.
Let's start by duplicating the existing workflow currently in use.

Let's call it Staging Workflow.
The Staging Workflow can be as complicated as you want. You can secure it even to ensure only those with rights to approve content and publish it do. For the purposes of this example, we are not going to do that.
For us, all we need is an Awaiting Approval state control items that get published. So we've gone in and deleted the Draft state within the process.

Important thing to note is that the Reject command pushes any document back to a specific state in a specific workflow.
If you are using multiple workflows and each one of them will utilize the staging workflow to synchronize publishing, then you will need multiple reject commands.
You could get around this by customizing Sitecore's workflow commands to perhaps reject to the "default" workflow of the item in question.
Now what we need is a step in the Company Workflow that will send an item into the Staging Workflow. The simplest way to do that is to duplicate the Submit command item under Draft.
What you will need to figure out is at what point an item should go into that staging area. Is it before "approval" or after? For us, it will be before.

We added a Submit to Staging Area state and updated the Next State to be the Awaiting Approval state of the Staging Workflow.
Now when a document is in Draft we have the option to Submit or Submit to Staging Area.

After clicking Submit to Staging Area we now have an updated icon that shows it's in a new, "special" workflow.

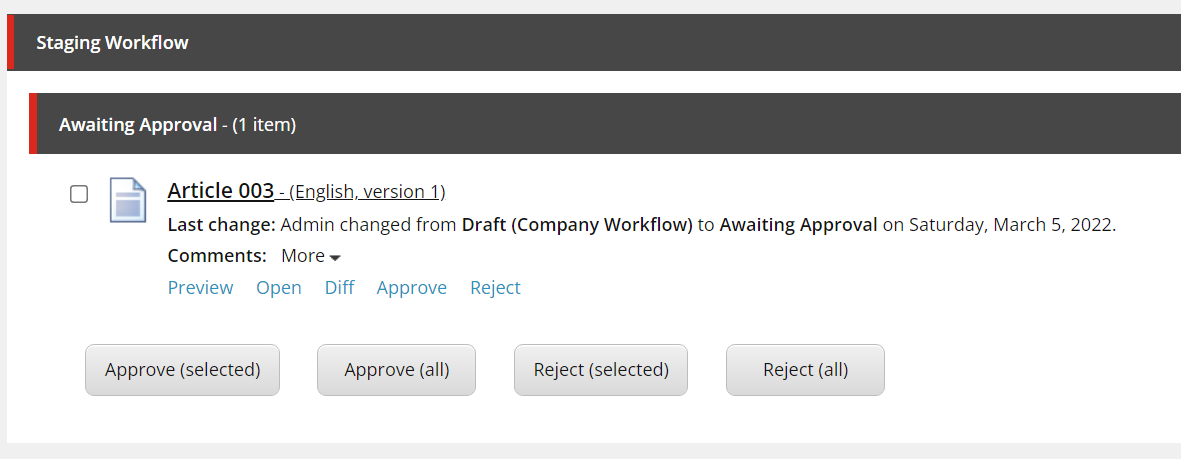
Inside the Workbox we can now see all the items that are in the Staging Workflow (in our case just one) and when we are ready we can Approve (all) and all of them will be published together.

Start typing to search...